


Adding a tipping option to your checkout process is a direct revenue lever that platforms like WooCommerce, Square, and QuickBooks already support through native settings and plugins. The practice, formally called gratuity integration, lets customers voluntarily add a tip at the point of payment, creating an additional income stream without changing your core pricing. For e-commerce businesses and content creators, this feature can meaningfully increase per-transaction revenue while signaling to customers that the people behind the product deserve recognition. This article walks you through prerequisites, platform-specific setup, UX design decisions, and common troubleshooting fixes so you can implement it confidently.
What you need before you add tipping option to checkout
Before you configure anything, confirm that your platform and payment processor actually support tipping natively. Not every setup does, and discovering that mid-build wastes time.
| Platform | Required tool or plugin | Subscription needed |
|---|---|---|
| WooCommerce | Order Delivery for WooCommerce (Kestrel) or custom plugin | No, but hosting required |
| QuickBooks | GoPayment app | Yes, QuickBooks Payments subscription |
| Square | Square Dashboard + Square Point of Sale app | No, included in free plan |
| Stripe (custom) | Checkout Session API with "submit_type: ‘donate’` | No, pay-per-transaction |

Beyond the technical stack, two business decisions need to happen first. The first is tax treatment. Tips may be taxable income depending on your jurisdiction and business structure, so confirm with your accountant before going live. The second is UI placement. Decide whether the tip prompt appears before or after the customer selects a payment method, since this affects both conversion and the technical implementation path you will follow.
Pro Tip: Test your tipping setup in a staging environment before pushing to production. A misconfigured tip field that adds unexpected charges to live orders creates refund headaches and erodes customer trust fast.
How to add tip options in WooCommerce, QuickBooks, and Square
Each platform handles the checkout tipping feature differently. Here is a direct comparison of the three major implementations, followed by step-by-step instructions for each.
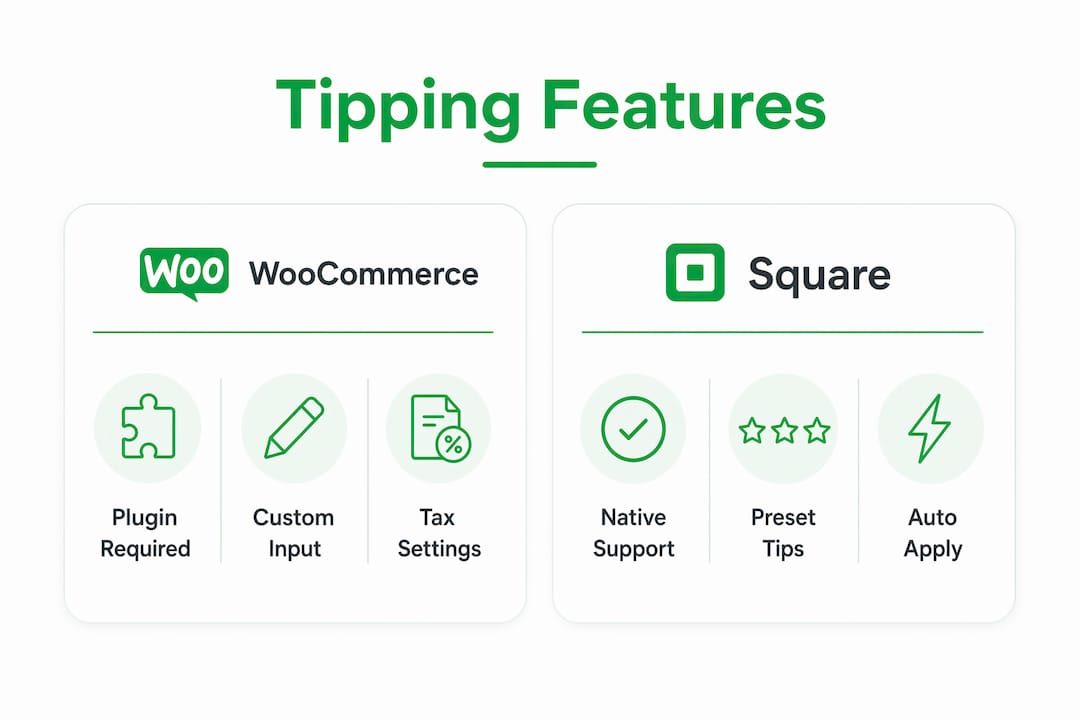
| Platform | Tip display location | Preset format | Custom input | Small transaction behavior |
|---|---|---|---|---|
| WooCommerce | Cart or checkout page | % or fixed amount | Yes, with explicit apply step | Configurable |
| QuickBooks GoPayment | Before or after payment method | % presets | No native custom field | Switches to fixed dollar amounts |
| Square | Customer-facing display or receipt | % or fixed dollar | Yes, signature line option | Fixed dollar for payments under $10 |
WooCommerce step-by-step
WooCommerce adds tips as cart fees with customizable percentages or fixed amounts, and the tip appears as a line item in both the order total and your reports.
- Go to WooCommerce > Settings > Delivery & Pickup Dates.
- Open the Tips tab and toggle tipping to enabled.
- Set your preset options. Common choices are 5%, 10%, and 15%, or fixed amounts like $2, $5, and $10.
- Enable the Custom Amount field if you want customers to enter their own figure.
- Save settings and clear your site cache.
- Place a test order and confirm the tip appears as a line item in the order summary.
When a customer selects the custom option, the UI requires an explicit apply step: the customer selects “Custom,” enters a value, and clicks “Add Tip” before the total recalculates. This two-step flow reduces accidental tip submissions and gives customers clear control.
QuickBooks GoPayment step-by-step
QuickBooks requires a Payments subscription for tipping, which is worth confirming before you start.
- Open the GoPayment app and tap the menu icon.
- Go to Settings > Tips and toggle tips on.
- Choose whether the tip prompt appears before or after the customer selects a payment method.
- Set your percentage presets (typically 15%, 20%, 25%).
- Note that for transactions under $10, QuickBooks automatically switches to fixed dollar tip options rather than percentages. This is built-in behavior you cannot override.
- Run a test transaction to confirm the prompt timing and preset display.
Square step-by-step
Square enables tipping through both the dashboard and the app, with fixed dollar tips for payments under $10 and percentage tips for larger amounts.
- Log into Square Dashboard > Settings > Device Management > Modes.
- Select your device profile and open Tipping.
- Toggle tipping on and set your percentage presets.
- Choose your receipt format: quick-tip checkboxes for digital receipts or a custom-amount signature line for printed receipts.
- Save and sync the settings to your Square Point of Sale device or app.
- Process a test payment above and below $10 to verify that the tip format switches correctly.
How to design an effective tipping UI during checkout
The placement and design of your tip prompt directly affects whether customers use it. Poor placement creates confusion; good placement creates a natural moment of generosity.
- Position the prompt before payment confirmation. Customers are most receptive to tipping after they have committed to a purchase but before they enter payment details. Placing the tip screen after payment method selection but before the final “Pay” button captures attention at the right moment.
- Offer three preset options plus a custom field. Research on customer behavior consistently shows that three choices reduce decision fatigue. Preset and custom tip options together balance simplicity and flexibility for the widest range of customers.
- Match tip format to transaction size. Fixed dollar tips for small totals avoid the confusion that percentage calculations create when the math produces odd numbers. Fixed dollar options for small transactions are the standard approach used by Square and QuickBooks for payments under $10.
- Show the tip as a line item in the order summary. Tip visibility in the order summary reduces customer confusion and prevents disputes at the payment stage. Customers who can see exactly what they are paying are less likely to abandon checkout.
- Label the field clearly. Use “Leave a tip” or “Add a tip for your team” rather than vague labels like “Optional amount.” Specific language sets clear expectations and removes ambiguity.
Pro Tip: If your average order value is under $15, lead with fixed dollar tip options ($1, $2, $3) rather than percentages. A 15% tip on a $12 order is $1.80, which sounds small and feels awkward. A clean $2 button gets clicked far more often.
Common challenges when implementing tipping at checkout
Even a well-planned tipping integration runs into technical friction. Knowing the most common failure points saves hours of debugging.
The most frequent issue is the tip field not displaying at all. This usually traces back to plugin settings that restrict tipping to the cart page only, or a theme layout that pushes the tip field below the fold or outside the checkout container. The fix is to adjust the plugin’s display placement setting and clear all site caches after saving. Display failures from plugin or theme conflicts are the leading cause of tipping features going live but never being seen by customers.
A second common problem is the checkout total not updating after a customer selects a tip. In WooCommerce, fees added via add_fee update dynamically but do not auto-refresh on payment method changes without a manual update_checkout trigger. If your customers switch payment methods mid-checkout and the tip total freezes, a developer needs to hook into woocommerce_review_order_before_payment to force a recalculation.
Refund handling is the third area that catches businesses off guard. On platforms like Scan to Pay, the tip amount cannot be refunded separately from the base transaction. Any refund applies to the entire transaction amount. Build this into your refund policy and communicate it clearly to customers before they complete payment.
Always test your tipping feature with a live payment in your actual checkout environment, not just in a sandbox. Sandbox environments frequently skip tip prompts or handle fee recalculations differently than production, which means bugs only surface after real customers encounter them.
For Stripe-based custom checkouts, tips must be included server-side in the Checkout Session create call. You cannot add them client-side after the session is created. Plan your server logic accordingly before writing any front-end code.
Key takeaways
Adding a tipping option to your checkout process requires platform-specific configuration, deliberate UI placement, and proactive troubleshooting to convert the feature into consistent additional revenue.
| Point | Details |
|---|---|
| Platform prerequisites vary | WooCommerce needs a plugin; QuickBooks requires a Payments subscription; Square includes tipping in its free plan. |
| Tip format should match order size | Use fixed dollar amounts for transactions under $10 to avoid confusing percentage math. |
| UI placement drives conversion | Position the tip prompt after purchase commitment but before the final payment confirmation screen. |
| Refunds apply to full transactions | Most payment gateways cannot separate tip from base amount, so update your refund policy before launch. |
| Test in live environment | Sandbox testing misses real-world fee recalculation bugs; always run a live test transaction before going public. |
Why tipping UX is harder than it looks
I have watched a lot of e-commerce owners treat tipping as a five-minute checkbox. Enable the setting, pick three percentages, ship it. The conversion data tells a different story every time.
The businesses that see real lift from tipping are the ones that treat it as a communication moment, not a technical feature. The label matters. The position in the flow matters. Whether you show a “No tip” button or just let customers skip matters more than most people expect. A “No tip” button with a sad face emoji, which some platforms suggest, creates guilt rather than generosity, and customers remember that feeling.
What I have found actually works is radical transparency. Show the tip as a line item the moment it is selected. Let customers remove it without friction. Give them a reason to tip in the label itself, something like “Support your delivery team” rather than a generic prompt. Customers who feel respected tip more consistently than customers who feel pressured.
The other thing worth saying: tipping is not a substitute for fair pricing. If your margins depend on customers tipping to make the economics work, that is a pricing problem, not a tipping problem. Use the feature to reward exceptional service and build goodwill, not to subsidize a broken cost structure.
— Steve
How Tipper makes adding tips to your checkout simple
If you want to enable tipping during checkout without configuring plugins, managing platform subscriptions, or writing server-side code, Tipper is built for exactly that use case.
Tipper gives creators and businesses a personalized tipping link that works instantly with Apple Pay and Google Pay. No account required from the customer, no complex integration work on your end, and you keep 100% of every tip received. Whether you are a freelancer adding a tip option to your invoice flow or an e-commerce brand looking to reward your fulfillment team, Tipper handles the payment infrastructure so you can focus on the customer relationship. Supporters can also leave thank-you notes or video messages, which turns a simple tip into a genuine connection.
FAQ
What is a tipping option at checkout?
A tipping option at checkout is a feature that lets customers voluntarily add a gratuity to their order total before completing payment. It appears as a preset percentage, fixed dollar amount, or custom input field within the checkout flow.
Which platforms support tipping natively?
WooCommerce, Square, and QuickBooks GoPayment all support tipping natively through their settings or plugins. Stripe supports tip-style payments through its submit_type: 'donate' parameter in the Checkout Session API.
How do I handle tip refunds?
Most payment gateways, including Scan to Pay, apply refunds to the entire transaction rather than separating the tip from the base amount. Update your refund policy to reflect this before enabling tipping, and communicate it clearly at checkout.
Should I use percentage or fixed dollar tip options?
Use fixed dollar tip options for transactions under $10 and percentage presets for larger orders. Both Square and QuickBooks apply this logic automatically, because percentage calculations on small totals produce confusing, odd-cent amounts.
Can I add a tipping option without a developer?
Yes. Square and QuickBooks GoPayment require no coding. WooCommerce requires a plugin like Order Delivery for WooCommerce but no custom code for basic setup. Custom Stripe integrations do require server-side development.




[…] between your ordering system and your payment processor is the most frequent source of errors. Adding tip options to your checkout requires confirming that the tip value passes correctly through to your payment gateway and appears […]