
About Tipper

This author has not yet filled in any details.
So far Tipper has created 134 blog entries.

Go Live in 10 Minutes: Tip Page Examples and Paste Ready Copy for Creators

A tip page is a single link where anyone can send you money in seconds, no account required on their end. You can build one and go live in under 10 minutes with a personalized link, three preset amounts, and Apple Pay or Google Pay turned on. The rest of this guide shows exactly what that page should say and look like, with copy-ready examples for every kind of creator.


TL;DR:

  • Wallet payments like Apple Pay and Google Pay significantly enhance conversion rates due to their one-tap confirmation, especially on mobile devices.
  • Using three well-chosen preset amounts and keeping the tipping process within three taps minimizes friction and boosts the likelihood of tips.
  • Placement of tip links matters; ideal spots include bios, email signatures, website footers, podcast shownotes, and printed materials with QR codes.
  • Testing the entire payment flow on different devices and conditions is crucial to ensure a smooth, trustworthy experience before going live.
  • Prioritizing the simplicity and speed of the payment process results in higher tips than focusing solely on visual design or offering many options.

Tipper
Turn Appreciation Into Instant Tips
Give your audience a personalized link for instant tips, with no account required and Apple Pay or Google Pay support.

Create your tip link

Table of Contents

What Is a Tip Page and Why Do Creators Use One?

A tip page (sometimes called a virtual tip jar) is a landing page or link built for one job: collecting small, voluntary payments from an audience without a subscription, invoice, or storefront attached, as explained in Splash page vs landing page which to use for your business. It’s the digital version of a busker’s open guitar case, except it works at 2 a.m. from someone’s phone.

Creators reach for a tip page because it removes almost every barrier a subscription or product sale requires. There’s no recurring commitment to talk a fan into, no shipping, no “sign up first” wall. Someone reads a blog post, laughs at a joke in a livestream, or finishes a freelance gig, and they can act on that feeling immediately. That immediacy is the entire value proposition. The IndieWeb community has documented this pattern for years on personal sites: a short /tip URL with a prefilled amount, sitting quietly in a footer or bio, ready whenever gratitude strikes.

Compared to other monetization tools, a tip page does a narrower but faster job:

  • Versus subscriptions: no monthly obligation for the fan, no churn math for you.
  • Versus merchandise: no inventory, printing, or shipping delays.
  • Versus ad revenue: payment comes directly from someone who values your work, not from a platform’s ad auction.

One practical note for creators in the United States: tips you receive through a payment platform are generally taxable income, and larger payment volumes may trigger a 1099 form from the processor. Keep records as you would for any freelance income, and check with a tax professional once your tip volume grows.

Concrete Tip Page Examples and Creative Ideas You Can Copy

The best tip pages borrow their format from whatever platform the creator already lives on. Here’s how that plays out across six common creator types, with placement, suggested amounts, and copy you can adapt directly.

  1. Bloggers and newsletter writers. Place the link at the end of every post and in the email signature. Presets: $3, $7, $15. Sample copy: “If this saved you an hour of research, a coffee-sized tip helps keep it free for everyone else.”
  2. Podcast hosts. Put the link in the shownotes and read it once per episode, near the outro. Presets: $2, $5, $10. Sample copy: “Enjoyed this episode? Send a quick tip. It goes straight to editing costs, not ads.”
  3. Livestreamers. Pin the link in chat and add it to an on-screen overlay. Presets: $1, $5, $20 (higher ceiling works well here since tips often double as shoutouts). Sample copy: “Tip $5+ and I’ll read your name on stream.”
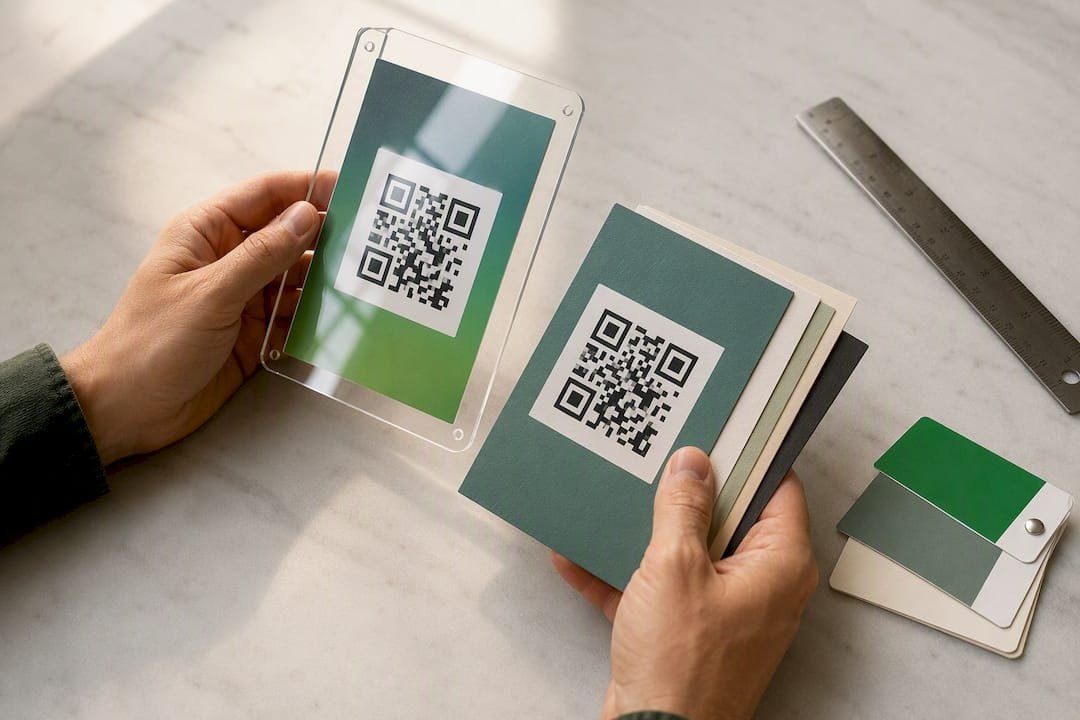
  4. Musicians and performers. QR code on a table tent at shows, plus the link in the bio. Presets: $5, $10, $25. Sample copy: “Loved the set? Tips go directly to gas money and studio time.”
  5. Freelancers and consultants. Add the link to your invoice thank-you page or email footer after a project wraps. Presets: $10, $25, $50. Sample copy: “If this project went smoothly, a tip is always appreciated (and never expected).”
  6. Small business owners. QR code at the register or on a receipt. Presets: $1, $3, $5. Sample copy: “Service was great? Skip the change, send a tip instead.”

Seasonal and cause-driven variants perform well too. A “Thank You 2026” page during December, a disaster-relief matching push, or a “help me upgrade my mic” fundraising goal with a visible progress bar all give tippers a specific reason tied to a specific moment. Developer-facing examples follow the same logic in code: Moneydevkit’s tip-jar scaffold shows preset amounts plus a custom field as the minimum viable structure, whether you’re building it yourself or picking a no-code tool that already does it.

For freelancers specifically, pairing a personalized link with a set of tested custom tip amounts tends to outperform a single generic “buy me a coffee” button, because the presets do the thinking for the tipper instead of asking them to type in a number.
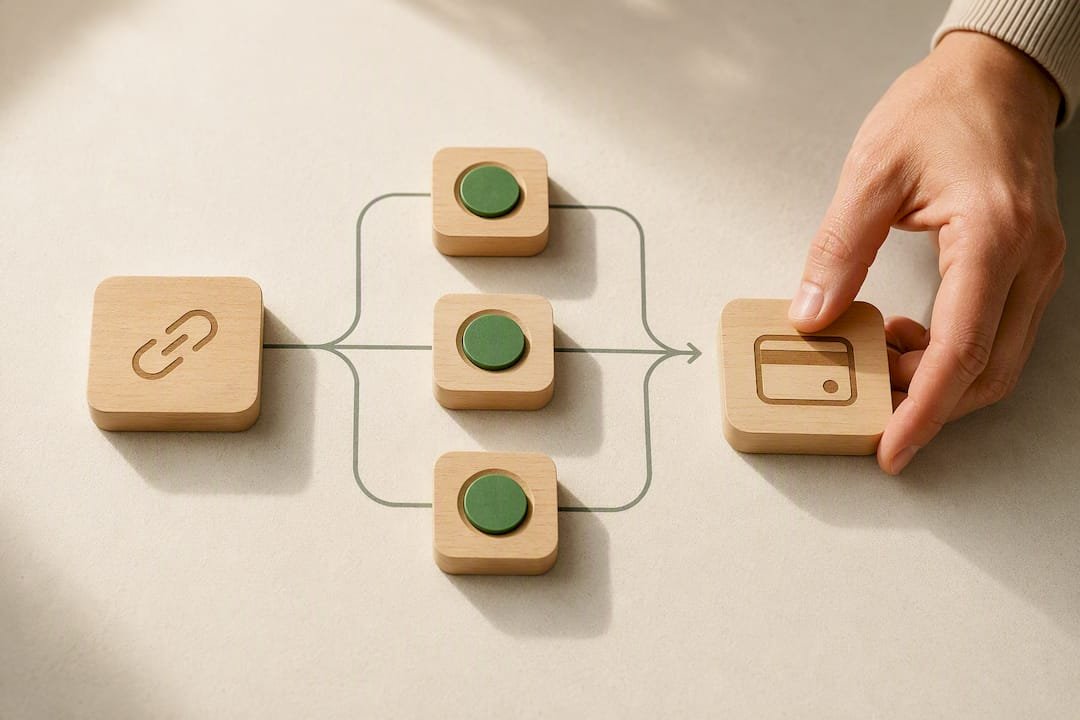
Illustration of preset tip amount choices

How Do You Set Up a Tip Page Step by Step?

Building a tip page isn’t a design project. It’s closer to filling out a short form correctly. Here’s the order that avoids rework:

  1. Pick your link or platform. Choose a short, memorable URL or a dedicated tipping platform rather than a generic form builder. A personalized tip link is easier to say out loud on a livestream than a long checkout URL.
  2. Generate your QR code. Most link-based tools generate one automatically. Save it for print materials and stream overlays.
  3. Turn on wallet payments. Enable Apple Pay and Google Pay before anything else. These are the two options mobile visitors reach for first.
  4. Add card payments as backup. Not everyone has a wallet set up. Card checkout should still be one tap away.
  5. Connect your payout account. Link your bank account and confirm the payout schedule so you know when money actually lands.
  6. Set three presets plus a custom field. Round numbers, low to high, with room to type a different amount.
  7. Add a photo and a short bio. Fifty words or less. A face and a sentence build more trust than a paragraph.
  8. Write your thank-you flow. Decide what happens right after payment: a message, a video, a discount code.
  9. Test the entire flow yourself. Send a real $1 tip from your own phone.
  10. Test it on someone else’s device. Ask a friend to try it on a different phone and browser before you announce it publicly.

Pro Tip: Test your tip page on a phone with a cracked screen protector or an older device if you can borrow one. Layout problems that never show up on your new phone often surface immediately on someone else’s.

Once the flow works twice, in two different hands, it’s ready to publish.

Which Payment Options Actually Convert Best?

Wallet payments win on mobile, and mobile is where most tips happen. Apple Pay and Google Pay let someone confirm a payment with a face scan or fingerprint instead of typing a 16-digit card number on a phone keyboard, which is exactly the kind of friction that kills conversion at the last step.

Card checkout still matters as a fallback, but it comes with trade-offs worth knowing upfront:

  • Processing fees apply to every transaction, typically taken as a small percentage plus a flat amount, regardless of which payment method the tipper chooses.
  • Payout timing varies by platform — some deposit within a day or two, others take longer, so check this before you promise fans anything about turnaround.
  • Wording changes perception. “Tip” reads as casual and expected in creator culture; “donation” reads more formal and charitable. Match the word to your content, not the other way around.

Whatever platform you choose, the goal is the same: get the tipper from “I want to give this person money” to “payment confirmed” in as few taps as possible, ideally without leaving the page for a new checkout screen.

What UX Rules Actually Improve Completion Rates?

Tip pages lose money in the last five seconds, not the first five. The design choices that matter most all target that final stretch between intent and completion.

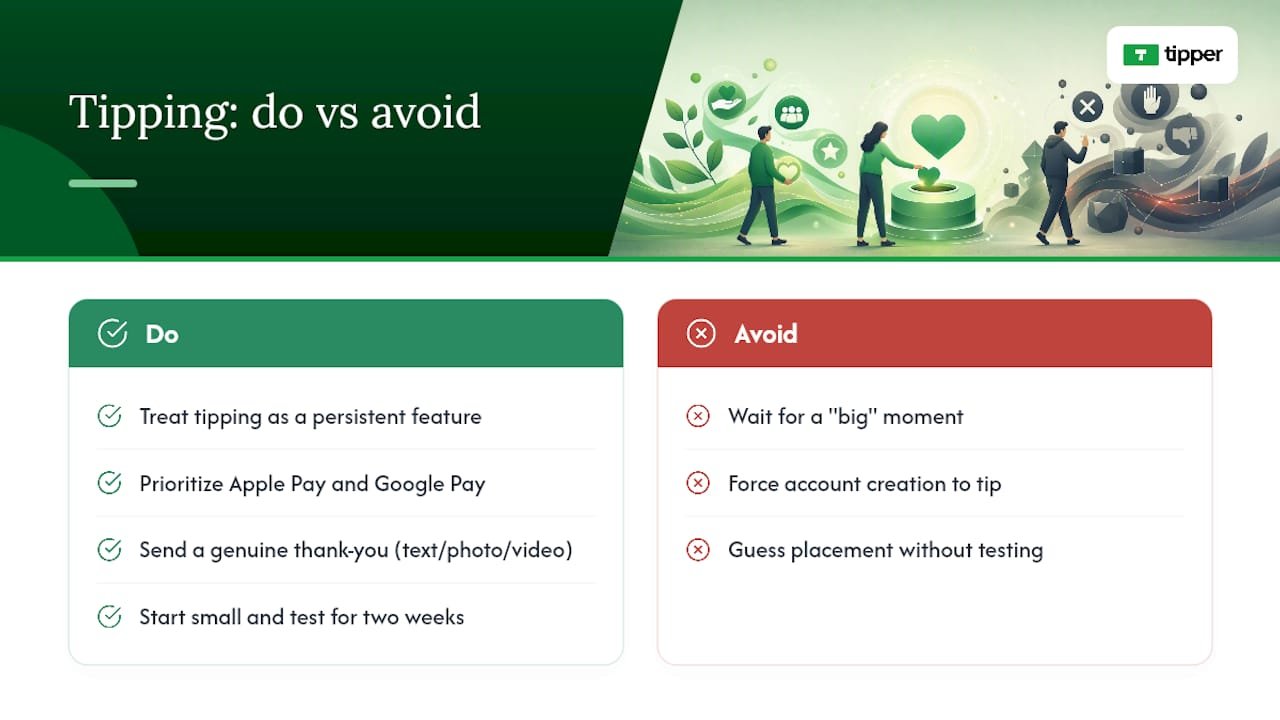
  • Follow the Three-Tap Rule. A tipper should be able to land on your page, pick an amount, and confirm payment in three taps or fewer. Every extra screen is a chance for someone to close the tab.
  • Keep buttons thumb-sized. Mobile tap targets need real space around them; a cramped row of tiny buttons causes mis-taps and abandonment, according to tip-screen UX guidance.
  • Stick to three presets. More options create decision fatigue. Anchor the highest one slightly above what you expect most people to choose; it nudges the average up without pressuring anyone.
  • Show a visible “No Tip” or “Maybe Later” option. Counterintuitive, but confirmed by the same UX research: giving people an easy out builds enough trust that more people opt in.
  • Keep your bio under 50 words. One sentence about who you are, one about what the tip supports.
  • Check color contrast. Light gray text on a white button looks clean on a designer’s laptop and disappears on a phone in direct sunlight.

Pro Tip: Where possible, keep the whole payment flow inline instead of redirecting to a new page. Native wallet popups that complete without a page reload cut abandonment noticeably compared to a full checkout redirect.

Copy-Ready Presets and Microcopy You Can Paste In

Different creator tiers call for different anchor points. Here are three preset sets built around that idea, plus label wording you can use as-is.

  • Casual creator (blogs, personal projects): $2 / $5 / $10, labeled “Buy me a snack,” “Cover my hosting,” “You’re the best.”
  • Professional freelancer: $10 / $25 / $50, labeled “Quick thanks,” “Really appreciated,” “Above and beyond.”
  • Livestream anchor: $1 / $5 / $20, labeled “Wave,” “Shoutout,” “VIP mention.”

Thank-you copy should stay under 50 words: “Got it. Thank you so much. This genuinely helps me keep making this stuff. If you want a personal shoutout next stream, drop your name in the note field.”

One accessibility note worth building in from day one: label currency clearly (write “$10” rather than a bare number) so screen readers announce it correctly, and avoid replacing dollar amounts with symbols or icons alone.

Placement decides whether a tip page ever gets seen, and promotion decides whether it gets seen without becoming annoying. Core placements to cover first:

  • Bio or link-in-bio page, always near the top
  • Website footer, on every page, not just the homepage
  • Email signature or a P.S. line in newsletters
  • Podcast shownotes, mentioned once per episode
  • QR code signage at live events or on printed materials

For promotion, soft asks outperform hard sells. Mention the tip link once when it’s relevant, occasionally show a “thank you” feed of recent supporters to prove the system works, and refresh your presets or microcopy every few months so regular visitors don’t tune it out. Track three numbers from the start: link clicks, completed tips as a percentage of clicks, and average tip amount. Those three tell you whether the problem is visibility, friction, or pricing.

What Should You Expect When You Set Up a Tip Page With Tipper?

Tipper is built around one idea: a tipper shouldn’t need an account to send money, and a creator shouldn’t lose a cut of every dollar to platform fees beyond standard payment processing. The setup mirrors the checklist above almost exactly. Pick a personalized link, turn on Apple Pay and Google Pay, set your presets, connect payouts, and you’re generally live within minutes rather than days.

A tip page works best when it asks for almost nothing from the person paying: no login, no app download, no new password to remember. The fewer decisions between “I want to tip” and “paid,” the more tips actually happen.

Creators keep full control over branding, thank-you messages, and payout timing, and the platform supports text, photo, or video thank-you notes so the relationship doesn’t end at the transaction. That last part matters more than it sounds. A tip is often the only direct signal a creator gets that someone was paying attention, and a real thank-you closes that loop.

Our Take: Most Tip Page Advice Optimizes the Wrong Step

Most guides on this topic obsess over design polish, fonts, colors, animated confirmation screens, and mostly ignore the one variable that actually moves the needle: how many taps stand between intent and confirmation. A beautifully designed tip page with a five-step checkout will lose to an ugly one that completes in two taps, every time.
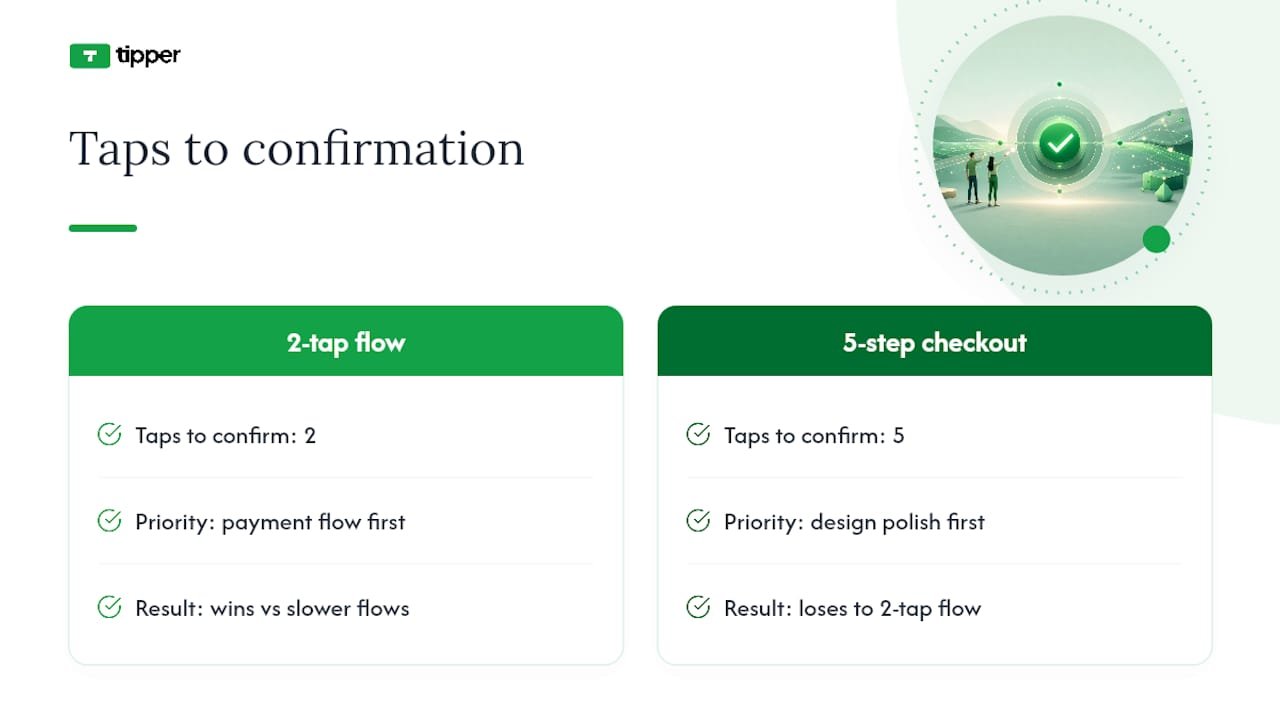
Comparison of two-tap and five-step checkout

The conventional advice to “give tippers lots of options” is backwards, too. Three presets outperform six, because every additional choice is a moment where someone can talk themselves out of tipping. The research on tip-menu anchoring backs this up: a small, well-anchored set of options raises average tip size without adding friction.

If you take one thing from this article, prioritize the payment flow over the visual theme. Get wallet payments working first, get the three-tap flow tested on a real phone second, and treat font choices and color palettes as the very last thing you touch.

— Tipper

Ready to Launch Your Own Tip Page?

Some platforms get a creator from zero to a working tip page quickly by requiring no account on the sender’s side and no subscription fee for the creator. You keep control over your payout schedule, your presets, and how you thank the people who support you, whether that’s a text note or a short video.
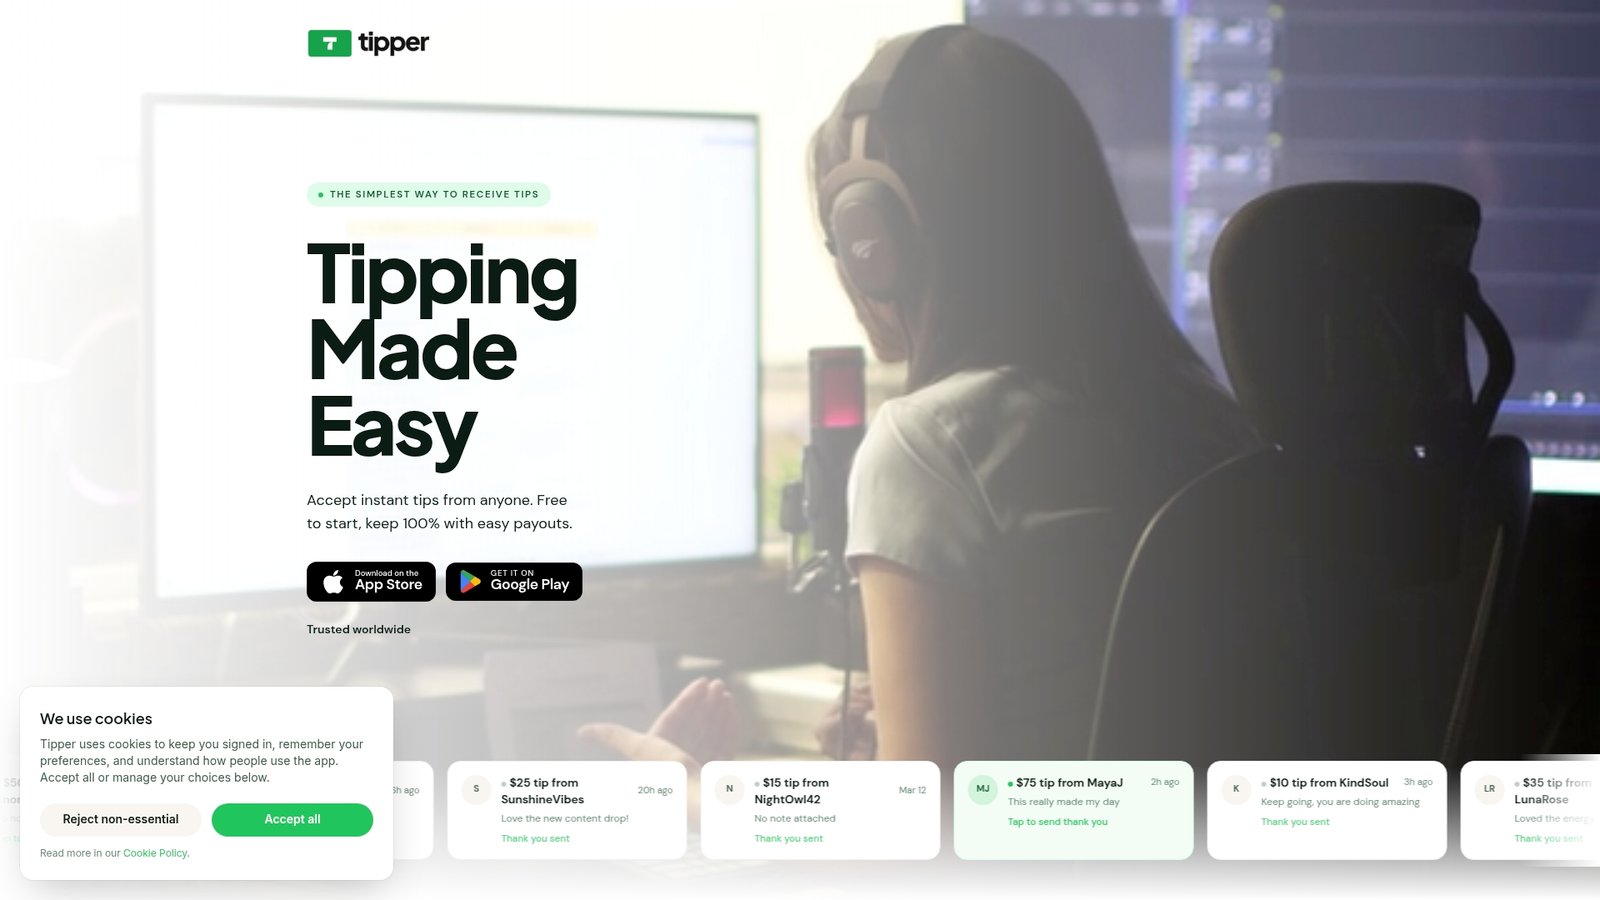
Tipper

Creators often choose platforms for reasons like speed to launch, payout control, and support for mobile wallet payments so tippers can pay in one tap. If you’re weighing this against a plugin-based setup like a WordPress payment plugin or an embeddable widget from a donation processor like Donorbox, the trade-off usually comes down to how much setup time you want to spend versus how fast you want to be live.

Set up your personalized tip link today and test your first live flow within the hour.

Sources

FAQ

Can You Give Me an Example of a Tip?

A common example is a podcast host adding a link in their shownotes with preset amounts of $2, $5, and $10, alongside a line like “Enjoyed this episode? A quick tip helps cover editing costs.”

What Are Some Clever Ideas for a Tip Jar?

Tie the ask to something specific and visible, like a progress bar toward new equipment, a QR code on a physical table tent at live shows, or a rotating seasonal theme like a “Thank You 2026” page during the holidays.

How Do I Create an Online Tip Jar?

Pick a personalized link or platform, turn on Apple Pay and Google Pay, set three preset amounts with a custom field, connect your payout account, and test the full flow on your own phone before sharing it publicly.

Is a 20% Tip a Good Tip?

That figure applies to service industries like restaurants and delivery, not creator tip pages, where there’s no fixed percentage; tips instead run on flat preset amounts, commonly ranging from $1 to $50 depending on the platform and content type.

Go Live in 10 Minutes: Tip Page Examples and Paste Ready Copy for Creators2026-09-13T01:30:55+00:00

Confirm YouTube Setup and Keep 100%: How to Accept Tips on YouTube

You can accept tips on YouTube two ways: turn on Super Thanks if your channel qualifies for the YouTube Partner Program, or add an external tip link like Tipper that any viewer can use right away. Super Thanks is easier for viewers but costs you roughly 30% off the top. An external link takes more setup but usually leaves more money in your pocket. Most creators end up running both.


TL;DR:

  • External tip links like Tipper allow creators to receive a larger percentage of tips because they bypass YouTube’s 30% fee and eligibility restrictions.
  • Setting up Super Thanks requires meeting YouTube Partner Program criteria and involves a straightforward activation process within YouTube Studio, with about 70% revenue retention.
  • Running both superimposed tips and external links together caters to different viewer preferences, increasing overall tipping opportunities.
  • External payment apps like Venmo and PayPal are free to implement but only effective if viewers already have those apps installed, which can limit international reach.
  • Payouts through Super Thanks follow YouTube’s monthly schedule and take roughly 30%, while external tools often process faster and with lower fees.

Tipper
tipper.app
Keep More From Every Tip
Tipper gives YouTube creators a personalized link for instant tips, with no sender account required and 100% of earnings kept.

Get your personal tip link

Table of Contents

Which Option Fits Your Channel Right Now?

Before you build out a full monetization plan, it helps to see the native and external routes side by side.

  • Super Thanks — one-time tips ($2 to $50) on uploaded videos and some Shorts. Requires YouTube Partner Program (YPP) membership. YouTube keeps about 30% of the purchase.
  • Super Chat and Super Stickers — live-stream-only tipping during active broadcasts and Premieres, also gated behind YPP.
  • External tip links (Tipper and similar) — work with no YouTube eligibility requirement, no signup for the sender, and typically a smaller cut taken out.
  • Payment app handles (Venmo, Cash App, PayPal) — free to set up but require the viewer to already have that app installed and an account.

If you’re already in YPP, turning on Super Thanks costs you nothing to enable and adds a frictionless option for casual viewers. If you’re not eligible yet, or you’d rather keep a bigger share of every tip, an external link is the more direct route.

How Do You Turn On Super Thanks?

Enabling Super Thanks is mostly a matter of checking boxes YouTube already knows about your channel. Before you touch any settings, confirm your channel clears these bars:

  1. You’re an active member of the YouTube Partner Program, which sets its own subscriber and watch-hour thresholds.
  2. You meet YouTube’s minimum age and are located in a country where Super Thanks is available.
  3. The specific video is public, not set as “made for kids,” and carries no active Content ID claims.

Once eligibility is confirmed, here’s the setup path on desktop:

  1. Open YouTube Studio and go to Earn (sometimes labeled Monetization).
  2. Select Supers and click Get started.
  3. Review and accept the Commerce Product Module terms. This is a required legal step, not optional fine print.
  4. Toggle Super Thanks on for your channel, then confirm it’s active on individual videos under each video’s monetization settings.

On mobile, open the YouTube Studio app, tap Earn, then Supers, and flip the same toggle. You can turn Super Thanks off at any time from the same menu if you change your mind.

Revenue split: viewers can send $2, $5, $10, or $50 per tip, and creators keep about 70% after YouTube’s roughly 30% cut. A $10 tip nets you around $7. You can track exact totals and read Super Thanks comments inside YouTube Studio’s revenue reports.

How Do You Turn On Super Thanks? — overview diagram

What External Tipping Methods Actually Work?

Super Thanks isn’t the only door open to you, and for a lot of creators, it isn’t even the best one.

Tip links like Tipper generate a personalized page or QR code viewers can pay through instantly using Apple Pay, Google Pay, or a card, without creating an account first. That’s the biggest practical advantage: no signup friction on the sender’s side, and no YPP requirement on yours. The tradeoff is that the transaction happens off YouTube, so you have to actively direct viewers there.

Payment app handles (Venmo, Cash App, PayPal, Ko-fi, Buy Me a Coffee) cost nothing to set up but only work smoothly if the viewer already has that specific app. That’s a real limitation for international audiences.

Stream overlays and alert tools, built with an OBS browser source, can display a real-time notification when someone tips through your external link, mirroring the instant gratification of Super Chat without routing money through YouTube at all.

Where you place the link matters as much as which tool you pick:

  • Pin a comment with your tip link on every video.
  • Add it to your video description and channel “About” section.
  • Feature it on an end screen or in a Community post.
  • Overlay it on-screen during live streams.

Pro Tip: Don’t make viewers guess which button does what. Say it plainly: “Hit the Thanks button for a quick on-YouTube tip, or use my link in the description if you’d rather pay with Apple Pay.” That one sentence removes almost all the confusion between the two options.

How Do You Actually Get Viewers to Tip?

Enabling a tip option is the easy part. Getting people to actually use it takes deliberate habit-building, and YouTube’s own creator guidance backs most of these tactics.

  1. Reply to every tip comment. YouTube specifically recommends replying to Super Thanks comments and pinning a thank-you comment so other viewers see the acknowledgment.
  2. Say the ask out loud, briefly. A five-second CTA (“If this helped, there’s a Thanks button and a tip link below”) outperforms a wall of text nobody reads.
  3. Show where the money goes. Creators who explain fund usage, new gear, editing help, production costs, consistently see better tipping behavior than those who stay vague.
  4. Give visible recognition. Shoutouts, a closing-credits roll, or a Community tab thank-you post all reinforce that tipping gets noticed.
  5. Test placement. Move your CTA earlier or later in the video and compare Super Thanks analytics against external link clicks over a few uploads.

Pro Tip: Run Super Thanks and an external link side by side. Some viewers want the one-tap convenience of staying on YouTube; others want to keep more of their money going directly to you. Offering both removes the excuse for either group not to tip.

What Policies and Tax Rules Should You Check First?

Before you flip any switch, a few compliance items are worth locking down, because getting them wrong costs more than a missed tip.

  • Accepting the Commerce Product Module is mandatory for Super Thanks. Skipping or later violating those terms can suspend your access to fan-funding features.
  • Community Guidelines strikes, repeated policy violations, or suspicious payment activity can get Super Thanks revoked from your channel entirely.
  • YouTube is explicit that fan-funding tools like Super Thanks are not crowdfunding, and creators remain responsible for complying with applicable tax and reporting laws in their own country.
  • Tip income, whether from Super Thanks or an external link, generally counts as taxable income. Keep records of every payout and talk to an accountant about how to report it correctly.
  • Confirm your payout banking details in YouTube Studio and in whichever external tipping tool you use, since mismatched account info is the single most common cause of delayed payouts.

Setting Up Third-Party Tipping Tools With Your Stream Software

Most external tip tools follow a similar setup pattern, whether you’re running Tipper, a payment app, or a dedicated alert service.

First, create your tip page or link inside the tool’s dashboard. For a platform like Tipper, that means generating a personalized link and QR code, no account required on the viewer’s end.

Second, if you stream live, connect that link to an alert system. Services built for this generate a unique browser source URL. Copy that URL into OBS Studio (or Streamlabs, or whatever software you use) as a new Browser Source layer in your scene. Set the dimensions to match your overlay area, usually a corner box around 400×200 pixels, and position it so alerts don’t cover your face cam or gameplay.

Third, test the full loop before going live: send a small test tip yourself, confirm the on-screen alert fires, and check that the notification email or dashboard entry arrives correctly.

Fourth, add the link everywhere viewers will actually see it, description, pinned comment, and an on-screen graphic during the stream itself, not buried in an “About” tab nobody visits.

Fifth, revisit the setup every few months. Streaming software updates, browser source caching issues, and expired links are the most common reasons an overlay silently stops working. A quick test tip before a big stream catches that problem before your audience does.

Fees and Payout Speed: What Actually Differs

The fee structure is where native and external tipping diverge the most, and it’s worth understanding before you commit to one path exclusively.

Super Thanks takes roughly 30% off every tip before it reaches you, and payouts follow YouTube’s standard monthly AdSense payout schedule, the same cycle your ad revenue already runs on. That means a tip sent today might not land in your bank account for several weeks.

External tip links vary by provider, but the model is generally a transaction fee plus a standard payment processing charge, rather than a flat 30% platform cut. Payout timing also tends to move faster since it isn’t tied to YouTube’s monthly revenue cycle.

Payment apps like Venmo or PayPal charge their own standard transfer fees, and instant transfers usually cost extra compared to standard multi-day transfers. Buy Me a Coffee and Ko-fi take a small platform percentage on top of payment processing fees.

The practical takeaway: if speed and take-home percentage matter more to you than staying fully inside YouTube’s ecosystem, external tools generally win on both counts. If simplicity for the viewer matters most, Super Thanks wins there instead.

Fees and Payout Speed: What Actually Differs — overview diagram

What to Do When a Tip Payment Goes Wrong

Disputes are rare, but when they happen, how you handle them affects both your relationship with that viewer and your standing with the platform.

For Super Thanks issues, missing revenue, a tip that doesn’t show up in analytics, start in YouTube Studio’s revenue reports, since most “missing” tips are just a reporting delay rather than a lost payment. If the discrepancy persists past a normal processing window, YouTube’s Creator Support is the correct escalation point, not a public comment reply.

For external tip links, resolution depends on the payment processor, not the tipping platform itself. Apple Pay and Google Pay transactions run through the underlying card network’s dispute process, so a refund request typically goes through your payment processor’s support channel rather than the tip tool’s dashboard.

A few habits reduce disputes before they start:

  • Confirm your payout details are current in every tool you use, since a wrong bank account is the most common cause of a “missing” tip.
  • Keep a simple log of tip amounts and dates outside of any single platform, so you have your own record if a dashboard glitches.
  • Respond to viewer questions about a tip quickly and publicly when appropriate. It reassures other viewers watching the exchange.

Most payment disputes resolve within a normal processing window once the right support channel gets involved. Panic is rarely warranted, but a paper trail always helps.

Why a Hybrid Approach Usually Wins

Treating Super Thanks and external tip links as competing choices misses the point. They solve different problems. Super Thanks removes friction for a viewer who’s already logged into YouTube and wants to tip in two taps. An external link removes YouTube’s cut and its eligibility gate entirely.

A tool like this kind of external tip link works well as the complementary half of that pair, since it emphasizes instant payment without requiring the sender to sign up for anything. Running both means a subscriber and a first-time viewer each get a tipping option that fits how they actually want to pay.

— Tipper

Super Thanks takes roughly 30% before it ever reaches you, and it only works if your channel already cleared the YouTube Partner Program bar; an external tipping service skips both problems.

Tipper

That matters most for creators still building toward YPP eligibility, since it means you can start collecting tips today instead of waiting on subscriber and watch-hour thresholds. It also matters for eligible creators who’d rather not hand over nearly a third of every tip to platform fees. Beyond the payment itself, some external tipping platforms let you send a personal thank-you back, a text note, photo, or short video, so supporters get something back beyond a receipt.

Getting started takes about the time it takes to read this sentence: create your tip link, drop it into your video description and pinned comment, and mention it once in your next upload. If you want a deeper walkthrough on placement strategy, this guide on tip link setup and payout presets covers the details.

Where to Verify the Official Rules

For exact eligibility language and setup screens, go straight to YouTube’s own documentation rather than a secondhand summary: the Super Thanks eligibility and policy page and the official tips for encouraging Super Thanks cover requirements and the Commerce Product Module directly. For overlay and alert setup on live streams, StreamAlert’s walkthrough breaks down the OBS browser source configuration step by step.

Sources

FAQ

How Do I Add Tips to YouTube?

Go to YouTube Studio, open Earn, select Supers, and toggle on Super Thanks after accepting the Commerce Product Module terms. If you’re not eligible for YPP yet, add an external tip link like Tipper to your video description and pinned comment instead.

How Do You Turn On Accept Gifts on YouTube?

“Accept gifts” refers to Super Thanks and Super Chat, both enabled from the Supers section under Earn in YouTube Studio. You must already be a YouTube Partner Program member and meet YouTube’s age and country eligibility criteria before the toggle appears.

How Many YouTube Views Do I Need to Make $2,000 a Month From Tips?

There’s no fixed view count, since tipping income depends on conversion rate and average tip size, not raw views. A channel with modest views but high viewer trust and consistent CTAs can outperform a much larger channel that never asks for tips.

How Many YouTube Views Do You Need to Make $10,000 a Month?

This also depends heavily on tip conversion and audience generosity rather than views alone, so no universal view target applies. Creators generally see stronger tipping revenue by combining Super Thanks with an external tip link and applying the engagement tactics YouTube itself recommends, replying to tips, pinning thank-yous, and explaining how funds are used.

Neither replaces the other entirely. Super Thanks is easier for viewers already on YouTube but costs about 30% in platform fees, while an external link like Tipper works without YPP eligibility and typically leaves creators with a larger share of each tip.

Confirm YouTube Setup and Keep 100%: How to Accept Tips on YouTube2026-09-12T01:30:49+00:00

Set Up Event QR Tipping with a $1 Test for Creators & Small Businesses

Event QR tipping means a personalized link and QR code that let supporters pay you instantly with Apple Pay, Google Pay, or a card, no account required on their end. The fastest path to using it: build a tip page, generate the QR, and run a $1 test scan before you ever put it in front of a crowd. The platform is built specifically for this flow.


TL;DR:

  • A checkout process under two seconds is crucial, especially at live events, to prevent supporters from abandoning the tip due to delays.
  • Personalization, such as preset tip amounts and a brief thank-you message, significantly increases the likelihood of repeat tipping.
  • Proper QR code placement at eye level in high-traffic, natural pause points maximizes scan rates and support.
  • Using branded QR codes and short, clear copy around them builds trust and encourages more support, especially on digital screens or slides.
  • Always verify QR code destinations with HTTPS links and test scans beforehand to prevent “quishing” phishing attacks.

Tipper
Make Event Tipping Easier
Tipper lets supporters send instant tips through your personalized link, without creating an account, using Apple Pay or Google Pay.

Table of Contents

How Does Account-Free QR Tipping Work?

The flow is short by design. Someone scans your QR with their phone camera, lands on a secure checkout page, taps Apple Pay, Google Pay, or enters a card, and the tip lands in your account seconds later, no app download and no sign-up screen standing between them and you

That speed isn’t a nice extra. It’s the entire mechanism. Industry guidance on QR tipping points to page loads under 1.5 seconds as the target, and conversions tend to drop once the process stretches past roughly eight seconds. Every extra tap, every spinning loader, every “create an account to continue” screen is a chance for someone to give up and pocket their phone instead.

QR tipping checkout flow and timing

Quick Stat: A checkout that clears in under two seconds keeps far more people in the flow than one that makes them wait, according to the same QR tipping guidance. At a live event, with noise and distraction working against you, that margin is everything.

Personalization does the rest of the work. Preset tip amounts remove the “how much is appropriate” hesitation. A short thank-you message, whether it’s a line of text or a ten-second video, gives the supporter something back and makes them more likely to tip again next time. This is also standard creator practice outside of live events: QR-code workflows that route fans to a tip page or bio link are already common on merch tables, in video outros, and on printed cards, so attendees at your event have likely seen this pattern before.

Step-by-Step: Set Up Your Tip Page and QR Code

You can have this running the same afternoon. Work through it in order.

  1. Build your tip page. Add a clear photo, one sentence explaining what the tip supports, and preset amounts like $5, $10, and $20. Record a short thank-you video (ten seconds is plenty) or write a brief note that plays after someone tips.
  2. Connect your payout method. Enter your bank details, confirm your identity, and set your payout cadence. Once that’s done, generate a short, clean URL for your tip page.
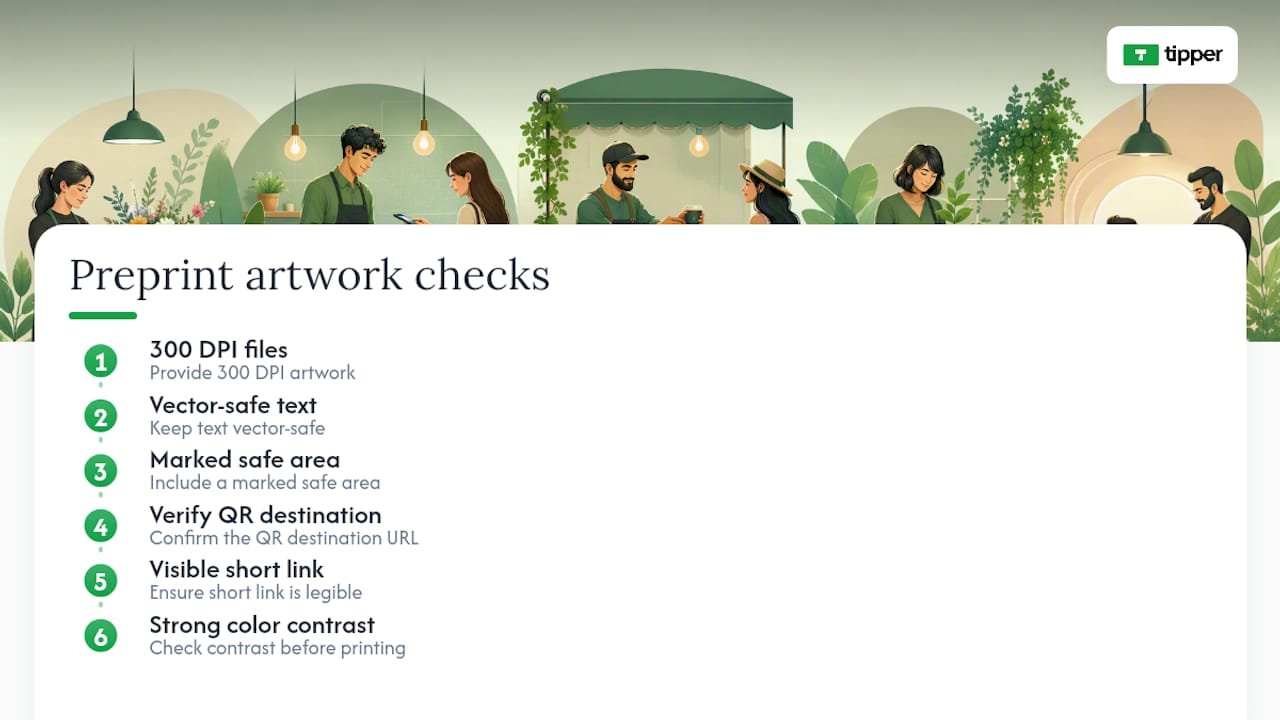
  3. Generate your QR code. Export it as a PNG for digital use and an SVG for print, so it stays sharp whether it’s on a slide deck or a foam-core sign.
  4. Test it before the event. Scan with an iPhone and an Android phone. Confirm the Apple Pay or Google Pay button actually appears, run a real $1 tip, and check that the payout notice shows up where it should.

A few practical notes as you build:

  • Keep the URL short. Long, parameter-heavy links produce dense QR codes that scan poorly from a distance.
  • Print at a size a person can scan from arm’s length, not just up close, especially for signage on a stage or bar.
  • Save both the light-background and dark-background versions of your QR, since event lighting varies.

The six-step setup checklist Tipper publishes covers this same sequence with printable sign templates if you want a head start on the design side.

Where Should You Place Your QR Code for Maximum Scans?

Placement decides whether any of this matters. A perfectly built tip page is worthless taped to a wall nobody looks at twice.

Put your QR wherever people naturally pause: the final slide of a set or presentation, the merch table, the edge of the bar, even a bathroom mirror at a venue that allows it. Eye level beats knee level, and a spot with steady foot traffic beats a quiet corner every time, even if the quiet corner “looks nicer” on camera.

Branding the QR itself matters more than most people assume. A branded code, meaning one with your logo or colors worked into the design rather than a plain black-and-white square, gets roughly 25% more scans than a generic one. People are more likely to trust and tap something that looks like it belongs to a real person or business, not a random sticker someone left behind.

Keep the copy around it short:

  • “Enjoyed the show? Tip here.” beats a paragraph explaining your creative process.
  • List two or three preset amounts near the code so the ask feels concrete, not open-ended. Suggested amounts genuinely reduce decision fatigue, which means fewer people stall out trying to decide what’s fair.
  • Add simple alt text if the QR appears on a digital screen or slide, so screen readers can describe it.

Pro Tip: Put your QR on the last slide of any presentation or set, not the first. People act on impulse right as something ends, not before it’s started.

A related idea worth stealing from other small businesses: pairing your tip collection setup with a quick way to capture repeat supporters, so a one-time tipper at an event becomes a recurring one online.

Is Scanning a Tip QR Code Safe?

It is, as long as you and your supporters both take a few basic precautions. QR codes carry a real, documented risk called “quishing,” a form of phishing where a malicious code sends people to a fake payment page instead of your real one.

Protect against it with a short checklist:

  • Always generate your QR from an HTTPS link, and scan-test it yourself before printing anything.
  • Preview the destination URL on your own phone before trusting a printed code, especially if you didn’t generate it yourself.
  • Keep your landing page visually consistent, same colors, same logo, every time, so returning supporters notice immediately if something looks off.
  • Add a one-line privacy note on your tip page explaining what information you collect and how payouts work.

Security researchers who track QR phishing attacks recommend exactly this kind of consistency check as a first line of defense, since fake codes almost always route to a landing page that looks slightly, but noticeably, different.

What Tipper Offers for Event Tipping

Tipper is built around the exact flow this guide describes, not a stripped-down version of it. Supporters tip without creating an account, using Apple Pay or Google Pay directly from the checkout screen.

A few specifics worth knowing:

  • No account is required for the person sending the tip.
  • Apple Pay, Google Pay, and standard card payments are supported at checkout.
  • Users keep 100% of what they earn, with only standard payment processing fees applied.
  • Tip pages are customizable, and thank-you messages can be text, photo, or a short video.
  • Payouts go directly to the user, with no long approval delays.

For the sign and layout side of setup, Tipper’s guide on QR tipping sign ideas walks through placement and printable templates step by step. It’s worth pairing with real examples other creators have used for contactless tip collection if you want to see the layout choices in context before designing your own.

Why Most Tipping Advice Gets the Order Wrong

Most guides on this topic obsess over design first: colors, fonts, sign placement. That’s backwards. The order that actually matters is speed, then trust, then design.

If your checkout takes ten seconds and asks someone to create a password, no amount of clever signage saves it. Get the payment flow fast and account-free first. Then make it look trustworthy, consistent branding, a real thank-you, a privacy line people can actually read. Design comes last, and it’s the part most creators over-invest in relative to its actual impact.

Why Most Tipping Advice Gets the Order Wrong — overview diagram

The other place conventional advice falls short is treating a tip QR as a one-time print job. It’s not. It’s a small piece of ongoing infrastructure, worth testing before every event the same way you’d check a microphone before a show. A code that worked in March might route to a payout account you closed in June if you’re not careful.

Prioritize the boring stuff first: test your scan, verify your payout method, confirm the button someone expects to see actually shows up on their phone. Everything else is decoration on top of a system that either works or doesn’t.

— Tipper

Try Tipper Before Your Next Event

Tipper gets you paid the moment someone decides to be generous, without making them dig for a wallet, create an account, or wait for a receipt email that never comes. Supporters tap Apple Pay, Google Pay, or a card, and you keep 100% of what they send.

Tipper

The concrete next step: build your tip page, generate your QR, and run a real $1 test tip on your own phone before you print anything or step on stage. Confirm the payment button shows up, the payout lands, and the thank-you message plays the way you set it up. Start that test now on Tipper, or check out this creator’s guide to collecting tips without a signup if you want a walkthrough before you commit.

Sources

FAQ

What Is Event QR Tipping?

It’s a personalized tip link and QR code that let supporters send you money instantly, using Apple Pay, Google Pay, or a card, without needing an account of their own.

Do Supporters Need an App to Tip Me?

No. They scan the QR with their phone’s regular camera, and the checkout opens in their browser, no app download required.

How Fast Should My Tip Page Load?

Aim for under 1.5 seconds. Conversions drop noticeably once the whole process passes about eight seconds.

Is It Safe to Scan a Tip QR Code at an Event?

Yes, as long as the code uses an HTTPS link and the landing page looks consistent with the creator’s branding. Watch for “quishing” attempts where a fake code redirects to a lookalike page.

Does this platform take a cut of my tips?

Creators keep 100% of what they earn on Tipper; only standard payment processing fees apply at checkout.

Can I Personalize My Thank-You Message?

Yes. Tipper lets you add a text note, photo, or short video that plays after someone sends a tip, which is one of the simplest ways to turn a one-time tipper into a repeat supporter.

Set Up Event QR Tipping with a $1 Test for Creators & Small Businesses2026-09-11T01:31:23+00:00

Get Paid in Minutes With a Personalized Tip Link for Creators

A personalized tip link is a single URL or QR code you create that lets fans send you instant tips, with no supporter account needed to pay you. You set it up once, connect a payout method, and share it anywhere your audience already hangs out. The whole process, from signup to a working link, usually takes minutes, not days, and it works with Apple Pay, Google Pay, and cards.


TL;DR:

  • Preset tip amounts outperform open fields by encouraging casual supporters to give quickly without extra effort.
  • Adding personalized thank-you messages after tips can boost repeat support and foster a stronger connection.
  • Sharing the tip link in prominent places like bios, livestream overlays, and printed QR codes maximizes visibility at moments of peak generosity.
  • In the US, tips are taxable income, so creators should track earnings and consult professionals for correct reporting.
  • Supporters can tip seamlessly with Apple Pay and Google Pay, and there are generally no platform fees deducted from the tips themselves.

Tipper
Let Your Audience Tip You Directly
Tipper gives creators a personalized link for instant tips, with no supporter account required and 100% of earnings kept.

Create your tip link

Table of Contents

Setting one up is closer to making a social media profile than filing paperwork. Most digital tipping platforms follow the same basic sequence, and once you know the order, you can have a live link before your next stream starts.

  1. Sign up and claim your slug. Pick a short, consistent username, something like yourname or yourname-tips, since readable slugs improve recall for fans who type the link from memory instead of clicking it.
  2. Connect a payout method. This usually means linking a bank account through a processor like Stripe, plus completing identity verification so payouts actually land.
  3. Set your suggested amounts. Decide whether you want quick preset buttons ($5, $10, $20) or an open field, and confirm the page accepts Apple Pay, Google Pay, and major cards.
  4. Add your photo, bio, and a thank-you note. A short paragraph about who you are and what tips support goes a long way toward trust.
  5. Test it, generate a QR code, and publish. Send yourself a small tip first to confirm the flow works end to end before you post the link publicly.

That’s it. Creating a virtual tip jar this way, sign up, connect payout, customize, publish, typically takes just a few minutes once you know what to fill in, and Tipper’s own setup walkthrough covers the technical flow in more detail.

What Customization Options Actually Improve Conversions?

The default setup works, but a few tweaks separate a tip link that sits ignored from one that gets used. Small design choices change whether a fan finishes the payment or bails halfway through.

  • Suggested amounts beat open fields for casual tippers. Lock in three or four preset buttons; save the open-amount option for supporters who want to give more.
  • A thank-you asset turns a transaction into a memory. A short video, photo, or personal note after the tip often encourages repeat support, because it makes the moment feel personal instead of transactional.
  • Keep your slug and branding consistent. The same name, same colors, same photo everywhere reduces confusion across platforms.
  • Set privacy and message options deliberately. Decide whether tippers can leave public notes or only private ones.
  • Use URL parameters to prefill amounts or names for personalized tipping campaigns. Tools built on frameworks like Fundraise Up’s URL API let you add parameters that prefill a suggested amount or supporter name, which shortens the path from click to payment, especially in email or SMS campaigns.

Pro Tip: Never stuff someone’s real name or email into a public link you post on social media. Save personalized prefills for private messages, and use generic campaign tags for anything public.

A personalized tip link only earns money where people actually see it, so placement matters as much as the page itself. The goal is putting the link in front of fans at the exact moment they feel generous.

  • Link in bio. This is the baseline. Every platform bio should carry it.
  • Pinned comment or end-of-video CTA. Say the link out loud or flash it on screen right when a video’s payoff lands.
  • Livestream panel or overlay. Streamers can keep the link visible during the whole broadcast, not just at the start.
  • QR codes for in-person events. A printed QR code on a table or badge converts foot traffic that would never type a URL manually.
  • Embedded widgets on a website or blog. A simple button keeps the tip option present without redirecting visitors away.

Beyond placement, a few integrations make the link more effective. Fundraise Up’s approach to prefilled URL parameters applies just as well to creator tipping as it does to donations, letting you build campaign-specific links for a newsletter blast versus a stream chat. RaiseNow uses a similar pattern, where customized PayLinks carry parameters that define amounts ahead of time. And platforms like GoFundMe track unique share links so you can see which channel actually drove the tip, bio link, video CTA, or QR code. If you want a deeper breakdown of embedding tip collection into your content workflow, Tipper’s guide on linking tips to content walks through it.

How Do Payouts and Fees Actually Work?

Money moves in a fairly predictable path: a fan taps a payment method, a processing fee gets deducted, and the remainder lands in your connected bank account on the platform’s payout schedule. Some platforms add their own fee on top of the processor’s cut; others don’t, so read the fee structure before you commit to one.

  • Payment methods affect speed and fees. Apple Pay and Google Pay tend to have lower friction at checkout than typing in a card number, which usually means fewer abandoned payments.
  • Payout cadence varies. Some platforms pay out same-day, others on a scheduled basis, often weekly.
  • Verification is a one-time step, not a recurring hurdle, once your bank account is confirmed.

Here’s the part creators often overlook: in the United States, tips are generally treated as taxable income, whether they come through a jar on a counter or a digital link on your phone. According to guidance on tip taxation, creators should keep records of what they receive and talk to a tax professional about reporting requirements that match their specific earning structure, self-employed, hobbyist, or business owner.

What Best Practices Actually Increase Tips?

Getting the link live is step one. Getting people to actually use it repeatedly is a different problem, and it comes down to a handful of repeatable habits rather than any single trick.

  1. Put the link where attention already exists. Don’t make fans hunt for it; put it in the caption, the comment, the overlay.
  2. Pair a clear call-to-action with a low-effort payment method. “Tap here, no account needed” removes the biggest excuse people have for not tipping.
  3. Reward tips immediately. A quick thank-you message or shoutout, tied to the moment of the tip, makes supporters more likely to tip again.
  4. Keep checkout frictionless. Every extra field or forced signup costs you conversions.
  5. Test and measure. Try different slugs, preset amounts, or thank-you formats, then watch which version converts better.

Pro Tip: Run one change at a time. If you swap your thank-you video and your suggested amounts in the same week, you won’t know which one moved the needle.

For a deeper look at combining amounts, presets, and payout timing into a repeatable system, Tipper’s creator tip link strategy guide breaks down the configuration choices that tend to matter most.

Why Does Tipper Fit How Creators Actually Get Tipped?

A tip link only works if the person paying doesn’t have to think twice, and that’s the gap most tools miss. This platform is built around the parts of this guide that matter most in practice:

  • No account required for supporters. Fans tap, pay, and move on, without creating a login just to send you $5.
  • Apple Pay and Google Pay support. These are the fastest checkout paths available on mobile, which is where most tipping happens.
  • Creators keep 100% of their earnings. No platform cut sitting between the tip and your bank account.
  • Thank-you messages via text, photo, or video. The personal-connection piece this guide keeps circling back to is built in, not bolted on.

These features map directly onto the friction points that kill conversions: forced signups, unclear payment options, and impersonal thank-yous. Removing them is the whole game.

What Happens When a Creator Actually Tests This?

Most creators who build a tip link expect a slow trickle. What tends to happen instead is a short burst right after the link gets pinned somewhere new, followed by a quiet stretch. That pattern usually means placement fatigue, not lack of interest.

The one lesson worth testing in the next 24 to 48 hours: move your link to a new spot, a pinned comment instead of just a bio, and watch whether the next batch of tips comes faster.

— Tipper

This platform strips out the parts of tipping that usually kill momentum: no signup wall for the person paying, no cut taken from what they send. You claim a slug, connect your payout method, and publish a page built around mobile and card payments, all in the same few minutes this guide describes.

Tipper

The setup mirrors everything covered above: sign up, pick your slug, connect payouts, set your suggested amounts, and add a thank-you note before you publish. Supporters never need an account to send money, and every dollar sent stays with the creator. If you want to see the full flow before committing, start with Tipper’s tipping page and claim your link.

Sources

FAQ

How do I create a virtual tip jar?

Sign up for a tipping platform, connect a payout method like a bank account through Stripe, and customize your page with a slug, bio, and photo. Most creators finish the whole setup in a few minutes.

What is the best online tipping app?

The right choice depends on what you need most, but look for no-account tipping for supporters, support for Apple Pay and Google Pay, transparent fees, and fast payouts. Tipper is built around exactly those priorities, letting creators keep 100% of what they earn.

Is TipTopJar legit?

TipTopJar is a real tipping platform used by some creators, but always confirm supported payment methods, payout timing, and fee structure directly on any platform before relying on it for income.

Yes, tip jars and digital tip links are legal in the United States, but the money you receive is generally treated as taxable income. Creators should keep records and consult a tax professional to handle reporting correctly for their situation.

Check that your payout method is verified, your slug is spelled correctly wherever you posted it, and your chosen payment methods (Apple Pay, Google Pay, cards) are all active on your account. Testing the link yourself with a small tip before sharing it publicly catches most issues early.

Get Paid in Minutes With a Personalized Tip Link for Creators2026-09-10T01:31:05+00:00

Creators: Add a Newsletter Tip Link Without Hurting Deliverability

Add any link to a newsletter by highlighting text or an image, clicking your editor’s link icon, and pasting the URL, mailto: address, or tip link destination. Three rules matter more than the tool you use: always use HTTPS, write anchor text that describes where the link goes instead of “click here,” and test every link on a phone before you hit send. Keep the total link count to roughly two to five, with your main call to action placed early.


TL;DR:

  • Using descriptive, specific link text with concrete expectations boosts click-through rates compared to generic phrases like “click here.”
  • Limiting your newsletter to two to five links maintains reader engagement and prioritizes your main call-to-action at optimal positions.
  • Branded domains for tracking links improve your sender reputation and avoid spam filters, unlike publicly shortened URLs like bit.ly.
  • Place your primary CTA at the end of sentences for better visibility, and ensure all links load over HTTPS with minimal redirect hops.
  • Incorporate optional tip links after valuable content, tagging them with UTM parameters to measure their performance separately from your main links.

Tipper
Let Readers Tip You Directly
Tipper gives creators a personalized link for instant tips, with no supporter account required and creators keeping 100% of their earnings.

Create your tip link

Table of Contents

Every major newsletter editor, whether that’s Mailchimp, ConvertKit, Substack, or beehiiv, follows the same basic pattern for inserting a link. The interface changes, the workflow doesn’t.

Here’s the process, step by step:

  1. Highlight the text or select the image you want to turn into a link.
  2. Click the link icon in your editor’s toolbar (usually a chain-link symbol).
  3. Paste the destination URL or choose a link type from the dropdown if your editor separates web links from email links.
  4. Decide whether it opens in a new tab. For anything that pulls the reader away from finishing the newsletter (a social profile, a long-form article), open in a new tab. For your main call to action, letting it open in the same window is fine.
  5. Save or apply the link, then preview the email to confirm it rendered correctly.

Button links work best when you want one link to visually dominate the email, typically your primary offer or the single action you want most readers to take, like creating landing pages on an all-in-one platform for online educators. Inline text links work better for secondary references, like linking a stat to its source or pointing to a past newsletter issue. Don’t turn every sentence into a button; it clutters the layout and buries the one CTA that actually matters.

For a mailto: link, the format is mailto:you@yourdomain.com. Select your text (say, “reply to this email”), open the link tool, and paste that address instead of a URL. Most editors detect the mailto: prefix automatically and route it correctly.

Image links need alt text and, where your editor supports it, an aria-label describing the destination, not just the image. “Photo of the author” tells a screen reader nothing useful if the image is actually a button linking to your podcast.

“Click here” is the weakest anchor text you can write, and it’s worth retiring for good. Descriptive, specific link text outperforms generic phrasing because it lets readers decide whether the link is worth their time before they click it, an approach Media A La Carte’s guide to newsletter link copy backs with concrete before-and-after examples.

Compare “click here to read more” with “read the full pricing breakdown.” The second version tells the reader exactly what’s waiting on the other side. Numbers help too: “see the 12 tools we tested” beats “check out our recommendations” because it sets a concrete expectation.

Place your primary link at the end of the sentence when possible. Readers scan left to right, and a link buried in the middle of a sentence gets less visual weight than one that closes it out. “We cut our churn by switching providers, and here’s exactly how we did it” reads more naturally, and clicks better, than a sentence with the link stuffed in the middle.

For accessibility, avoid ambiguous pronouns like “click this” or “read it here” since screen readers often list links out of context, without the surrounding sentence. If your link text is just an icon or a symbol, add an aria-label describing the destination in plain language.

Write Link Text That Gets Clicked, Not Skipped — overview diagram

Two to five links is the range that performs best across most newsletters, based on MailerLite’s analysis of email link counts.

The number that matters: Newsletters with 2 to 5 links consistently outperformed single-link emails on click rate, while also pulling stronger open rates, according to MailerLite’s link-count analysis.

That doesn’t mean single-link emails are wrong. They work well for narrowly targeted, single-offer sends, like a flash sale email or a webinar reminder where every reader gets the identical ask. The mistake is treating every newsletter like a link buffet.

Build a simple hierarchy instead. Your primary CTA gets the most visual weight and the earliest placement, and it’s fine to repeat it once further down. Secondary links (related articles, supporting resources) come next, with less prominence. Footer links (unsubscribe, contact, policy pages) sit at the bottom and stay purely functional. Resist the urge to link five different domains in one short email; it dilutes attention and gives your reader too many exits.

Most email service providers automatically rewrite the links you paste into your newsletter, swapping your visible URL for a tracking link that routes through their servers before redirecting to the real destination. This is normal and invisible to most readers, but it does affect how your domain reputation gets evaluated. Mailflow Authority’s guide to link patterns and deliverability recommends pointing a branded subdomain (like links.yourbrand.com) at your ESP’s tracking system using a CNAME record with HTTPS enabled, so the tracking domain reinforces your own brand’s reputation instead of a shared, generic one.

Public URL shorteners like bit.ly or tinyurl carry real risk in raw email bodies. They’re heavily associated with spam and phishing campaigns, and corporate firewalls often block them outright, killing your click before it happens. A branded short domain avoids that flag entirely.

Redirect chains matter too. Every hop between the link a reader clicks and the page that finally loads adds latency and a small trust penalty. Keep chains to two hops at most, and make sure any redirect in the chain uses a proper 301, not a temporary redirect that confuses crawlers and some spam filters.

Email link redirect paths and trust points

Pro Tip: If you use a short link alongside your ESP’s own tracking, you’re intentionally creating a two-hop chain, ESP tracking, then shortener, then destination. That’s fine as long as you tag the short link with UTM parameters so you can compare click data from both systems and catch bot noise that inflates one dataset but not the other.

A mailto: link can prefill more than just the address. Adding ?subject=Feedback%20on%20Issue%2042 after the email address prefills the subject line, and &body= prefills message text, using %20 for spaces. Keep prefilled bodies short. Long prefilled text breaks in some mail clients and looks sloppy in others.

Payment and tip links behave differently from a standard content link. A well-built one collects payment in a single click, without forcing the sender to create an account, using wallets like Apple Pay or Google Pay for near-instant checkout. Present a tip link inline, in a closing line, when you want it to feel optional, or as a small dedicated button when you want it visible without being the loudest thing on the page.

UTM parameters are the tags that tell your analytics platform where a click came from. The three that matter most are utm_source (the newsletter itself), utm_medium (usually “email”), and utm_campaign (the specific issue or promotion). Attach them to the final destination URL before it gets wrapped by your ESP, so they survive the redirect and show up correctly in your analytics dashboard.

Run through this list before every send, not just the big ones:

  • Hover over every link in the desktop preview to confirm the destination URL matches what you intended.
  • Click-test each link on at least two mobile email clients (Apple Mail and Gmail’s app cover most readers).
  • Confirm redirect chains stay at two hops or fewer and that every destination loads over HTTPS.
  • Check that UTM parameters actually arrive in your analytics dashboard after a test click, not just in the raw URL.
  • Verify the unsubscribe link works and that your footer includes any required policy links.

Skipping the unsubscribe check is more common than it should be, and it’s a real regulatory issue, not just a courtesy. The CAN-SPAM Act requires a working, easy-to-find unsubscribe mechanism in every commercial email, and burying or breaking that link increases spam complaints in ways that hurt future deliverability, a point Mailflow Authority’s deliverability guide also flags directly.

A freelance writer closing out a deeply researched issue might add one line at the bottom: “If this issue saved you time, you can leave a tip here.” The link routes to a Tipper page that takes Apple Pay, Google Pay, or a card, and the sender doesn’t need an account to send it. That’s the whole flow. No signup wall for the person tipping, no lost momentum between “I want to support this” and actually doing it.

Treat the tip link as a secondary CTA. It goes after the value content, uses optional, low-pressure language, and never competes with your primary link for attention. Tag it with its own UTM parameters, distinct from your main CTA, so you can compare tip-link clicks against your other links and see whether tipping performs better in certain issues, like a deeply reported piece, versus a quick roundup. Small businesses running paid newsletters have found similar placement rules work well for promoting tip links effectively without disrupting the reader’s flow.

Vague anchor text and public shorteners are the two habits that quietly cap click rates. Swap “click here” for descriptive text, and swap bit.ly for a branded tracking domain, and most of the improvement takes care of itself. Beyond that, pick one dominant CTA per issue, keep tip links optional and secondary, and never trust a single analytics source. Reconcile your ESP’s click data against shortener data before drawing conclusions about what worked.

— Tipper

Some digital tipping platforms offer a one-click way to say thanks, with no account required on the sender’s end, supporting Apple Pay, Google Pay, and card payments.

Tipper

Setting one up takes a few minutes: create your personalized Tipper link, customize your tip page with a short note about why you write, and drop the link into your newsletter footer or a closing line after your best content. Watch two numbers over your first few sends: click-through on the tip link itself, and how that compares to conversions on your main CTA. If tipping clicks trend upward on your most valuable issues, that’s a signal to keep the placement.

For a deeper look at collecting support without forcing anyone through a signup flow, Tipper’s guide on collecting tips with no signup required walks through setup and privacy details in more depth. Set up your link, add it to your next issue, and see how it performs before deciding whether to make it a permanent fixture.

Sources

For deeper technical grounding, see Mailflow Authority’s deliverability guide, MailerLite’s link-count research, and Sleeknote’s guide to growing a quality subscriber list.

FAQ

Are Newsletters Still Relevant in 2026?

Yes. Email remains one of the few channels a creator fully owns, unaffected by algorithm changes, and newsletters with well-placed, purposeful links continue to outperform social posts on both engagement and reader trust.

How Do I Send an Anonymous Tip to a News Outlet?

That’s a different kind of “tip” than what this article covers. Most newsrooms publish a dedicated tip line or secure submission form on their contact page, separate from any newsletter tip or payment link discussed here.

What Are the Essential Parts of a Newsletter?

A strong newsletter typically includes a clear subject line, a preview line, a short intro, your main content, one primary CTA, secondary links if relevant, a signature or sign-off, and a footer with your unsubscribe link and required policy links.

What Is the 3-2-1 Newsletter Format?

It’s a popular structure where each issue shares three ideas, two quotes or insights, and one actionable takeaway or question for the reader. It works well for curators who want a repeatable format instead of long-form writing each week.

Two to five links tends to maximize click rates without overwhelming the reader, based on MailerLite’s analysis of email performance. Single-link emails work better for a narrowly targeted, single-offer campaign.

Creators: Add a Newsletter Tip Link Without Hurting Deliverability2026-09-09T02:00:39+00:00

Raise Creator Tips Fast: 3 Custom Tip Amounts That Convert

Use three rounded preset amounts plus a clearly labeled custom field, keep the layout spacious, and highlight one recommended option. That combination raises average tips while protecting how supporters feel about the payment itself. Before you promote your tip link anywhere, run a lower-limit test and a mobile checkout test to make sure small tips actually go through.


TL;DR:

  • Using three rounded tip presets at moderate, highlighted, and aspirational levels, with a clearly labeled custom amount field, maximizes both tips and supporter satisfaction.
  • Keeping the tip menu layout spacious and well-separated from other buttons prevents reduced satisfaction, even as tips increase through suggested amounts.
  • Setting the default tip to a mid-range amount rather than the highest encourages repeat engagement and a sense of control for supporters.
  • Confirming that small tips go through on mobile, and testing custom amounts for rounding and display, prevents payment failures before promotion.
  • Offering a clear context or explanation about tipping, along with short-term A/B testing of defaults, improves conversion and adjusts for audience size and experience.

Tipper
Let Supporters Tip You Directly
Tipper gives creators a personalized link for instant tips, with no supporter account required and 100% of earnings kept.

Start accepting tips

Table of Contents

What Are the Best Custom Tip Amounts to Offer?

The strongest tip menu has three preset buttons and one open field, nothing more. Each preset plays a specific role: a low “impulse” amount for someone tipping on a whim, a middle “default” amount you visually highlight, and a higher “aspirational” amount for the superfan who wants to go big. Round numbers outperform odd ones, so $5, $10, and $25 beat $4.75, $9.99, and $23.

Three preset tip amounts and custom field

Skipping the custom field costs you money. A 2026 peer-reviewed study found that showing concrete dollar amounts alongside an open custom field increased both tipping likelihood and average tip size compared to percentage-based suggestions alone. People who want to give $47 because that is what feels right to them will not do it if their only options are $10, $20, or $50. Give them the door.

Practical creator playbooks back the same structure: three tiers, one clearly marked as recommended, plus custom input for anyone who wants to give more or less.

A few build rules matter more than they seem:

  • Cap your presets at three to five. More than that and supporters start comparing instead of deciding.
  • Highlight the default preset with color, a border, or a “most popular” label, but keep it subtle. Loud badges read as pushy.
  • Label the custom field clearly. “Other” works. “Enter your own amount” works better because it feels like an invitation, not a fallback.
  • Make every button large enough for a thumb, especially on mobile, and place the whole block near your primary call to action so supporters don’t have to scroll to find it.

Pro Tip: Test your custom field with a decimal amount like $17.43. If your payment page rounds it, rejects it, or displays it wrong, fix that before you ever share the link publicly.

How Layout and Wording Affect Whether People Actually Tip

Spacing changes how a tip ask feels, not just how it looks. Suggested tip amounts do increase how much people give, but the same research found that satisfaction with the payment experience drops when the layout feels crowded. A spacious layout with clear separation between the tip block and other calls to action erases most of that downside.

In other words, you can have the revenue lift and the goodwill. You just have to give the design room to breathe.

Design rules that hold up across creator pages:

  • Give the tip block its own visual section, not a cramped row squeezed between a subscribe button and a social link.
  • Use full-width buttons on mobile so there’s no ambiguity about where to tap.
  • Separate the tip ask from any transactional language (“payment due,” “invoice total”) that makes it feel like a bill instead of a thank-you.

Statistic Callout: Tip suggestions raise average amounts, but in crowded layouts that gain comes paired with lower satisfaction. Spacious layouts keep the gain and remove the trade-off.

Microcopy matters just as much as spacing. Frame the ask around appreciation, not obligation: “Loved this? Leave a tip” reads warmer than “Tips accepted here.” Place the block where it will actually get seen, meaning your bio, the end of a piece of content, or right after you deliver something a supporter has been waiting for.

Why Anchoring and Defaults Can Backfire

Pricing psychology works in your favor until you push it too far. Anchoring with a higher aspirational option makes your middle preset look more reasonable by comparison, which nudges more people toward that mid-tier amount instead of the cheapest one. That part is well established and easy to use.

The catch is what happens with defaults. Research on default tip levels found that setting the default too high raises the immediate tip but can reduce repeat visits and word-of-mouth afterward, because it lowers how much control the giver feels they had. That effect shows up most strongly when the audience isn’t used to tipping in that context yet, which describes most creator and freelancer tip pages.

The practical takeaway: don’t set your highlighted default at the top of your range. Set it in the middle, and lean toward a lower default rather than a higher one if your audience is new to tipping you at all. A sliding scale or a modest default works better than a bold, high number when you’re still building the habit with your supporters.

Rules for picking ranges:

  • For a small or new audience, start low. Impulse at $3, default at $5, aspirational at $15.
  • For an established audience with a history of generous gifts, scale up: $10, $25, $50.
  • Base your ranges on what your typical supporter has actually given before, not on what you wish they’d give.
  • Run an A/B test on your default before locking it in. Two weeks of data beats a guess every time.

Pro Tip: If you’re not sure which default to pick, start one tier lower than feels natural. You can always raise it once you see real conversion data. Raising a default is easy; recovering from a default that scared people off is not.

Payment Mechanics You Need to Check Before Launch

Your tip menu means nothing if the payment fails at checkout. Before you promote a tip link anywhere, run through this list:

  1. Confirm your processor’s minimum transaction floor. Some processors quietly reject or mishandle very small charges, or route them in ways that eat the entire tip in fees. Send yourself a test tip at your lowest preset amount and confirm the actual payout that lands.
  2. Turn on Apple Pay and Google Pay. These cut mobile checkout down to one tap, which matters enormously since most tips happen on a phone, often seconds after someone finishes reading or watching something. Practical site guides for accepting tips consistently point to wallet support as the single biggest friction reducer.
  3. Add inline validation to the custom field. If someone types a non-numeric character or an amount below your processor’s floor, the error message should explain what to fix, not just flash red.
  4. Decide how you handle amounts under your soft minimum. Suggesting a slightly higher number is usually better than blocking the transaction outright. Document your fee structure somewhere visible so nobody’s surprised by what actually lands in your account.

Timing decides more than most creators expect. The tip ask works best right after a content drop, at a milestone, or the moment right after you deliver something a supporter has been waiting on. That’s when appreciation is highest and the ask feels earned instead of random.

Copy that pairs an action with an impact line consistently outperforms a flat dollar amount sitting alone. A few patterns worth stealing:

  • “Say thanks with $5” under your lowest preset
  • “Fuel the next project — $10” under your middle, highlighted preset
  • “Go all in — $25” under your top tier, with a one-line note on what that funds (“covers a full editing session”)

Avoid persistent, sitewide prompts that follow supporters around. A tip block that shows up everywhere starts to feel like a paywall, not an invitation. Contextual placement, plus a shareable, prefilled tip link you can drop into a caption or an email, does more work than any sticky banner ever will.

Tipper: Setting Up Custom Tip Amounts in Minutes

Tip pages can support preset buttons, a custom amount field, and one-tap Apple Pay and Google Pay checkout, with no account required on the sender’s side. Supporters tap, choose or type an amount, and pay. Nobody creates a login.

To configure it the way this article recommends:

  • Set your three presets using round numbers based on your audience’s typical gift size.
  • Enable the custom amount field and label it clearly.
  • Add a short impact line under each preset so supporters know what their tip does.
  • Run a low-amount test transaction before sharing your link anywhere public, and check what actually lands after fees.

Before scaling any promotion, confirm your payout timing and fee behavior so there are no surprises once real volume starts coming through.

Accessibility Considerations for Custom Tip Amount Input

A custom amount field that only works for sighted, mouse-using visitors is leaving money and goodwill on the table. Screen reader compatibility starts with proper labeling: the input needs an associated <label> element, not just placeholder text, because placeholder text disappears the moment someone starts typing and often gets skipped by assistive tech entirely.

Keyboard navigation matters as much as screen reader support. Every preset button and the custom field itself should be reachable with the Tab key, in a logical order, with a visible focus outline so someone navigating without a mouse always knows where they are on the page.

Color contrast on preset buttons needs to meet basic legibility standards, especially for the highlighted “default” option. A pale gold border on a white background might look elegant, but it’s invisible to a supporter with low vision. Stick to contrast that holds up in bright sunlight on a phone screen, which is where a lot of tipping actually happens.

Numeric input fields should trigger the numeric keypad on mobile automatically, using the correct input type, so someone doesn’t have to hunt for number keys on a full keyboard. Error messages tied to invalid amounts need to be announced to screen readers immediately, not just shown as a red asterisk that a sighted user would catch but a screen reader user would miss entirely. None of this requires a redesign. It requires checking the boxes once and testing with a keyboard alone, no mouse, to see what actually happens.

Security and Privacy Concerns When Entering Custom Tip Amounts

Supporters typing in a custom dollar amount are also handing over payment details, and that moment deserves real protection, not just a lock icon for show. Any tip page collecting card information needs to run through a PCI-compliant processor rather than handling raw card numbers on its own servers. This isn’t optional or a nice-to-have feature; it’s the baseline for legally processing payments at all.

HTTPS across the entire tip page, not just the checkout step, protects the connection from the moment someone lands on your link. Look for the padlock and confirm it before ever sharing a tip page publicly, especially if you built any part of it on a custom domain.

Privacy works both directions here. Supporters generally don’t want their tip amount or a thank-you note visible to other visitors unless they explicitly opt into a public shoutout, so keep amount data private by default. On the creator’s side, avoid storing more supporter data than you actually need. A name and an email for a thank-you note is reasonable; scraping full billing addresses for no clear reason just creates a liability if that data ever gets exposed.

Wallet-based checkout, through Apple Pay or Google Pay, sidesteps a lot of this risk automatically because the platform never sees the supporter’s raw card number in the first place. That’s a security upside on top of the friction reduction these wallets already provide at checkout.

Tips collected through a personalized link are generally treated as income for the person receiving them, which means creators and freelancers need to track what comes in the same way they’d track any other payment for services or content. This differs meaningfully from restaurant-style tipping, where separate labor rules and tip-pooling regulations apply to employees, because a creator collecting tips through their own page is typically operating as an independent earner, not an employee receiving gratuities on a shift.

Sales tax treatment of tips varies depending on whether the payment is genuinely voluntary appreciation or functions as payment for a specific service or good. A freelancer adding a tip option to an invoice for completed work should check whether that particular jurisdiction treats it as taxable revenue tied to the service itself. Rules differ by state and by business structure, so this is genuinely a case where a quick conversation with an accountant beats guessing.

Payment processors also carry their own terms around what tipping flows are allowed to look like, including disclosure requirements about fees and refund policies. Reading the fine print on your processor agreement once, before you scale, saves a lot of confusion later if a supporter disputes a charge or asks why a fee was deducted.

None of this should scare you off collecting tips. It just means treating tip income the way you’d treat any other income, with basic recordkeeping and one honest conversation with a tax professional if your tip volume starts adding up.

How Do Cultural Differences Shape Custom Tip Acceptance?

Tipping norms are not universal, and a preset structure that feels generous in one market can feel awkward or even confusing in another. Audiences in the United States are generally comfortable with tipping as a concept and respond well to clearly labeled presets with a highlighted recommended amount. Audiences in parts of Europe and Asia, where tipping culture is thinner or nonexistent in everyday life, may need more context around why the option exists at all, not just what to click.

For creators with an international audience, a short line explaining that a tip is optional appreciation, not an expected fee, does real work. It reframes the ask for someone who has never been asked to tip anything in their life and removes the awkwardness that comes from an unfamiliar social script.

Currency framing also matters more than creators tend to assume. A $10 preset means something very different to a supporter earning in a stronger currency versus a weaker one, so if your audience skews heavily international, consider whether your lowest preset is genuinely accessible globally or only comfortable for supporters in wealthier markets. A $3 or $5 low tier tends to travel better across currencies than a $10 floor.

The safest approach for a mixed international audience is the same pattern this article already recommends: round presets, a visible custom field, and a spacious layout that doesn’t pressure anyone. That structure adapts naturally because it lets each supporter set their own comfort level instead of forcing a single cultural assumption about what a tip should be.

How Do Cultural Differences Shape Custom Tip Acceptance? — overview diagram

A Quick Word From Tipper

We land on three presets plus custom, spacious layout, every time, because the research and the practical creator data point the same direction: that combination raises tips without making anyone feel cornered into a number that doesn’t fit them. Run small, measured tests before you scale anything. Change one variable at a time, watch what happens, and share what you learn with other creators. Before you promote any link widely, confirm your payment minimums and your mobile checkout flow actually work.

— Tipper

Get Started With Tipper

This platform is built specifically for the setup this article walks through: no account required for the person sending the tip, Apple Pay and Google Pay ready to go, and a tip page where you control the presets and the custom field yourself.

Tipper

Getting set up takes three steps. Sign up and create your personalized tip page, configure three rounded presets plus a labeled custom field, then send yourself a small test tip at your lowest amount to confirm what actually lands after fees. Once that test clears, you’re ready to share your link wherever your supporters already are.

Sources

Studies on tip suggestions and defaults, plus practical creator presets guidance.

FAQ

How many preset tip amounts should I offer?

Three to five presets works best, with one clearly highlighted as the recommended amount and a custom field always available for anyone who wants to give a different amount.

Should the highlighted default be a high or low amount?

Keep it in the middle of your range rather than at the top. Research on default tip levels shows very high defaults raise the immediate tip but can reduce repeat engagement and perceived control, especially with audiences unfamiliar with tipping.

Why should I include a custom amount field instead of just presets?

A custom field captures generosity that fixed presets miss entirely, and research comparing the two found that displaying concrete dollar amounts alongside a custom field increases both tipping likelihood and average tip size.

Does a crowded layout actually hurt tipping?

Crowded layouts don’t reduce how much people tip, but they do lower satisfaction with the payment experience. A spacious layout with clear separation from other buttons keeps the revenue benefit without the trade-off.

Can Tipper handle both preset and custom tip amounts?

Yes. Tipper’s tip pages support preset buttons and a custom amount field together, along with Apple Pay and Google Pay checkout, so supporters can tap a suggested amount or type in their own without creating an account.

Raise Creator Tips Fast: 3 Custom Tip Amounts That Convert2026-09-08T02:01:10+00:00

Creators: Set a $1–$2 Tip Minimum Amount That Covers Fees and Converts

Set your lowest preset button at $1 or $2, make sure it clears your payment processor’s fee floor and highlight your middle preset as the default. That combination protects you from losing money on micro-tips while giving supporters an easy entry point. Do it now, then watch your numbers for two to four weeks before making further changes.


TL;DR:

  • Setting your lowest preset between $1 and $2 ensures it covers payment processor fees and prevents rejected charges on minimum tips.
  • Displaying both percentage and dollar amounts together increases tipping likelihood and average tip size compared to showing only percentages.
  • A three-button preset structure with a low, highlighted default mid, and a high tip option maximizes conversions and influences average tip amounts.
  • Testing and adjusting your tip minimum and presets every two to four weeks helps optimize revenue and supporter engagement.
  • Always comply with your payment processor and platform policies to avoid issues with micro-transactions, chargebacks, or tax reporting.

Tipper
Make tipping easier for your audience
Tipper lets supporters send instant tips through a personalized link, without an account, while creators keep 100% of their earnings.

Table of Contents

How Do You Set a Processor-Aware Tip Minimum Amount?

Before picking a number out of thin air, check what your payment processor actually charges per transaction in this guide to how to collect dance studio payments online. That’s not nothing, but it’s thin. A $0.50 tip after the same fee structure can leave you with almost nothing, or even trigger a rejected charge if your processor enforces a hard floor.

Fee-aware process for setting tip minimums

Support docs from tipping tools confirm this is common practice: most tipping settings pages let creators configure minimum and maximum amounts, and processors will reject charges that fall under their own floors. Help documentation for tip-collection tools also warns that custom amounts below the processor’s minimum will simply fail, which frustrates supporters more than a clearly stated minimum ever would.

Here’s the math, in plain terms:

  • Add your processor’s fixed fee to the percentage cut on your target minimum.
  • Ask yourself: after fees, does this tip amount still feel worth collecting?
  • If the answer is no, raise your floor until it does.
  • Check your platform’s settings page for a “minimum tip amount” or “custom amount” toggle. Most let you either lock in preset buttons only, or set a numeric floor for custom entries.

Getting this right up front saves you from support headaches later. For a deeper breakdown of how processor fees interact with small transactions, see this guide to setting up payment processing for tips.

Why Do Presets and Displays Change How Much People Tip?

The buttons you show supporters, and how you label them, change behavior more than most creators expect. A recent natural experiment tracking 5,169 real transactions found that showing both a percentage and its dollar equivalent side by side increased both the average tip size and the likelihood someone tipped at all, compared to showing a percentage alone. The effect held up even after the test period ended.

Pro Tip: If your tipping tool lets you display a percentage next to the dollar amount, turn it on. Supporters make faster decisions when they can see exactly what a number means in real money, not just an abstract percent.

That said, bigger isn’t automatically better. Research on suggested tip defaults found that raising the default amount does increase the size of individual tips, but it can also reduce repeat support and word-of-mouth referrals afterward, especially when supporters feel like the number was chosen for them rather than by them. Perceived control matters as much as the number itself.

Translate that into UI rules you can apply today:

  • Always show currency amounts, not vague labels like “small” or “generous.”
  • Use percentage-plus-amount displays where your tipping tool supports it.
  • Set your default preset at a level your typical supporter would choose naturally, not an aspirational ceiling.
  • Never set the highlighted default so high that a one-time supporter feels pressured.

Choice architecture isn’t about tricking people into tipping more. It’s about removing friction so the natural choice is also the profitable one.

What Preset Structure Actually Converts?

Three buttons beat five almost every time. A field experiment testing QR-code tipping pages found that presenting three suggested values, a lower option, a central default, and a higher option, produced measurable anchoring effects tied to the central value. Push the middle number up, and average tips rise with it. Push it down, and they fall. The middle button does most of the work.

Here’s a preset structure that works for most creator tip pages:

  1. Low preset ($1 to $3): your functional minimum, priced just above your processor’s fee floor.
  2. Mid preset ($5 to $10), highlighted as the default: this is where most clicks land, so choose a number that matches what your typical supporter can comfortably give.
  3. High preset ($15 to $25): a ceiling option for your most engaged fans, not an expectation.

If your audience spans wildly different budgets (say, casual scrollers and paying clients), a fourth option or a “custom amount” link can help. But more than four choices tends to slow people down rather than help them.

Pro Tip: Label your custom option as “Send a note + custom tip” rather than just “Other.” It signals that personal messages are welcome, not just spare change.

Always leave a way for supporters to reach out directly for larger or unusual requests. A short “DM me for custom amounts” line covers that without cluttering your main buttons.

How Do You Test and Validate Your Tip Minimum?

Guessing at a minimum once and never revisiting it is the most common mistake creators make. Treat your tip floor and presets as something you tune, not something you set and forget.

Track these numbers before and after any change:

  • Tips per visitor (your conversion rate)
  • Average tip amount
  • Net revenue per visitor, after processor fees
  • Repeat-tip rate among returning supporters

For the test itself:

  1. Change one variable at a time (just the minimum, or just the default preset, not both).
  2. Run the test for at least two to four weeks, or until you’ve collected at least 50 to 100 tips, whichever comes first.
  3. Compare net revenue per visitor, not just average tip size, since a higher default can inflate individual tips while shrinking your total tipper count.
  4. If conversion drops more than it gains in average tip size, revert and try a smaller adjustment.

Small, sequential changes beat sweeping overhauls. You’ll learn more from three small tests than one big guess.

Quick Implementation Checklist for Your Tip Page

Once you’ve done the math and picked your presets, implementation takes minutes. Work through this list on whatever platform hosts your tip page:

  • Confirm your processor’s minimum charge and fixed fee before locking in a floor.
  • Set your lowest preset at or above that floor, typically $1 to $2.
  • Highlight your middle preset as the visual default.
  • Decide whether to allow a custom amount field, and if so, enforce the same minimum on it.
  • Turn on thank-you tools (text, photo, or video replies) so supporters get instant acknowledgment.
  • Double-check that receipts or confirmations are enabled for transparency.

A quick privacy note: if you’re collecting names or messages alongside tips, be clear about what you’ll do with that information, even a one-line note builds trust. And keep the KPIs from your testing plan visible somewhere you’ll actually check them weekly, not buried in a settings tab you forget exists.

Tip minimums aren’t purely a design choice. Payment processors set hard technical floors, and some platforms add their own policy layers on top. Most major processors reject any charge below a fixed cents’ threshold, which is why so many creator guides land on $1 as a practical floor rather than a round marketing number.

Some platforms also restrict what you can call a “tip” versus a “purchase” or “donation,” which matters for tax reporting and terms-of-service compliance. If your tipping tool routes payments through a third-party processor, read its terms on chargebacks and refund windows. Micro-transactions are more prone to disputes relative to their value, and a $1 tip that gets reversed can cost you more in fees than the tip itself was worth.

If you’re a small business owner rather than an individual creator, sales tax treatment of tips can vary depending on your state and whether the tip is voluntary or added automatically. That’s a question worth a quick check with a tax professional if you’re processing tips at any real volume.

Finally, some platforms cap how high a “suggested” amount can be displayed without triggering additional verification or reporting requirements. None of this should scare you away from setting a floor. It just means the number you pick should account for the rules of whichever processor and platform you’re actually using, not just the psychology of what converts best.

Legal or Platform Policy Considerations Affecting Minimum Tip Amounts — overview diagram

Tipper’s Perspective: Why These Defaults Reflect Creator Priorities

We built Tipper around one belief: creators should keep what they earn, and supporters shouldn’t need an account to show appreciation. That shapes how we think about minimums, too. A $1 floor only makes sense if the creator actually nets a meaningful amount after fees, which is why we push for practical floors over flashy round numbers.

Instant tips through popular payment methods can reduce the friction that kills small transactions elsewhere.

— Tipper

Set Up Your Tip Presets in Minutes With Tipper

Everything covered above, the fee math, the preset structure, the highlighted default, is designed to be handled easily by modern tipping platform settings. You get a personalized link or QR code, preset buttons you control, and instant payments through various methods, without requiring an account on the supporter’s side.

Tipper

If you’re weighing this against a traditional point-of-sale tipping setup, Tipper skips the hardware and the account friction entirely; see how it compares for point-of-sale tipping alternatives. For creators who want their tip link doing double duty as a monetization strategy, this guide on tip link strategy pairs well with the presets covered here.

Ready to put your new minimum and presets into practice? Set up your Tipper page and start testing today.

Sources

FAQ

What is a good minimum tip amount to set?

Most creators land on $1 to $2 as a functional floor, high enough to clear typical processor fees without blocking impulse tips.

Why do payment processors reject very small tips?

Processors charge a fixed fee per transaction plus a percentage. Below a certain amount, that fee consumes the entire tip, so many processors block the charge outright.

How many preset tip amounts should I offer?

Three works best for most tip pages: a low option near your minimum, a highlighted mid-range default, and a higher option for engaged supporters. Four or five can work for audiences with a wide income range.

Does showing a percentage next to the dollar amount actually increase tips?

Yes. A natural experiment tracking 5,169 real transactions found that percent-and-amount displays increased both average tip size and tipping likelihood compared to percentage-only prompts.

Can setting my default tip too high backfire?

It can. Research on tip defaults found that while higher suggested amounts raise individual tip sizes, they can also reduce repeat support and referrals if supporters feel pressured rather than in control.

Creators: Set a $1–$2 Tip Minimum Amount That Covers Fees and Converts2026-09-07T02:00:35+00:00

11 QR Tipping Sign Ideas for Small Businesses, Plus a 6 Step Setup

Use a QR tipping sign at the exact moment a customer’s transaction ends, pair it with a warm, specific call to action, and print it clean enough to scan from arm’s length. That’s the whole formula. The rest is choosing a style that fits your counter, your bar, or your gig case, then walking through a simple setup: grab your tipping link, generate the code, drop it into a template, print it at 300 DPI, and put it where eyes already land.


TL;DR:

  • Use a dynamic QR code for easy updates and avoid reprinting signs if your payment URL or platform changes.
  • Place the sign at the customer’s point of pause, such as the register or pickup counter, to ensure it is seen and scanned easily.
  • Choose durable materials like acrylic for high-traffic areas or cardstock for frequent updates, and always test a sample before mass printing.
  • Incorporate specific, friendly call-to-action copy that matches your venue’s tone to increase customer engagement and tipping rates.
  • Pair the QR code with contactless payment options like Apple Pay or Google Pay to reduce friction and encourage instant tipping.

Table of Contents

QR Tipping Sign Ideas Worth Copying

Some of these work as-is. Others need a font swap or a color change to match your space. Either way, start with the one that matches your venue before you invent something from scratch.

  1. Minimalist acrylic with a small stand. Clean sans-serif type, one line of copy, one QR code. Fits coffee counters, boutique checkout stands, and anywhere a cluttered sign would look out of place.
  2. Chalkboard-style hand-lettered sign. Popular with farmers market stalls and neighborhood cafes that already use chalkboard menus. It reads as personal, not corporate.
  3. Playful pun sign with suggested amounts. Bars and casual spots do well with humor. “Tips: because bartenders remember faces” next to $2/$5/$10 buttons on the linked page works better than a bare code.
  4. Photo or team thank-you sign. Salons and service teams that show a real photo of the staff tend to see warmer reactions, since personalizing a tip sign with a photo or short note increases engagement compared with a generic code.
  5. Musician or busker gig card. A laminated card propped against an instrument case, with “Enjoyed the set? Tip here” and nothing else competing for attention.
  6. Holiday or event-themed signs. Swap colors and a headline for weddings, seasonal pop-ups, or a one-off market booth. Dynamic QR codes make this painless because you can change the destination without reprinting the sign.
  7. Table tents for catering and events. Freestanding, double-sided, and easy to move between tables during a buffet line or cocktail hour.
  8. Sticker or receipt-attached QR for mobile vendors. Food trucks and pop-up stalls can stick a code directly on a receipt or cup sleeve.
  9. Dual physical-plus-digital setup. Keep the cash jar and add a QR sign beside it, since a combined approach catches both cash and cashless customers instead of forcing a choice.
  10. Interactive jars paired with a code. A jar labeled with two options (“Team A” vs. “Team B”) turns tipping into a small game, and playful competitions and themed jars tend to boost engagement.
  11. High-contrast, large-code accessibility variant. Bigger code, bold color blocking, larger type for the CTA line. Built for low-light bars or venues with older customers.

Choosing Materials: Acrylic, Cardstock, or Something Else

Your material choice comes down to how long the sign needs to last and how often you’ll change it.

  • Acrylic (3 mm thick, UV printed) holds up on high-traffic counters and looks polished without extra design work. A common format is a 3 x 5 inch acrylic panel with a matching stand, which fits coffee shops, salons, and food trucks without eating much counter space.
  • Cardstock or laminated paper costs almost nothing, prints at home or at a local shop, and comes in standard sizes like 4×6, 5×7, or letter. Best for signs you’ll swap often.
  • Table tents and framed prints suit sit-down venues where the sign needs to survive being bumped.
  • Stickers or small laminated cards work for mobile vendors who need something that travels.

Acrylic wins on durability but costs more and takes longer to order. Cardstock wins on speed and price but wears out fast under grease, spills, or sun.

Pro Tip: Before ordering a bulk run of anything, print one sample first. A single acrylic piece or a short cardstock batch catches sizing, glare, and contrast problems while they’re still cheap to fix.

Acrylic and cardstock sign samples

What to Write on Your Sign: CTA Copy by Venue

The words next to your code matter as much as the code itself. Tone should match how your venue talks to customers everywhere else, and matching CTA tone to venue type is one of the simplest ways to make a sign feel native instead of bolted on.

  • Cafes and casual counters: “Enjoyed your coffee? Leave a tip.” or “$2 = a happy barista.”
  • Bars: “Tip your bartender. They remember who does.”
  • Fine dining or professional services: “Your support matters. Tip if you wish.”
  • Events and pop-ups: “Scan to show some love” with an emoji or two if your brand allows it.
  • Salons and personal services: “Loved your service? A tip goes a long way.”

Test two versions for a week if you can. Small wording changes, especially around suggested amounts, shift behavior more than people expect.

How to Build a QR Tipping Sign Step by Step

Here’s the actual workflow, start to finish.

  1. Get your payment link. Use a platform that needs no account on the sender’s side and supports Apple Pay and Google Pay directly. Copy the shareable URL.
  2. Decide static or dynamic. A dynamic QR code lets you swap the destination later without reprinting anything, which matters if you ever change payment tools or run a seasonal promotion.
  3. Generate the code at high resolution. Export as a 300 DPI PNG so it stays sharp when printed. Add a short line above or below it: “Scan to tip” or “Thanks for your support.”
  4. Drop it into a print template. Use 4×6 or 5×7 for countertops, 3×5 or 3×4 for small stands. Check that the code sits inside the safe area, away from the trim edge.
  5. Proof the layout, then print. Following the copy link, generate code, insert into template, print sequence keeps the process from turning into guesswork.
  6. Test before you commit. Scan the printed code with at least two different phones, check for glare under your actual lighting, and confirm the link lands where you expect.

Placement and Scannability: The Rules That Actually Matter

Put the sign where the customer already pauses: at the register, the bar edge, the pickup counter, or the instrument case lid. A sign tucked somewhere customers don’t look gets ignored no matter how good the design is.

  • Use 5×7 for counters where customers stand a foot or two back; 4×6 works for close-range spots like a tip jar next to a register.
  • Avoid glossy laminate under bright lights and skip busy patterned backgrounds behind the code.
  • Print at 300 DPI minimum, and keep a quiet white border around the code so phone cameras lock on fast.
  • If scans keep failing, re-export the code at a higher resolution or simply size the sign up.

Customers scan when there’s zero friction between seeing the code and completing the tip. Anything that adds a second of hesitation, glare, a tiny code, a confusing CTA, cuts your conversion before the customer even reaches for their phone.

Where to Find Templates and Design Files

You don’t need to design from scratch. Print-ready PNG templates from sites like QR Code Templates work for quick home or local print jobs. Editable Canva-based files, like the ones sold through Rainy Lain Designs, give you more control for event-specific branding.

For a custom acrylic sign, most printers ask for 300 DPI files, vector-safe text, and a marked safe area. If you’re new to sending artwork to a print shop, a small business guide to proofing signage walks through exactly what to check before you hit order. Whatever route you take, confirm the QR destination, check that any short link is visible, and check color contrast one more time before printing.

Six checks for QR sign artwork

Staying on the Right Side of Tipping and Payment Rules

QR tipping signs don’t require special licensing to display, but the money flowing through them isn’t exempt from normal tax and labor rules. Tips collected digitally are still income, and in most cases, they get treated the same way cash tips do under federal and state law. If you run payroll, that usually means tracking and reporting digital tips the same way you’d track cash tips left in a jar. If you’re a solo creator or freelancer using a personal tipping link, tips you receive still count as taxable income, no different from a cash tip in an envelope.

Payment processing itself sits with the platform you use to move money, so a QR code by itself isn’t a currency handler. It’s just a pointer to a link. What matters is picking a payment method (Apple Pay, Google Pay, card) processed through a compliant provider.

If you employ tipped workers, check your state’s specific rules on tip pooling and distribution before assuming a QR tip works the same as a cash tip dropped in a shared jar. Some states have stricter tip-pooling laws than others, and how the money is split among staff can trigger different rules depending on whether it passes through the business’s own account first. When in doubt, a quick conversation with an accountant or labor law resource beats guessing, especially if you’re combining a shared tip jar with individual QR links for specific staff members.

Real Scenarios Where QR Signs Increased Tips

A salon that swapped a generic “tips accepted” sticker for a photo-based sign showing the stylist’s face alongside a QR code saw more customers actually stop and scan, since personalized signage tends to outperform anonymous signage on engagement. A small detail, a name and a face, turns an abstract request into something that feels personal.

Personalized QR tipping sign in salon

Food trucks running QR stickers directly on the receipt or cup sleeve catch a moment cash jars miss entirely: the walk back to the customer’s car. There’s no jar to notice, so the code becomes the only tipping option, which removes the “I don’t have cash” excuse completely.

Bars that combine a physical jar with a visible QR sign tend to do better than either one alone, partly because starting a shift with a few visible bills in the jar creates social proof that nudges hesitant customers, and partly because the QR code catches everyone who’s already gone cashless. Musicians and buskers see similar results: a laminated card with a short, specific line, “Enjoyed the set? Tip here,” outperforms a bare code with no context, because it tells the passerby exactly what they’re supporting and why.

Weddings and pop-up events benefit from swapping in a dynamic QR code tied to the event’s theme colors, since it feels intentional rather than like an afterthought taped to a table.

Mistakes That Quietly Kill Your Tip Rate

The most common mistake is placing the sign somewhere customers glance at but never pause near, like a wall behind the register instead of the counter edge right where they’re standing. Location beats design almost every time.

A close second: printing the code too small. A code that scans fine at six inches often fails at two feet, and most customers won’t lean in to try twice. If your sign sits somewhere customers stand back from, size the code up rather than shrinking your text to compensate.

Skipping the pre-print test is another one. A code that looks fine on a screen can blur, glare, or lose contrast once it’s printed and laminated. Order or print one sample before committing to a bulk run.

Vague copy causes drop-off too. “Scan to support us” tells a customer nothing about what happens next. Specific, warm language, tied to the actual person or team behind the counter, converts better than generic phrasing.

Last one: choosing a static code when your payment platform or event details might change. Reprinting a whole batch of signs because a link died is avoidable if you start with a dynamic code from the beginning.

Tipper’s Take on Frictionless Tipping

Tipping should take one tap, not a login screen. That’s the whole argument for frictionless links over apps that require the customer to create an account before they can send $3. Support for Apple Pay and Google Pay matters because it removes the last excuse a customer has for skipping the tip, and creators keeping their full earnings matters because nobody builds loyalty around a platform that quietly takes a cut of someone’s gratitude. Check the contactless tip collection examples for more real setups. Whatever sign style you pick, match the materials and tone to your actual room, not a template you found online.

— Tipper

Some platforms support creating personalized tipping links and generating QR codes that let customers pay through Apple Pay, Google Pay, or card without needing an account. That last part matters more than it sounds. Every extra login screen or signup form is a customer who decides the tip wasn’t worth the hassle.

Tipper

Small business owners, bartenders, freelancers, and service providers can set this up once and reuse the same link across every sign style covered above, with some services offering the option to send a quick thank-you note or video back to whoever tipped. If you’re ready to stop guessing at payment friction, visit Tipper’s tipping page to build your first link and QR code in a few minutes.

Sources

FAQ

What are some cute tip sign ideas I can use?

Photo-based thank-you signs, chalkboard hand-lettering, and pun-based lines like “$2 = a happy barista” tend to feel warm without trying too hard. Match the cuteness level to your venue’s existing tone.

What are some cool QR code ideas beyond tipping?

QR codes work well for menu access, event RSVPs, playlist requests, and review links, but for tipping specifically, pairing the code with a short, specific CTA and a visible placement matters more than the code’s design.

How do I create a QR code for tips?

Copy your tipping link from a platform like Tipper, generate a QR code from that link at 300 DPI, then place it into a print template sized for your venue, such as 4×6 for counters.

Where can I find a QR code tip sign template?

Free print-ready files are available through sites like QR Code Templates, while editable Canva versions let you customize colors and copy before printing.

11 QR Tipping Sign Ideas for Small Businesses, Plus a 6 Step Setup2026-09-06T02:01:15+00:00

Creators: How TikTok Tips Reach You, Stripe Fees and Backup Links

TikTok Tips let viewers send creators direct payments through the app, using a system built on Creator Next and processed by Stripe. TikTok says it doesn’t take a cut of Tips, but Stripe’s processing fees still come out before the money lands in a creator’s account. The main takeaway: if you’re a creator, joining Creator Next and connecting Stripe is the only way in.


TL;DR:

  • Creators must join Creator Next and verify a Stripe account to access TikTok Tips, which are not available to all users automatically.
  • Stripe processes the payment, applying its own fees, so creators do not receive the full tip amount even though TikTok does not charge a platform fee.
  • Eligibility criteria include account standing, minimum activity levels, application approval, and Stripe verification, with thresholds around 100,000 followers at launch.
  • External tipping links offer an alternative for those waiting on eligibility or seeking more control over their income streams.
  • Tips are primarily intended for direct, ongoing support, while live gifts and donation stickers serve different engagement and fundraising purposes.

Table of Contents

What Is TikTok Tipping and How Does the Sender Flow Work?

The Tips button sits on a creator’s profile, usually near the message or follow buttons, once that creator has Tips enabled through Creator Next. Viewers tap it, choose from a set of preset amounts, or enter a custom figure, and TikTok’s help page on tipping walks through the same basic flow: find the button, pick an amount, pay.

During checkout, the sender picks a payment method (typically a saved card or digital wallet) and can usually choose to send the tip anonymously rather than have their username attached. That anonymity option matters to a lot of fans who want to support someone without turning it into a public gesture.

Behind the scenes, TikTok doesn’t touch the money directly. The app integrates with Stripe to handle the actual transaction, which means:

  • Stripe verifies the payment method and processes the charge.
  • TikTok’s role is limited to the interface and connecting the sender’s payment to the creator’s linked Stripe account.
  • The Tips Terms and Conditions confirm this Stripe integration and TikTok’s stated hands-off approach to the money itself.

Who Can Receive Tips on TikTok?

Not every creator sees a Tips button on their own profile, and eligibility is stricter than most people expect. Here’s the basic path:

  1. Meet the age and account standing requirements. TikTok requires accounts to be in good standing, with no active violations, before Creator Next access is granted.
  2. Join Creator Next. Tips is one of several tools bundled inside Creator Next, and creators have to apply and get accepted before Tips even appears as an option.
  3. Connect a verified Stripe account. This means submitting identity verification and banking details directly to Stripe, not TikTok.
  4. Check follower and view thresholds. Early coverage from Billboard cited requirements around the 100,000 follower mark at rollout, though exact thresholds can shift by region and account type.

If Tips isn’t showing up, the most common culprits are an incomplete Stripe verification, a Creator Next application still in review, or an account that hasn’t hit the minimum activity bar.

Who Actually Pays the Fees on TikTok Tips?

TikTok’s own terms state plainly that it does not charge a fee for Tips. That sounds like creators keep every dollar, but the reality is a little different once Stripe enters the picture.

The gap between “no platform fee” and “no fee at all” is where most creators get surprised. Stripe applies its own processing charges, which typically follow a percentage-plus-fixed-fee structure common across the payments industry, often somewhere in the range of a few percent of the transaction plus a small flat charge per payment. The exact rate depends on the payment method, region, and card type.

That’s a very different model from:

  • Live Gifts, where fans buy Coins, send virtual gifts during a stream, and creators convert those gifts into Diamonds, a system where the platform’s conversion ratio eats into the effective payout far more than a straightforward processing fee does.
  • Donation stickers, which route money to vetted nonprofits rather than to the creator’s own account at all.

Tips, in short, are the closest thing TikTok offers to a direct, low-friction payment from fan to creator.

How Do You Tip on TikTok?

Sending a tip takes less time than reading this sentence out loud. Here’s the sequence:

  1. Open the creator’s profile or catch them during a LIVE stream where tipping is enabled.
  2. Tap the Tips button and select a preset amount or type in a custom one.
  3. Choose whether to send it anonymously or with your username attached.
  4. Confirm payment through your saved card or digital wallet.

Good moments to tip: right after a video that genuinely helped you, during a LIVE session where a creator is answering questions in real time, or when someone you follow is clearly putting in the work without a big brand deal behind them. Bustle’s walkthrough of the sender experience confirms the preset-plus-custom-amount setup is consistent across accounts.

Pro Tip: If you want your support to go to a specific charitable cause instead of an individual creator, look for a donation sticker or fundraiser link. Those route through vetted nonprofit partners, not the creator’s personal Tips balance.

How Do Creators Set Up Tips (and What If You’re Not Eligible Yet)?

Once you’re accepted into Creator Next, turning on Tips is mostly a matter of paperwork:

  • Apply for Creator Next through the app’s Creator Tools menu.
  • Link and verify a Stripe account, which includes identity checks and bank details.
  • Enable Tips inside the Creator Next dashboard once Stripe confirms the connection.

If you don’t meet the thresholds yet, you’re not stuck. A large share of creators rely on external tipping links placed in their bio, often through a dedicated tipping page rather than a raw payment app username, making an AI TikTok Ad Generator useful for creators monetizing content efficiently. This sidesteps TikTok’s eligibility gate entirely and gives you control over the page, the branding, and sometimes the fee structure. A tool like Tipper works this way, generating a personalized link that fans can use without creating an account of their own.

Pro Tip: Mention your tipping link out loud during a video, not just in your bio text. Viewers rarely scroll to a profile mid-scroll, but they will screenshot a link they hear called out.

Tips vs. Live Gifts vs. Donation Stickers: Which One Fits?

These three tools solve different problems, and mixing them up costs creators money or credibility.

  • Tips are direct, one-to-one payments from a specific fan to a specific creator, best for ongoing support outside of a live session.
  • Live Gifts run on Coins and Diamonds, work well for real-time LIVE engagement, and come with a platform conversion built into the economics that creators should track closely.
  • Donation stickers send money to registered nonprofits through partners TikTok has vetted, part of the expanded fundraising tools the platform rolled out for charitable campaigns.

If a fan wants to support you personally, point them to Tips or an external tipping link. If they want to back a cause, the donation sticker is the honest answer, since nonprofit-focused fundraising guides confirm that flow bypasses a creator’s personal account by design.

How Do Payouts and Recordkeeping Work?

Once a tip clears, the money sits in the creator’s connected Stripe balance before it moves to a linked bank account, usually on a standard payout schedule rather than instantly.

  • Stripe handles the transfer from processor balance to bank account, and payout timing can vary by verification status and region.
  • New accounts sometimes face a short hold while Stripe finishes identity checks, which can delay the first few withdrawals.
  • Keep a simple log of tips received by date and amount. Tip income is still income, and a tax professional, not a TikTok help article, is the right source for how to report it.

In-app Tips win on convenience. There’s nothing to build, no separate app to promote, and fans already trust the checkout flow because it lives inside TikTok. But convenience comes with a locked door: no Creator Next, no Tips button, full stop.

External tipping links win on control. You set the page, you’re not waiting on a follower threshold, and you’re not tied to a single platform’s approval process. The smartest move isn’t picking one. It’s running Tips for the fans already inside the app and a tipping link for everyone else, including followers who found you on another platform entirely.

— Tipper

If you’re waiting on Creator Next approval, or you just want a backup income stream that doesn’t depend on TikTok’s eligibility rules, a personalized tipping link solves the wait. Tipper lets fans send support through Apple Pay, Google Pay, or a card, without creating an account first, and creators keep 100% of what they earn.

Tipper

Setup takes about the time it takes to film one video: create your link, drop it in your TikTok bio, and mention it on camera so viewers actually see it. Supporters can even leave a text, photo, or video thank-you note attached to their tip, which turns a payment into an actual connection with your audience. Start your tipping page and add the link to your bio today.

Sources

FAQ

What Is Tipping on TikTok?

TikTok Tips are direct payments viewers send to eligible creators through a Tips button on their profile, processed by Stripe under TikTok’s Creator Next program.

What’s the 3-Second Rule on TikTok?

The 3-second rule refers to TikTok’s algorithm favoring videos that hook viewers within the first three seconds, keeping them from scrolling away; it’s a content strategy tip, not a tipping feature.

How Much Does TikTok Pay Per 1,000 Views?

TikTok doesn’t publish a fixed rate per number of views, since earnings depend on the Creator Rewards Program, video performance, and region, which is exactly why many creators add Tips or a tipping link as a more predictable income source.

How Many Views Do You Need on TikTok to Make $100?

There’s no fixed view count that guarantees $100, because Creator Rewards payouts vary by watch time, engagement, and content category, while direct Tips depend entirely on how many viewers choose to send money rather than view count alone.

Do Creators Keep All of a TikTok Tip?

TikTok states it doesn’t charge a fee for Tips, but Stripe’s processing fees are deducted before the payout reaches the creator’s account, so the final amount is slightly less than the tip sent.

Creators: How TikTok Tips Reach You, Stripe Fees and Backup Links2026-09-05T01:30:59+00:00

Collect Tips in an Hour: Add a Tip Button to Your Blog

You can accept one-off tips on your blog, and you don’t need a fundraising campaign or a Patreon-style membership to do it. The fastest path is a short tip link or embedded button that takes card payments plus Apple Pay and Google Pay, placed right where readers finish reading. Tools like Tipper build this exact function into a single personalized link. Set it up once, drop it into your post footer, and you’re collecting tips within the hour.


TL;DR:

  • Using a personalized tip link supported by Apple Pay, Google Pay, and card payments ensures the highest convenience for mobile users, increasing tips.
  • Placing the tip button immediately after the content or on confirmation pages yields better conversion rates than mid-article or top-of-page placements.
  • Limiting preset tip amounts to four between $3 and $10, along with an optional custom field, appeals to most readers without overwhelming choices.
  • Keep the tipping process simple by skipping account requirements and additional fields, reducing friction and encouraging spontaneous tips.
  • Testing a $1 tip beforehand and adding a genuine thank-you message significantly boosts repeat tipping and overall success.

Table of Contents

Every platform handles the technical part a little differently, but the sequence is the same everywhere.

  1. Build the tip page or personalized link. Set two to four preset amounts, write one line of microcopy explaining what the money supports, and skip anything that looks like a fundraising goal, since tip jars work better as a no-strings gesture than a campaign with a target.
  2. Embed the button inline or use a short redirect URL. Something like yoursite.com/tip is easier to say out loud in a podcast or read aloud in a video than a long checkout link.
  3. Test the full flow on both desktop and mobile, confirm the payout destination, and check that a receipt actually gets sent.

For WordPress specifically, you have three real options: a dedicated tip jar plugin, a WooCommerce product priced at $0 with a “name your price” field, or a simple shortcode that embeds a hosted tip button. Shopify creators can do something similar with a product page and a Buy Button widget, while Substack writers typically just link a tip URL from their bio or use an embedded footer button. A step-by-step blog tip button walkthrough covers the screenshots platform by platform if you want the exact clicks.

Keep the whole thing simple. A tip jar is not a donor management system. It’s meant for individuals and small creators, so skip the account requirements and campaign tracking that bigger fundraising tools push on you.

Pro Tip: Run one test tip yourself for $1 before you announce the button publicly. It’s the only way to catch a broken redirect or a payout account that’s still pointed at the wrong email.

Placement matters more than most bloggers assume, and the data on this is consistent: tip requests convert best when they show up right after a reader has already gotten something valuable, not before.

  • End-of-post, immediately after the content, is the single strongest spot because readers who finish an article have already decided it was worth their time.
  • Confirmation pages (after a download or newsletter signup) work well because the reader just completed an action, which puts them in a “yes” mindset.
  • Avoid placing tip requests above the fold or mid-article, where they compete with the content itself.

Best-practice research on tip jars for blogs and online platforms backs this up directly: jars placed alongside free content, with clear customization and multiple payment options, outperform generic sidebar widgets.

Amounts matter almost as much as placement. Four preset tiers plus one open “enter your own amount” field covers the widest range of readers without overwhelming anyone with choices. Lower numbers work better than you’d think. Guidance on tip jar amounts suggests $3 to $10 as the range that gets clicked most, because it feels closer to a coffee than a donation.

Most of the specific tip jar recommendations in the best-practice checklist come down to reducing friction: fewer fields, familiar payment logos, and no forced account creation. Name is optional. Email is optional. Every extra field you require is a reason for someone to close the tab instead of tapping “send.”

Language changes behavior too. “Buy me a coffee” reads as casual and low-stakes. “Donate” reads as formal, sometimes even like you’re running a nonprofit, which can make a reader hesitate if they’re not sure their $5 belongs in that category.

Pro Tip: Pair each preset amount with a one-line impact statement, like “$5 covers my coffee while I edit next week’s post.” Creators who explain what a tip actually funds report higher willingness to give, even at the same dollar amount.

Which Payment Methods Should You Offer, and What Do They Cost?

Card payments combined with Apple Pay and Google Pay give you the lowest friction on mobile, where most blog traffic actually lands. A reader who has to type in a 16-digit card number is far less likely to finish than one who taps their phone once.

Two separate fees usually apply on any tip: a platform fee for the tipping tool itself, and a payment processor fee for moving the money. Before you go live, confirm exactly when payouts hit your bank, whether that’s instant, daily, or weekly, and double check where the money actually lands.

The tone that works is closer to a friend mentioning something in passing than a sponsor read. Nobody wants a hard pitch after a helpful tutorial.

  1. Add a casual line at the end of high-performing posts: “If this saved you time, tips are always appreciated” reads very differently than “Please donate now.”
  2. Put a version of the same line in your email newsletter footer and your social bio, so the ask shows up in three places without ever feeling repetitive.
  3. Show what a specific amount does. Impact-focused language increases perceived value far more than a bare “tip me” button ever does.
  4. Test the phrasing and placement on your two or three best-performing posts first, then roll out whatever gets the higher click rate everywhere else.

Timing beats volume. Placing the ask right after a direct value moment, like the end of a tutorial or right after you’ve answered someone’s comment, consistently outperforms a permanent sidebar widget that readers learn to tune out.

Pro Tip: Screenshot a thank-you note from a supporter (with their permission) and use it sparingly as social proof near your tip link. Seeing that someone else already tipped lowers the psychological barrier for the next reader.

What Should You Know About Privacy, Payouts, and Taxes?

Keep the data you collect to the bare minimum. Name and email should be optional fields, never required, since every unnecessary field reduces completion on a small transaction.

  • Tips are generally taxable income in the United States, so keep a simple record of every payout for your own bookkeeping.
  • Talk to a tax professional about how to categorize tip income for your specific situation. This article isn’t tax advice.
  • Before launch, confirm whether your tipping tool holds funds temporarily or forwards them immediately, and note the payout schedule so you’re not caught guessing where your money is.

What Actually Works Once You’ve Set Up Tipping

Most advice about blog tipping focuses on the button. That’s the easy part. What actually determines whether tipping generates real income is whether creators treat it as a persistent, low-key feature rather than a one-time announcement.

What Actually Works Once You've Set Up Tipping — overview diagram

Personalized links and in-page buttons prioritize Apple Pay and Google Pay specifically because that’s where mobile friction dies fastest. A sender doesn’t need an account, which removes the single biggest drop-off point in any tipping flow. Thank-you notes, whether that’s a short text, a photo, or a video, help with retention. A reader who gets a genuine thank-you is far more likely to tip again next month.

The honest takeaway: don’t wait for a “big” moment to add a tip link. Start small, put it in one spot, watch what happens for two weeks, then adjust placement or wording based on what you actually see. Guessing wastes more time than testing.

— Tipper

Start Collecting Tips With a tipping platform

Some platforms provide a personalized tip link and an embeddable button that accept Apple Pay, Google Pay, and card payments, with no account required on the sender’s side.

Tipper

Getting started takes less time than writing your next post. Sign up, build your tip link or button, add it to your post footer or social bio, and send yourself a $1 test tip to confirm the whole flow works before your readers see it. If you’re weighing rails and tools first, this rundown of digital tip jar tool types is worth a quick read. Once tipping is live, you’ll have a clearer sense of whether it can eventually reduce your dependence on ad revenue altogether.

Sources

FAQ

Yes. Accepting one-off tips through a payment processor is legal, but tip income is generally taxable, so keep records and consult a tax professional for your specific situation.

What’s the Best Payment Method for a Blog Tip Button?

Card payments paired with Apple Pay and Google Pay give the lowest friction on mobile, though including PayPal helps cover readers who prefer a processor they already trust.

How Much Should I Set as Preset Tip Amounts?

Four preset tiers between roughly $3 and $10, plus an open custom-amount field, tend to convert best because they feel closer to a small everyday purchase than a formal donation.

Do I Need a Recipient Account to Use Tipper?

No. Tipper lets senders tip through a personalized link using Apple Pay, Google Pay, or a card, with no account required on their end.

End of post is the strongest spot, since readers who just finished your content are already in a positive mindset, right before they’d otherwise navigate away.

Collect Tips in an Hour: Add a Tip Button to Your Blog2026-09-04T01:31:23+00:00
Go to Top