

Tipper First: 12 Ko-fi Alternatives for Creators, No Account Tips
The strongest Ko-fi alternatives for creators split into three lanes: Tipper for account-free, instant tips that let supporters pay with Apple Pay or Google Pay without signing up, Patreon or Memberful for recurring memberships, and Fourthwall, Gumroad, Payhip, or Sellfy for creators who want to sell digital products or merch. The right pick depends on whether you need one-off support, ongoing subscriptions, or a storefront.
TL;DR:
- Tip platforms like Tipper enable instant, account-free payments via Apple Pay or Google Pay, ideal for casual, high-volume audiences or in-person tipping.
- Recurring memberships are best supported by platforms like Patreon or Memberful, which provide patron management and content gating but require supporters to create accounts.
- For selling digital or physical products, Fourthwall, Gumroad, Payhip, or Sellfy offer storefronts with fulfillment or payment options tailored to digital downloads or merchandise.
- Testing and comparing platforms through quick, mobile-based transactions helps creators identify the lowest friction options aligned with their income streams.
- Combining tools, such as Tipper for tips and Patreon for memberships, allows creators to diversify income sources without forcing supporters into platforms that don’t suit specific engagement types.
Table of Contents
- How do the top Ko-fi alternatives compare at a glance?
- What sets each Ko-fi alternative apart for creators?
- How should you test and choose a Ko-fi alternative?
- What does Tipper actually offer creators?
- What does 2026 tell us about how creators get paid?
- Ready to add a frictionless tip link to your page?
- Where this comparison comes from
- Sources
- FAQ
How do the top Ko-fi alternatives compare at a glance?
Before testing anything, it helps to see how these platforms differ on the things that actually affect a creator’s income: fee structure, payout speed, and whether the tool is built for one-off tips or ongoing memberships. The table below lines up all twelve options against the criteria creators ask about most.
The passage contains no spelling or grammatical errors that require correction.
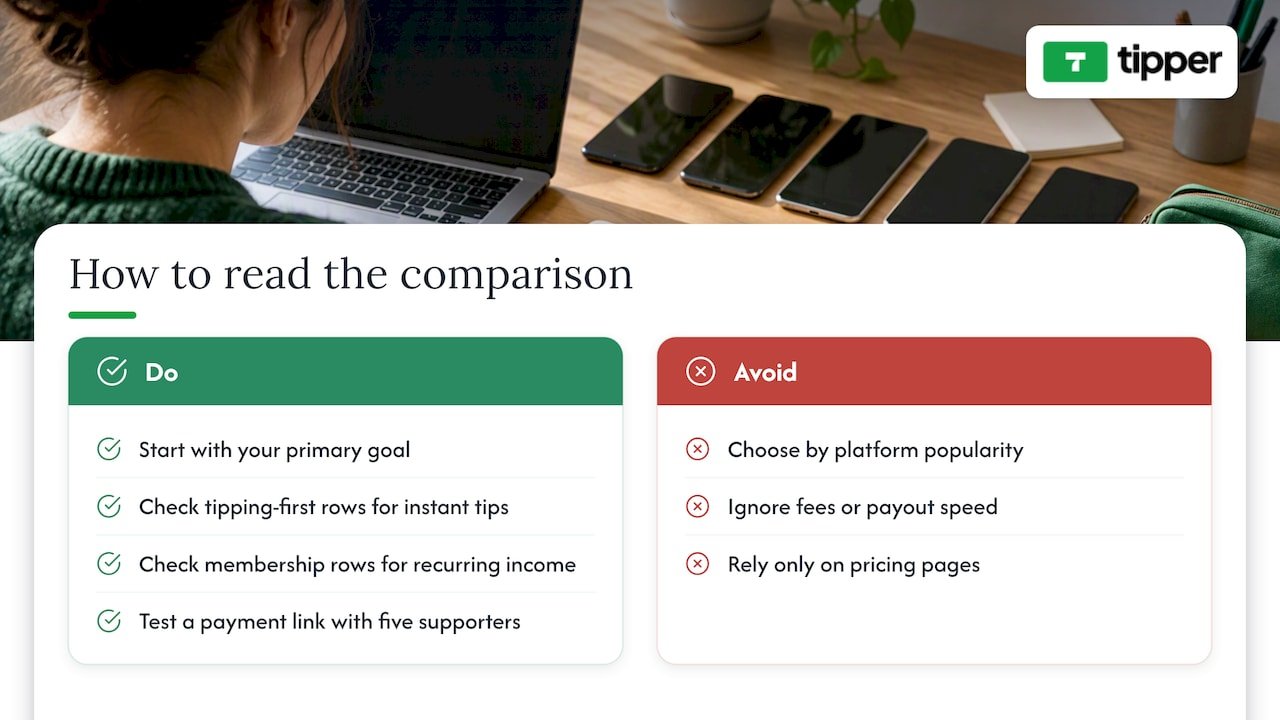
Read this table by starting with your primary goal, not the platform’s popularity. If you want a supporter to tip you in the next thirty seconds without creating an account, look at the tipping-first rows. If you’re trying to build predictable monthly income, the membership rows matter more than fees. A quick way to test any of these: set up a link, send it to five supporters, and see how many complete a payment without asking you a question first. That single test tends to reveal more about friction than any pricing page.
What sets each Ko-fi alternative apart for creators?
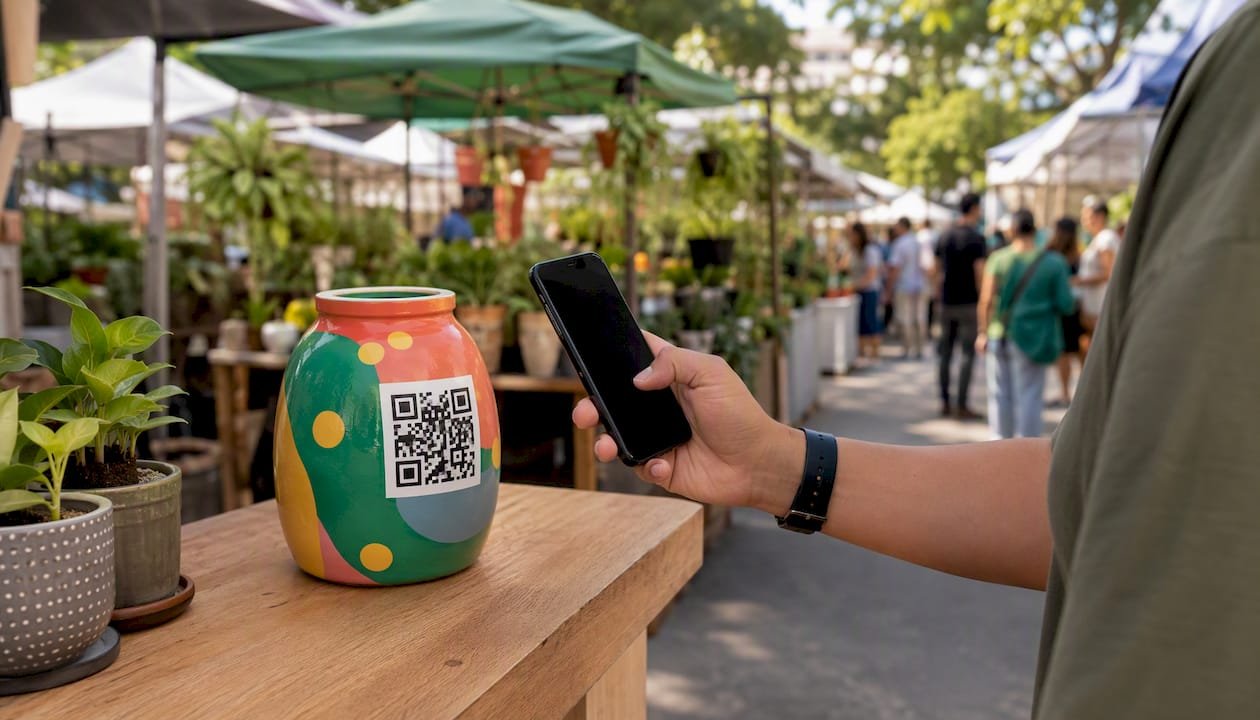
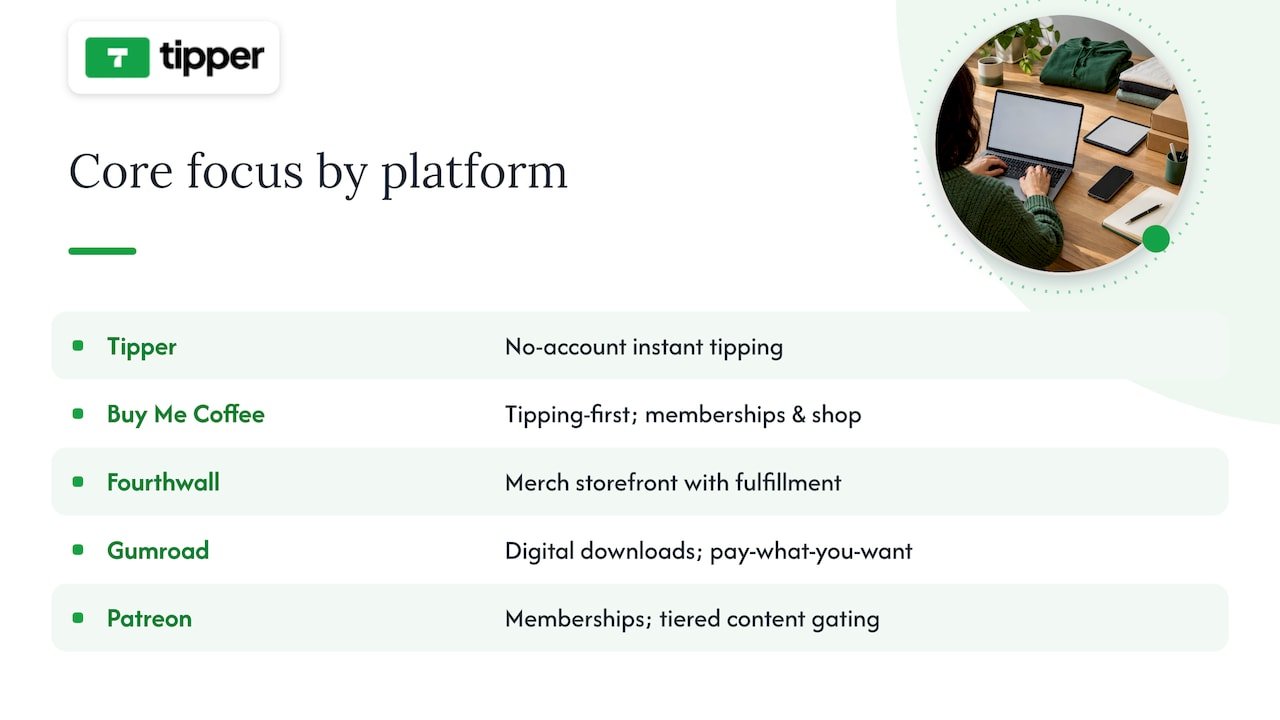
Tipper is built around a simple idea: supporters shouldn’t need an account to tip you. A creator shares a personalized link or QR code, and the person tipping pays instantly with Apple Pay, Google Pay, or a card, no login, no app download required on their end. Creators keep their earnings, with a payment processing fee applied at checkout, and there is no subscription cost to maintain a tipping page. The platform also supports thank-you messages back to supporters, in text, photo, or video form, which matters for creators who want tipping to feel personal rather than transactional. It’s a strong fit for in-person tipping (a QR code on a tip jar or business card), short-form video creators who need a link they can drop in a bio, and anyone tired of asking supporters to sign up just to send five dollars. To test it, generate a link and send yourself a small tip first to see the checkout flow from the supporter’s side.
Buy Me a Coffee built its reputation as a tipping-first alternative that later added membership tiers and a basic shop. Onboarding is mobile-friendly, and the one-tap support flow makes it easy for a first-time supporter to convert. Buy Me a Coffee is available as a mobile app, which matters for creators who manage their page from a phone between filming sessions. It charges a platform fee on top of payment processing, so creators give up a slightly larger share than with a pure tipping tool, but in exchange they get memberships and a shop without switching platforms.
Fourthwall is the strongest pick on this list for creators whose income already leans on merchandise. It bundles storefront tools with fulfillment, meaning a creator doesn’t need to separately manage printing, shipping, or inventory. A 2026 roundup of Ko-fi alternatives places Fourthwall specifically in the merch category, distinct from tipping or membership tools. The tradeoff is that Fourthwall isn’t designed for quick, no-friction tips: it’s a store, and it behaves like one.
Gumroad remains popular for creators selling digital downloads such as templates, presets, or ebooks, with pay-what-you-want pricing as a notable option for creators who want flexibility on price points. It charges a per-transaction fee rather than a monthly subscription, which keeps the barrier to entry low for creators testing a new product.
Patreon is the default answer for creators building a membership business. It offers patron management, tiered content gating, and tools built specifically for recurring relationships rather than one-time gestures. G2’s comparison of Patreon against Stripe Billing shows that many creators pair a membership platform like Patreon with separate billing infrastructure, which reflects a broader pattern: creators rarely rely on a single tool for their entire income. Patreon charges a tiered platform fee based on the plan, and payouts run on a monthly cycle tied to billing dates rather than on demand.
Payhip targets creators selling structured digital goods like PDFs and course materials, with built-in affiliate tools that let other people promote a creator’s products for a cut of sales. It’s a lighter-weight alternative to a full course platform for creators who just need a clean checkout page.
Substack solves a different problem: monetizing writing through paid subscriptions distributed by email. Its combination of a built-in audience feed and subscription billing makes it the practical choice for a newsletter writer, though it isn’t built for merch, tipping, or one-off digital sales.
Memberful is aimed at creators who already have a website and want membership tools embedded into it rather than sending supporters to a separate platform. Its white-label approach means a membership page can carry a creator’s own branding instead of Memberful’s, which matters for creators protective of their site’s look and feel.
Podia bundles courses, digital downloads, and memberships into one storefront, which suits creators selling a mix of products rather than a single income stream. It behaves more like a small business platform than a tipping tool.
Liberapay takes the opposite approach from most entrants on this list: an open, nonprofit-style donation model focused purely on recurring support, with no commercial storefront layered on top. It fits creators who want ongoing donations without the marketing tools or upsells that come with commercial platforms.
Sellfy offers a simple shop for both digital and physical products, with marketing tools built in. It’s a reasonable middle ground between Gumroad’s simplicity and Fourthwall’s merch focus, though it doesn’t specialize as deeply in either.
Kickstarter doesn’t compete directly with ongoing tipping tools. It’s built for project-based funding, a single campaign with reward tiers and a funding deadline, rather than continuous support. Creators raising money for a specific product run or one-time project still consider it, but it’s a poor substitute for a tip jar.
Across aggregator lists of Ko-fi competitors, the same core set of names keeps appearing, which suggests creators are converging on a fairly stable shortlist rather than constantly discovering new tools.
How should you test and choose a Ko-fi alternative?
Picking a platform on paper is easy. Confirming it actually works for your audience takes a short, deliberate test before you commit your bio link to it.
Start with a checklist of what matters most for your specific income mix:
- Fees: know the platform fee and the separate payment processing fee, since vendors often list them apart from each other.
- Payout speed: some platforms pay out on a fixed monthly cycle, others release funds faster.
- Payment methods: confirm Apple Pay, Google Pay, card, and bank transfer support match what your audience actually uses.
- Membership tools: check whether gated content, tiers, and patron communication are built in or require a third-party add-on.
- Digital or merch support: verify the platform handles delivery and fulfillment if you plan to sell products, not just accept tips.
- Customization: look at whether your page can carry your own branding or if it’s locked to a template.
Before switching, ask platform support directly (or search their pricing page) for three things: the exact percentage taken per transaction, whether there’s a minimum payout threshold, and whether supporter email addresses can be exported if you ever leave.
Then run three quick tests: set up a tip link and send yourself a small payment to feel the checkout flow, list a $1 digital file to see how delivery works, and check whether you can export your supporter list to email later.
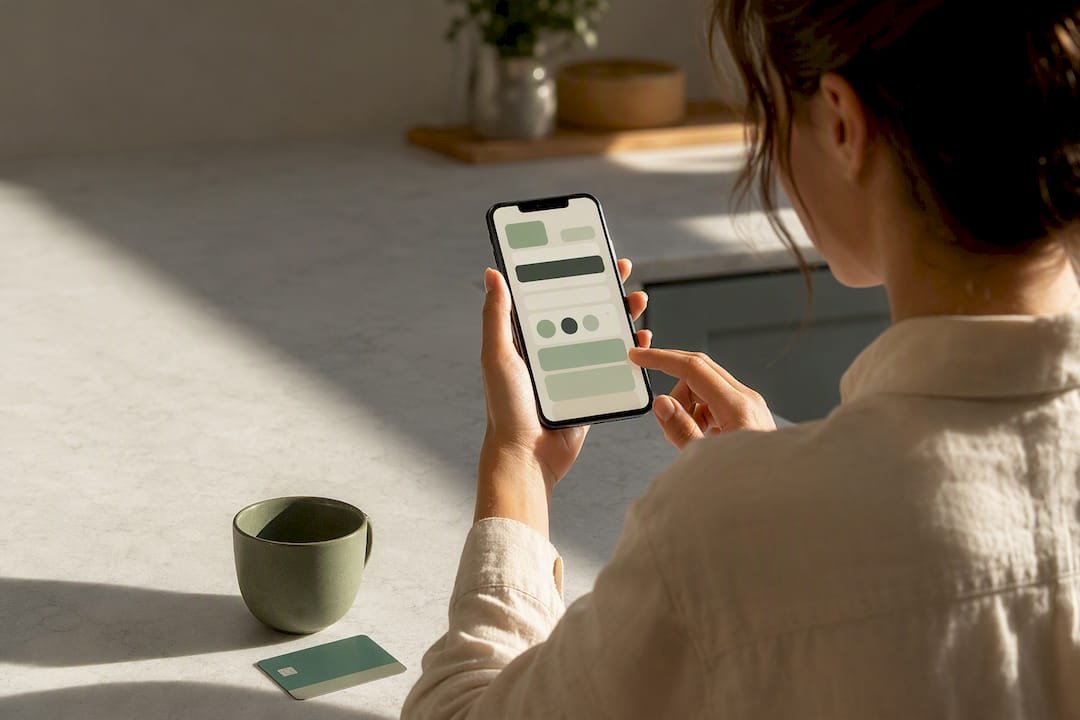
Pro Tip: Test the checkout flow from a phone, not a desktop. Most tips and small purchases happen on mobile, and a clunky mobile checkout is the fastest way to lose a supporter mid-payment.
Watch for red flags: hidden fees not listed on the main pricing page, features that require a paid subscription tier just to unlock basic functionality like payouts, and platforms with restrictive minimum payout amounts that delay access to your own money. A tips versus subscriptions comparison breaks down how these tradeoffs play out over several months, which is worth a look before locking in a single model.
What does Tipper actually offer creators?
Tipper’s core feature is a personalized tip link or QR code that lets anyone send a payment through Apple Pay, Google Pay, or a card, with no account required on the supporter’s side. Creators keep their earnings, with only a payment processing fee applied, and can send thank-you messages back through text, photo, or video. It fits in-person tipping (a QR code at a table or event), short-form video creators who need a frictionless bio link, and anyone who wants supporters to tip in seconds rather than after creating a profile. A creator’s guide to instant tips walks through setup in more detail.
What does 2026 tell us about how creators get paid?
Payment friction is the quiet tax on every creator’s income. The platforms winning attention in 2026 are the ones that shrink the number of steps between a supporter’s intent and a completed payment, not the ones with the most features bolted onto a dashboard. At the same time, subscription fatigue is real: audiences that already pay for five newsletters and three memberships hesitate before adding a sixth.
That split suggests a practical rule. Creators with high-volume, casual audiences (short-form video, in-person events) do better with tipping-first tools. Creators with a smaller, deeply engaged audience do better with memberships. Creators selling a physical or digital product need a storefront, full stop. Test one link from each category before deciding where to put your energy.
— Tipper
Ready to add a frictionless tip link to your page?
If you’ve read this far, you already know the tradeoff: membership platforms ask for commitment, storefronts ask for inventory, and both ask supporters to slow down before they can pay you. Tipper skips that step. A supporter taps your link, pays with Apple Pay or Google Pay, and you keep your earnings, with no account required on their end and no subscription fee on yours.
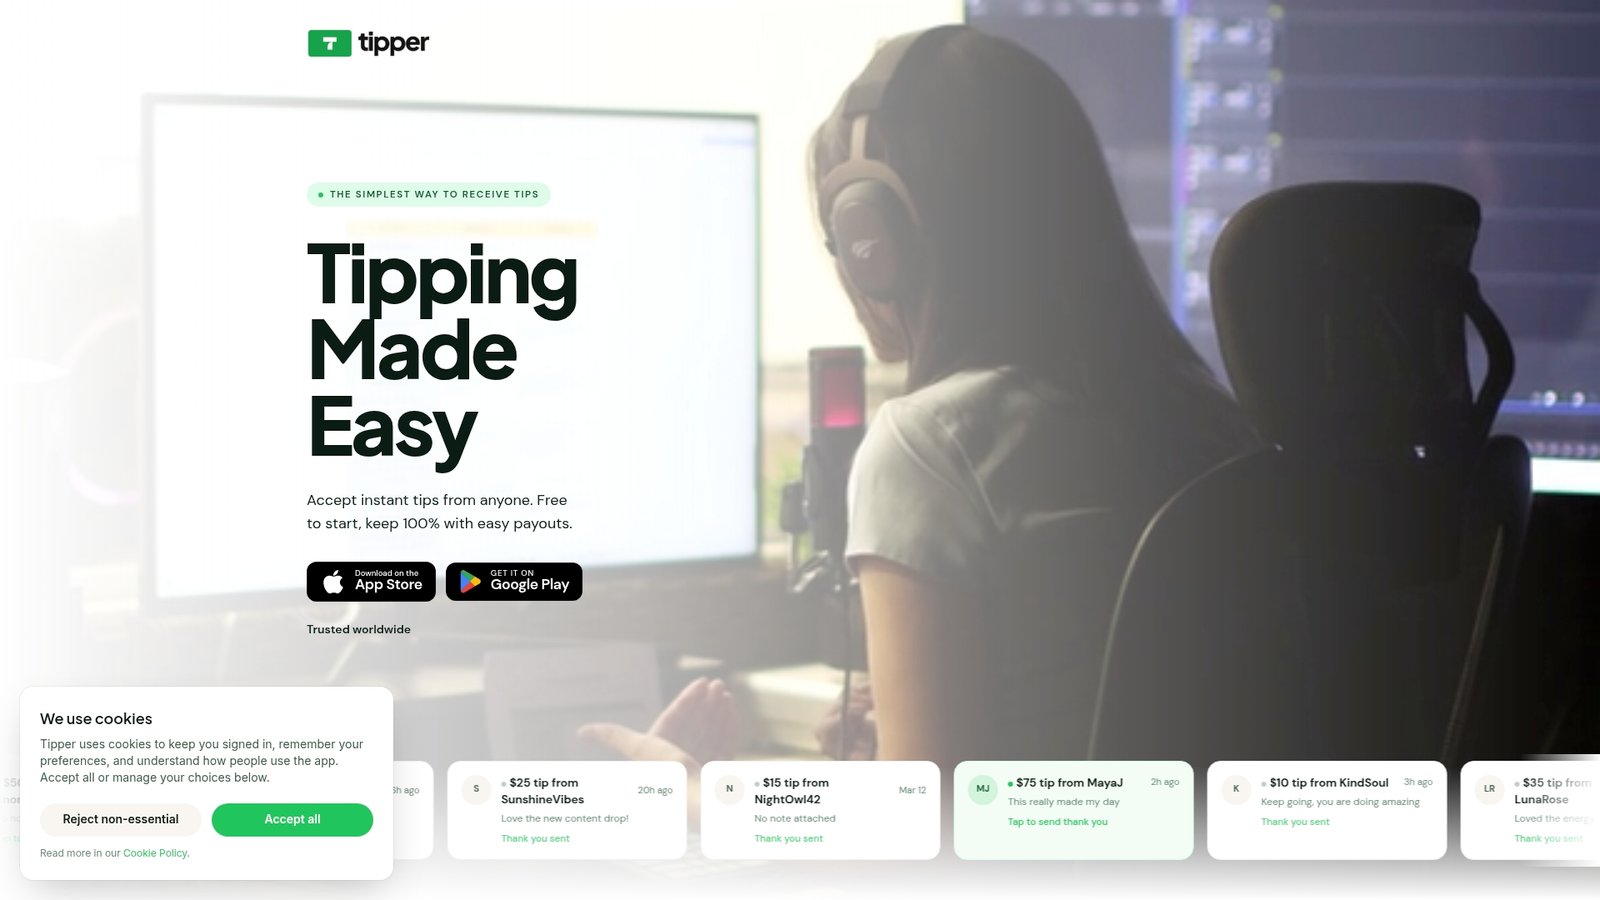
Setup takes a few minutes: claim your link, personalize your page, and start sharing it anywhere your audience already is. Visit Tipper to create your tip link, or read our frictionless tipping best practices for tips on getting your first supporters to convert.
Where this comparison comes from
This comparison draws on Ecommerce-Platforms’ 2026 roundup of Ko-fi alternatives for platform groupings and pricing structure, Product Hunt’s aggregated list of Ko-fi competitors for the consensus entrant list, and G2’s comparison of Patreon and Stripe Billing for how creators combine platforms and billing tools. For podcasters weighing a monetization toolchain, this roundup of podcast hosting platforms is a useful companion read.
Sources
- Ecommerce-platforms
- Ko-fi.com Competitors & Alternatives (2026)
- Compare Patreon and Stripe Billing on G2
FAQ
Is Ko-fi or VGen better for creators?
The two serve different needs: Ko-fi is built around tipping, memberships, and a simple shop, while VGen focuses on connecting creators with brand commissions and sponsorships. Neither is universally better, since the choice depends on whether you want direct supporter tips or brand-matched work.
What is better, Ko-fi or Patreon, for ongoing income?
Patreon is built specifically for recurring memberships with patron management and content gating, while Ko-fi supports both one-off tips and lighter membership tiers. Creators focused purely on predictable monthly income from a dedicated fanbase tend to lean toward Patreon, while those who want flexible one-off support often prefer a tipping-first tool.
Which is better, Gumroad or Ko-fi, for selling digital products?
Gumroad is built specifically for selling digital downloads, with pay-what-you-want pricing and per-transaction fees, while Ko-fi combines a simple shop with tipping and membership features. Creators focused entirely on digital product sales often prefer Gumroad’s dedicated storefront tools.
Is Ko-fi similar to OnlyFans?
No, they serve different purposes: Ko-fi is a general tipping and membership platform open to any creator category, while OnlyFans is a subscription platform primarily associated with adult content creators. The two aren’t interchangeable, since their audiences, content policies, and payment structures differ significantly.
Can I use Tipper alongside a membership platform like Patreon?
Yes, many creators combine a tipping tool with a membership platform to cover both one-off support and recurring income. Using Tipper for instant, account-free tips alongside a subscription tool for ongoing memberships lets you capture both types of supporter without forcing either into the wrong format.
Recommended

Creators: Set a $1–$2 Tip Minimum Amount That Covers Fees and Converts
Set your lowest preset button at $1 or $2, make sure it clears your payment processor’s fee floor and highlight your middle preset as the default. That combination protects you from losing money on micro-tips while giving supporters an easy entry point. Do it now, then watch your numbers for two to four weeks before making further changes.
TL;DR:
- Setting your lowest preset between $1 and $2 ensures it covers payment processor fees and prevents rejected charges on minimum tips.
- Displaying both percentage and dollar amounts together increases tipping likelihood and average tip size compared to showing only percentages.
- A three-button preset structure with a low, highlighted default mid, and a high tip option maximizes conversions and influences average tip amounts.
- Testing and adjusting your tip minimum and presets every two to four weeks helps optimize revenue and supporter engagement.
- Always comply with your payment processor and platform policies to avoid issues with micro-transactions, chargebacks, or tax reporting.
Table of Contents
- How Do You Set a Processor-Aware Tip Minimum Amount?
- Why Do Presets and Displays Change How Much People Tip?
- What Preset Structure Actually Converts?
- How Do You Test and Validate Your Tip Minimum?
- Quick Implementation Checklist for Your Tip Page
- Legal or Platform Policy Considerations Affecting Minimum Tip Amounts
- Tipper’s Perspective: Why These Defaults Reflect Creator Priorities
- Set Up Your Tip Presets in Minutes With Tipper
- Sources
- FAQ
How Do You Set a Processor-Aware Tip Minimum Amount?
Before picking a number out of thin air, check what your payment processor actually charges per transaction in this guide to how to collect dance studio payments online. That’s not nothing, but it’s thin. A $0.50 tip after the same fee structure can leave you with almost nothing, or even trigger a rejected charge if your processor enforces a hard floor.

Support docs from tipping tools confirm this is common practice: most tipping settings pages let creators configure minimum and maximum amounts, and processors will reject charges that fall under their own floors. Help documentation for tip-collection tools also warns that custom amounts below the processor’s minimum will simply fail, which frustrates supporters more than a clearly stated minimum ever would.
Here’s the math, in plain terms:
- Add your processor’s fixed fee to the percentage cut on your target minimum.
- Ask yourself: after fees, does this tip amount still feel worth collecting?
- If the answer is no, raise your floor until it does.
- Check your platform’s settings page for a “minimum tip amount” or “custom amount” toggle. Most let you either lock in preset buttons only, or set a numeric floor for custom entries.
Getting this right up front saves you from support headaches later. For a deeper breakdown of how processor fees interact with small transactions, see this guide to setting up payment processing for tips.
Why Do Presets and Displays Change How Much People Tip?
The buttons you show supporters, and how you label them, change behavior more than most creators expect. A recent natural experiment tracking 5,169 real transactions found that showing both a percentage and its dollar equivalent side by side increased both the average tip size and the likelihood someone tipped at all, compared to showing a percentage alone. The effect held up even after the test period ended.
Pro Tip: If your tipping tool lets you display a percentage next to the dollar amount, turn it on. Supporters make faster decisions when they can see exactly what a number means in real money, not just an abstract percent.
That said, bigger isn’t automatically better. Research on suggested tip defaults found that raising the default amount does increase the size of individual tips, but it can also reduce repeat support and word-of-mouth referrals afterward, especially when supporters feel like the number was chosen for them rather than by them. Perceived control matters as much as the number itself.
Translate that into UI rules you can apply today:
- Always show currency amounts, not vague labels like “small” or “generous.”
- Use percentage-plus-amount displays where your tipping tool supports it.
- Set your default preset at a level your typical supporter would choose naturally, not an aspirational ceiling.
- Never set the highlighted default so high that a one-time supporter feels pressured.
Choice architecture isn’t about tricking people into tipping more. It’s about removing friction so the natural choice is also the profitable one.
What Preset Structure Actually Converts?
Three buttons beat five almost every time. A field experiment testing QR-code tipping pages found that presenting three suggested values, a lower option, a central default, and a higher option, produced measurable anchoring effects tied to the central value. Push the middle number up, and average tips rise with it. Push it down, and they fall. The middle button does most of the work.
Here’s a preset structure that works for most creator tip pages:
- Low preset ($1 to $3): your functional minimum, priced just above your processor’s fee floor.
- Mid preset ($5 to $10), highlighted as the default: this is where most clicks land, so choose a number that matches what your typical supporter can comfortably give.
- High preset ($15 to $25): a ceiling option for your most engaged fans, not an expectation.
If your audience spans wildly different budgets (say, casual scrollers and paying clients), a fourth option or a “custom amount” link can help. But more than four choices tends to slow people down rather than help them.
Pro Tip: Label your custom option as “Send a note + custom tip” rather than just “Other.” It signals that personal messages are welcome, not just spare change.
Always leave a way for supporters to reach out directly for larger or unusual requests. A short “DM me for custom amounts” line covers that without cluttering your main buttons.
How Do You Test and Validate Your Tip Minimum?
Guessing at a minimum once and never revisiting it is the most common mistake creators make. Treat your tip floor and presets as something you tune, not something you set and forget.
Track these numbers before and after any change:
- Tips per visitor (your conversion rate)
- Average tip amount
- Net revenue per visitor, after processor fees
- Repeat-tip rate among returning supporters
For the test itself:
- Change one variable at a time (just the minimum, or just the default preset, not both).
- Run the test for at least two to four weeks, or until you’ve collected at least 50 to 100 tips, whichever comes first.
- Compare net revenue per visitor, not just average tip size, since a higher default can inflate individual tips while shrinking your total tipper count.
- If conversion drops more than it gains in average tip size, revert and try a smaller adjustment.
Small, sequential changes beat sweeping overhauls. You’ll learn more from three small tests than one big guess.
Quick Implementation Checklist for Your Tip Page
Once you’ve done the math and picked your presets, implementation takes minutes. Work through this list on whatever platform hosts your tip page:
- Confirm your processor’s minimum charge and fixed fee before locking in a floor.
- Set your lowest preset at or above that floor, typically $1 to $2.
- Highlight your middle preset as the visual default.
- Decide whether to allow a custom amount field, and if so, enforce the same minimum on it.
- Turn on thank-you tools (text, photo, or video replies) so supporters get instant acknowledgment.
- Double-check that receipts or confirmations are enabled for transparency.
A quick privacy note: if you’re collecting names or messages alongside tips, be clear about what you’ll do with that information, even a one-line note builds trust. And keep the KPIs from your testing plan visible somewhere you’ll actually check them weekly, not buried in a settings tab you forget exists.
Legal or Platform Policy Considerations Affecting Minimum Tip Amounts
Tip minimums aren’t purely a design choice. Payment processors set hard technical floors, and some platforms add their own policy layers on top. Most major processors reject any charge below a fixed cents’ threshold, which is why so many creator guides land on $1 as a practical floor rather than a round marketing number.
Some platforms also restrict what you can call a “tip” versus a “purchase” or “donation,” which matters for tax reporting and terms-of-service compliance. If your tipping tool routes payments through a third-party processor, read its terms on chargebacks and refund windows. Micro-transactions are more prone to disputes relative to their value, and a $1 tip that gets reversed can cost you more in fees than the tip itself was worth.
If you’re a small business owner rather than an individual creator, sales tax treatment of tips can vary depending on your state and whether the tip is voluntary or added automatically. That’s a question worth a quick check with a tax professional if you’re processing tips at any real volume.
Finally, some platforms cap how high a “suggested” amount can be displayed without triggering additional verification or reporting requirements. None of this should scare you away from setting a floor. It just means the number you pick should account for the rules of whichever processor and platform you’re actually using, not just the psychology of what converts best.

Tipper’s Perspective: Why These Defaults Reflect Creator Priorities
We built Tipper around one belief: creators should keep what they earn, and supporters shouldn’t need an account to show appreciation. That shapes how we think about minimums, too. A $1 floor only makes sense if the creator actually nets a meaningful amount after fees, which is why we push for practical floors over flashy round numbers.
Instant tips through popular payment methods can reduce the friction that kills small transactions elsewhere.
— Tipper
Set Up Your Tip Presets in Minutes With Tipper
Everything covered above, the fee math, the preset structure, the highlighted default, is designed to be handled easily by modern tipping platform settings. You get a personalized link or QR code, preset buttons you control, and instant payments through various methods, without requiring an account on the supporter’s side.
If you’re weighing this against a traditional point-of-sale tipping setup, Tipper skips the hardware and the account friction entirely; see how it compares for point-of-sale tipping alternatives. For creators who want their tip link doing double duty as a monetization strategy, this guide on tip link strategy pairs well with the presets covered here.
Ready to put your new minimum and presets into practice? Set up your Tipper page and start testing today.
Sources
- When percentages meet amounts: Evidence from a natural experiment on digital tipping prompts
- Effects of suggested tip defaults on tipping and non-tip customer responses
- Experimental evidence on QR-code tipping and suggested values
- Tipping Settings Page Overview – StreamElements
- How to use the Tips block in UniLink (Accept Tips and Micro-Payments on Your Page)
FAQ
What is a good minimum tip amount to set?
Most creators land on $1 to $2 as a functional floor, high enough to clear typical processor fees without blocking impulse tips.
Why do payment processors reject very small tips?
Processors charge a fixed fee per transaction plus a percentage. Below a certain amount, that fee consumes the entire tip, so many processors block the charge outright.
How many preset tip amounts should I offer?
Three works best for most tip pages: a low option near your minimum, a highlighted mid-range default, and a higher option for engaged supporters. Four or five can work for audiences with a wide income range.
Does showing a percentage next to the dollar amount actually increase tips?
Yes. A natural experiment tracking 5,169 real transactions found that percent-and-amount displays increased both average tip size and tipping likelihood compared to percentage-only prompts.
Can setting my default tip too high backfire?
It can. Research on tip defaults found that while higher suggested amounts raise individual tip sizes, they can also reduce repeat support and referrals if supporters feel pressured rather than in control.
Recommended

11 QR Tipping Sign Ideas for Small Businesses, Plus a 6 Step Setup
Use a QR tipping sign at the exact moment a customer’s transaction ends, pair it with a warm, specific call to action, and print it clean enough to scan from arm’s length. That’s the whole formula. The rest is choosing a style that fits your counter, your bar, or your gig case, then walking through a simple setup: grab your tipping link, generate the code, drop it into a template, print it at 300 DPI, and put it where eyes already land.
TL;DR:
- Use a dynamic QR code for easy updates and avoid reprinting signs if your payment URL or platform changes.
- Place the sign at the customer’s point of pause, such as the register or pickup counter, to ensure it is seen and scanned easily.
- Choose durable materials like acrylic for high-traffic areas or cardstock for frequent updates, and always test a sample before mass printing.
- Incorporate specific, friendly call-to-action copy that matches your venue’s tone to increase customer engagement and tipping rates.
- Pair the QR code with contactless payment options like Apple Pay or Google Pay to reduce friction and encourage instant tipping.
Table of Contents
- QR Tipping Sign Ideas Worth Copying
- Choosing Materials: Acrylic, Cardstock, or Something Else
- What to Write on Your Sign: CTA Copy by Venue
- How to Build a QR Tipping Sign Step by Step
- Placement and Scannability: The Rules That Actually Matter
- Where to Find Templates and Design Files
- Staying on the Right Side of Tipping and Payment Rules
- Real Scenarios Where QR Signs Increased Tips
- Mistakes That Quietly Kill Your Tip Rate
- Tipper’s Take on Frictionless Tipping
- Create Your Tipping Link and QR Code With Tipper
- Sources
- FAQ
QR Tipping Sign Ideas Worth Copying
Some of these work as-is. Others need a font swap or a color change to match your space. Either way, start with the one that matches your venue before you invent something from scratch.
- Minimalist acrylic with a small stand. Clean sans-serif type, one line of copy, one QR code. Fits coffee counters, boutique checkout stands, and anywhere a cluttered sign would look out of place.
- Chalkboard-style hand-lettered sign. Popular with farmers market stalls and neighborhood cafes that already use chalkboard menus. It reads as personal, not corporate.
- Playful pun sign with suggested amounts. Bars and casual spots do well with humor. “Tips: because bartenders remember faces” next to $2/$5/$10 buttons on the linked page works better than a bare code.
- Photo or team thank-you sign. Salons and service teams that show a real photo of the staff tend to see warmer reactions, since personalizing a tip sign with a photo or short note increases engagement compared with a generic code.
- Musician or busker gig card. A laminated card propped against an instrument case, with “Enjoyed the set? Tip here” and nothing else competing for attention.
- Holiday or event-themed signs. Swap colors and a headline for weddings, seasonal pop-ups, or a one-off market booth. Dynamic QR codes make this painless because you can change the destination without reprinting the sign.
- Table tents for catering and events. Freestanding, double-sided, and easy to move between tables during a buffet line or cocktail hour.
- Sticker or receipt-attached QR for mobile vendors. Food trucks and pop-up stalls can stick a code directly on a receipt or cup sleeve.
- Dual physical-plus-digital setup. Keep the cash jar and add a QR sign beside it, since a combined approach catches both cash and cashless customers instead of forcing a choice.
- Interactive jars paired with a code. A jar labeled with two options (“Team A” vs. “Team B”) turns tipping into a small game, and playful competitions and themed jars tend to boost engagement.
- High-contrast, large-code accessibility variant. Bigger code, bold color blocking, larger type for the CTA line. Built for low-light bars or venues with older customers.
Choosing Materials: Acrylic, Cardstock, or Something Else
Your material choice comes down to how long the sign needs to last and how often you’ll change it.
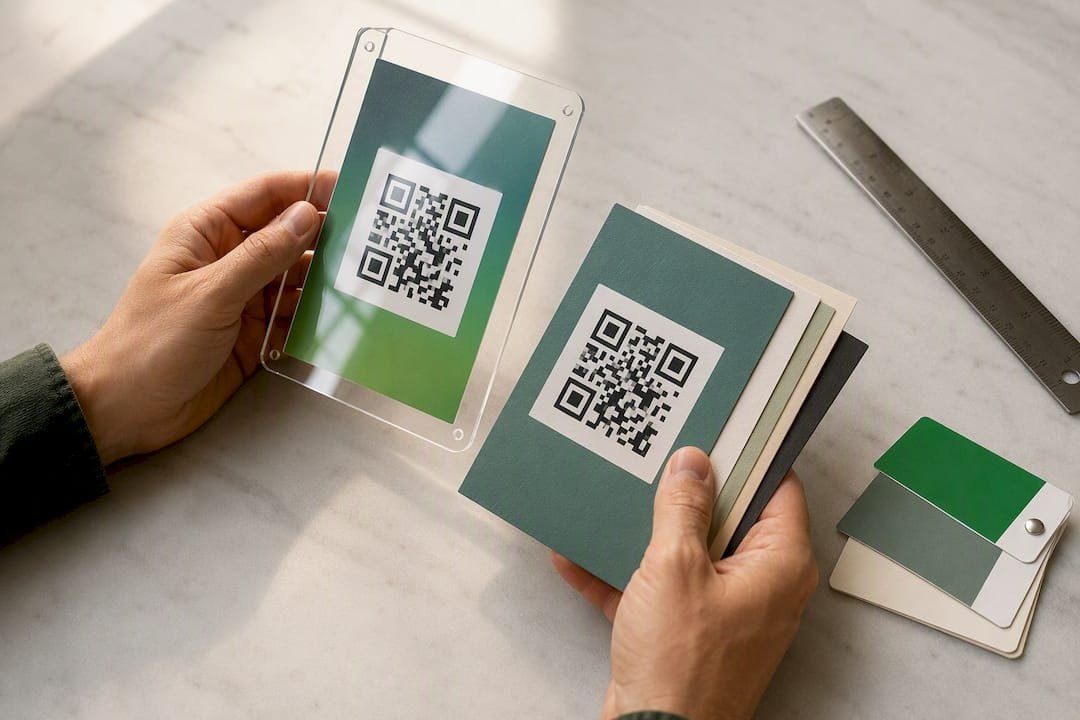
- Acrylic (3 mm thick, UV printed) holds up on high-traffic counters and looks polished without extra design work. A common format is a 3 x 5 inch acrylic panel with a matching stand, which fits coffee shops, salons, and food trucks without eating much counter space.
- Cardstock or laminated paper costs almost nothing, prints at home or at a local shop, and comes in standard sizes like 4×6, 5×7, or letter. Best for signs you’ll swap often.
- Table tents and framed prints suit sit-down venues where the sign needs to survive being bumped.
- Stickers or small laminated cards work for mobile vendors who need something that travels.
Acrylic wins on durability but costs more and takes longer to order. Cardstock wins on speed and price but wears out fast under grease, spills, or sun.
Pro Tip: Before ordering a bulk run of anything, print one sample first. A single acrylic piece or a short cardstock batch catches sizing, glare, and contrast problems while they’re still cheap to fix.
What to Write on Your Sign: CTA Copy by Venue
The words next to your code matter as much as the code itself. Tone should match how your venue talks to customers everywhere else, and matching CTA tone to venue type is one of the simplest ways to make a sign feel native instead of bolted on.
- Cafes and casual counters: “Enjoyed your coffee? Leave a tip.” or “$2 = a happy barista.”
- Bars: “Tip your bartender. They remember who does.”
- Fine dining or professional services: “Your support matters. Tip if you wish.”
- Events and pop-ups: “Scan to show some love” with an emoji or two if your brand allows it.
- Salons and personal services: “Loved your service? A tip goes a long way.”
Test two versions for a week if you can. Small wording changes, especially around suggested amounts, shift behavior more than people expect.
How to Build a QR Tipping Sign Step by Step
Here’s the actual workflow, start to finish.
- Get your payment link. Use a platform that needs no account on the sender’s side and supports Apple Pay and Google Pay directly. Copy the shareable URL.
- Decide static or dynamic. A dynamic QR code lets you swap the destination later without reprinting anything, which matters if you ever change payment tools or run a seasonal promotion.
- Generate the code at high resolution. Export as a 300 DPI PNG so it stays sharp when printed. Add a short line above or below it: “Scan to tip” or “Thanks for your support.”
- Drop it into a print template. Use 4×6 or 5×7 for countertops, 3×5 or 3×4 for small stands. Check that the code sits inside the safe area, away from the trim edge.
- Proof the layout, then print. Following the copy link, generate code, insert into template, print sequence keeps the process from turning into guesswork.
- Test before you commit. Scan the printed code with at least two different phones, check for glare under your actual lighting, and confirm the link lands where you expect.
Placement and Scannability: The Rules That Actually Matter
Put the sign where the customer already pauses: at the register, the bar edge, the pickup counter, or the instrument case lid. A sign tucked somewhere customers don’t look gets ignored no matter how good the design is.
- Use 5×7 for counters where customers stand a foot or two back; 4×6 works for close-range spots like a tip jar next to a register.
- Avoid glossy laminate under bright lights and skip busy patterned backgrounds behind the code.
- Print at 300 DPI minimum, and keep a quiet white border around the code so phone cameras lock on fast.
- If scans keep failing, re-export the code at a higher resolution or simply size the sign up.
Customers scan when there’s zero friction between seeing the code and completing the tip. Anything that adds a second of hesitation, glare, a tiny code, a confusing CTA, cuts your conversion before the customer even reaches for their phone.
Where to Find Templates and Design Files
You don’t need to design from scratch. Print-ready PNG templates from sites like QR Code Templates work for quick home or local print jobs. Editable Canva-based files, like the ones sold through Rainy Lain Designs, give you more control for event-specific branding.
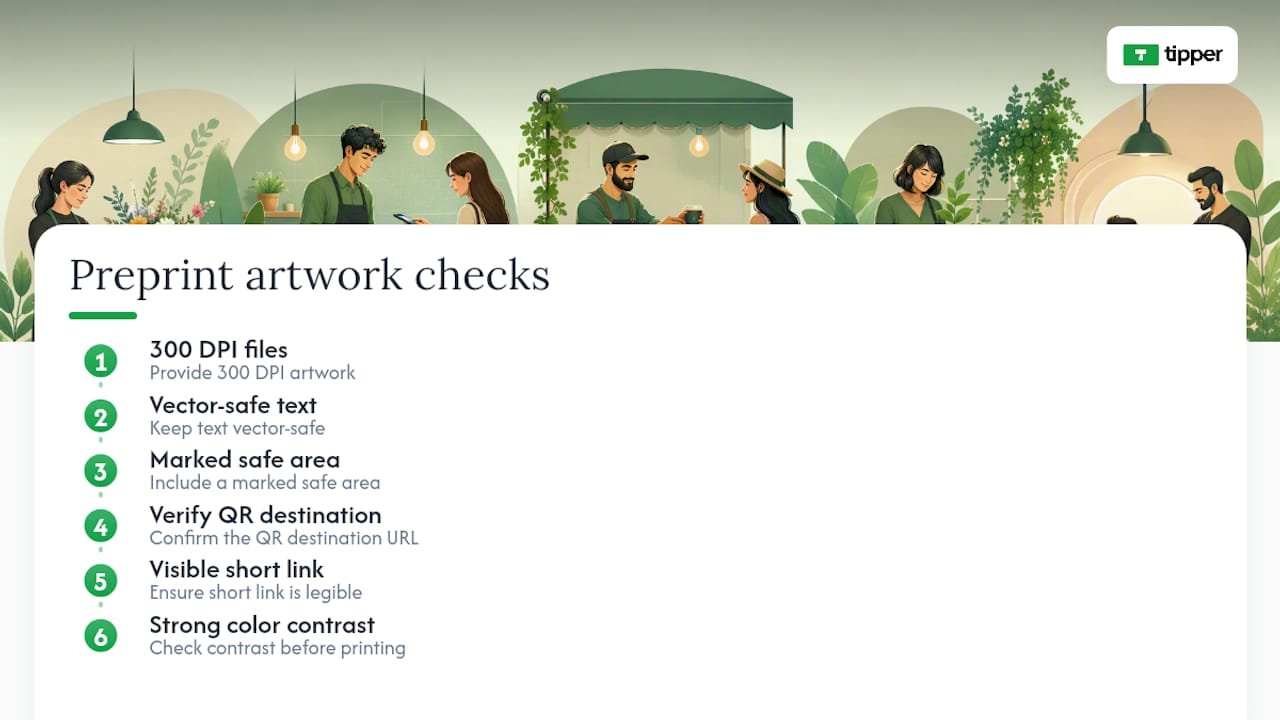
For a custom acrylic sign, most printers ask for 300 DPI files, vector-safe text, and a marked safe area. If you’re new to sending artwork to a print shop, a small business guide to proofing signage walks through exactly what to check before you hit order. Whatever route you take, confirm the QR destination, check that any short link is visible, and check color contrast one more time before printing.
Staying on the Right Side of Tipping and Payment Rules
QR tipping signs don’t require special licensing to display, but the money flowing through them isn’t exempt from normal tax and labor rules. Tips collected digitally are still income, and in most cases, they get treated the same way cash tips do under federal and state law. If you run payroll, that usually means tracking and reporting digital tips the same way you’d track cash tips left in a jar. If you’re a solo creator or freelancer using a personal tipping link, tips you receive still count as taxable income, no different from a cash tip in an envelope.
Payment processing itself sits with the platform you use to move money, so a QR code by itself isn’t a currency handler. It’s just a pointer to a link. What matters is picking a payment method (Apple Pay, Google Pay, card) processed through a compliant provider.
If you employ tipped workers, check your state’s specific rules on tip pooling and distribution before assuming a QR tip works the same as a cash tip dropped in a shared jar. Some states have stricter tip-pooling laws than others, and how the money is split among staff can trigger different rules depending on whether it passes through the business’s own account first. When in doubt, a quick conversation with an accountant or labor law resource beats guessing, especially if you’re combining a shared tip jar with individual QR links for specific staff members.
Real Scenarios Where QR Signs Increased Tips
A salon that swapped a generic “tips accepted” sticker for a photo-based sign showing the stylist’s face alongside a QR code saw more customers actually stop and scan, since personalized signage tends to outperform anonymous signage on engagement. A small detail, a name and a face, turns an abstract request into something that feels personal.

Food trucks running QR stickers directly on the receipt or cup sleeve catch a moment cash jars miss entirely: the walk back to the customer’s car. There’s no jar to notice, so the code becomes the only tipping option, which removes the “I don’t have cash” excuse completely.
Bars that combine a physical jar with a visible QR sign tend to do better than either one alone, partly because starting a shift with a few visible bills in the jar creates social proof that nudges hesitant customers, and partly because the QR code catches everyone who’s already gone cashless. Musicians and buskers see similar results: a laminated card with a short, specific line, “Enjoyed the set? Tip here,” outperforms a bare code with no context, because it tells the passerby exactly what they’re supporting and why.
Weddings and pop-up events benefit from swapping in a dynamic QR code tied to the event’s theme colors, since it feels intentional rather than like an afterthought taped to a table.
Mistakes That Quietly Kill Your Tip Rate
The most common mistake is placing the sign somewhere customers glance at but never pause near, like a wall behind the register instead of the counter edge right where they’re standing. Location beats design almost every time.
A close second: printing the code too small. A code that scans fine at six inches often fails at two feet, and most customers won’t lean in to try twice. If your sign sits somewhere customers stand back from, size the code up rather than shrinking your text to compensate.
Skipping the pre-print test is another one. A code that looks fine on a screen can blur, glare, or lose contrast once it’s printed and laminated. Order or print one sample before committing to a bulk run.
Vague copy causes drop-off too. “Scan to support us” tells a customer nothing about what happens next. Specific, warm language, tied to the actual person or team behind the counter, converts better than generic phrasing.
Last one: choosing a static code when your payment platform or event details might change. Reprinting a whole batch of signs because a link died is avoidable if you start with a dynamic code from the beginning.
Tipper’s Take on Frictionless Tipping
Tipping should take one tap, not a login screen. That’s the whole argument for frictionless links over apps that require the customer to create an account before they can send $3. Support for Apple Pay and Google Pay matters because it removes the last excuse a customer has for skipping the tip, and creators keeping their full earnings matters because nobody builds loyalty around a platform that quietly takes a cut of someone’s gratitude. Check the contactless tip collection examples for more real setups. Whatever sign style you pick, match the materials and tone to your actual room, not a template you found online.
— Tipper
Create Your Tipping Link and QR Code With Tipper
Some platforms support creating personalized tipping links and generating QR codes that let customers pay through Apple Pay, Google Pay, or card without needing an account. That last part matters more than it sounds. Every extra login screen or signup form is a customer who decides the tip wasn’t worth the hassle.
Small business owners, bartenders, freelancers, and service providers can set this up once and reuse the same link across every sign style covered above, with some services offering the option to send a quick thank-you note or video back to whoever tipped. If you’re ready to stop guessing at payment friction, visit Tipper’s tipping page to build your first link and QR code in a few minutes.
Sources
- Can you use QR codes for digital tips? (Bitly blog)
- Free digital tip jar QR code sign — QR Code Templates
- Custom QR Code Acrylic Tip Sign | AVDEB
- 130+ unique tip jar ideas (Eat App)
FAQ
What are some cute tip sign ideas I can use?
Photo-based thank-you signs, chalkboard hand-lettering, and pun-based lines like “$2 = a happy barista” tend to feel warm without trying too hard. Match the cuteness level to your venue’s existing tone.
What are some cool QR code ideas beyond tipping?
QR codes work well for menu access, event RSVPs, playlist requests, and review links, but for tipping specifically, pairing the code with a short, specific CTA and a visible placement matters more than the code’s design.
How do I create a QR code for tips?
Copy your tipping link from a platform like Tipper, generate a QR code from that link at 300 DPI, then place it into a print template sized for your venue, such as 4×6 for counters.
Where can I find a QR code tip sign template?
Free print-ready files are available through sites like QR Code Templates, while editable Canva versions let you customize colors and copy before printing.
Recommended

Creators: How TikTok Tips Reach You, Stripe Fees and Backup Links
TikTok Tips let viewers send creators direct payments through the app, using a system built on Creator Next and processed by Stripe. TikTok says it doesn’t take a cut of Tips, but Stripe’s processing fees still come out before the money lands in a creator’s account. The main takeaway: if you’re a creator, joining Creator Next and connecting Stripe is the only way in.
TL;DR:
- Creators must join Creator Next and verify a Stripe account to access TikTok Tips, which are not available to all users automatically.
- Stripe processes the payment, applying its own fees, so creators do not receive the full tip amount even though TikTok does not charge a platform fee.
- Eligibility criteria include account standing, minimum activity levels, application approval, and Stripe verification, with thresholds around 100,000 followers at launch.
- External tipping links offer an alternative for those waiting on eligibility or seeking more control over their income streams.
- Tips are primarily intended for direct, ongoing support, while live gifts and donation stickers serve different engagement and fundraising purposes.
Table of Contents
- What Is TikTok Tipping and How Does the Sender Flow Work?
- Who Can Receive Tips on TikTok?
- Who Actually Pays the Fees on TikTok Tips?
- How Do You Tip on TikTok?
- How Do Creators Set Up Tips (and What If You’re Not Eligible Yet)?
- Tips vs. Live Gifts vs. Donation Stickers: Which One Fits?
- How Do Payouts and Recordkeeping Work?
- Should Creators Rely on In App Tips or External Links?
- Add a Tipping Link Alongside Your TikTok Tips
- Sources
- FAQ
What Is TikTok Tipping and How Does the Sender Flow Work?
The Tips button sits on a creator’s profile, usually near the message or follow buttons, once that creator has Tips enabled through Creator Next. Viewers tap it, choose from a set of preset amounts, or enter a custom figure, and TikTok’s help page on tipping walks through the same basic flow: find the button, pick an amount, pay.
During checkout, the sender picks a payment method (typically a saved card or digital wallet) and can usually choose to send the tip anonymously rather than have their username attached. That anonymity option matters to a lot of fans who want to support someone without turning it into a public gesture.
Behind the scenes, TikTok doesn’t touch the money directly. The app integrates with Stripe to handle the actual transaction, which means:
- Stripe verifies the payment method and processes the charge.
- TikTok’s role is limited to the interface and connecting the sender’s payment to the creator’s linked Stripe account.
- The Tips Terms and Conditions confirm this Stripe integration and TikTok’s stated hands-off approach to the money itself.
Who Can Receive Tips on TikTok?
Not every creator sees a Tips button on their own profile, and eligibility is stricter than most people expect. Here’s the basic path:
- Meet the age and account standing requirements. TikTok requires accounts to be in good standing, with no active violations, before Creator Next access is granted.
- Join Creator Next. Tips is one of several tools bundled inside Creator Next, and creators have to apply and get accepted before Tips even appears as an option.
- Connect a verified Stripe account. This means submitting identity verification and banking details directly to Stripe, not TikTok.
- Check follower and view thresholds. Early coverage from Billboard cited requirements around the 100,000 follower mark at rollout, though exact thresholds can shift by region and account type.
If Tips isn’t showing up, the most common culprits are an incomplete Stripe verification, a Creator Next application still in review, or an account that hasn’t hit the minimum activity bar.
Who Actually Pays the Fees on TikTok Tips?
TikTok’s own terms state plainly that it does not charge a fee for Tips. That sounds like creators keep every dollar, but the reality is a little different once Stripe enters the picture.
The gap between “no platform fee” and “no fee at all” is where most creators get surprised. Stripe applies its own processing charges, which typically follow a percentage-plus-fixed-fee structure common across the payments industry, often somewhere in the range of a few percent of the transaction plus a small flat charge per payment. The exact rate depends on the payment method, region, and card type.
That’s a very different model from:
- Live Gifts, where fans buy Coins, send virtual gifts during a stream, and creators convert those gifts into Diamonds, a system where the platform’s conversion ratio eats into the effective payout far more than a straightforward processing fee does.
- Donation stickers, which route money to vetted nonprofits rather than to the creator’s own account at all.
Tips, in short, are the closest thing TikTok offers to a direct, low-friction payment from fan to creator.
How Do You Tip on TikTok?
Sending a tip takes less time than reading this sentence out loud. Here’s the sequence:
- Open the creator’s profile or catch them during a LIVE stream where tipping is enabled.
- Tap the Tips button and select a preset amount or type in a custom one.
- Choose whether to send it anonymously or with your username attached.
- Confirm payment through your saved card or digital wallet.
Good moments to tip: right after a video that genuinely helped you, during a LIVE session where a creator is answering questions in real time, or when someone you follow is clearly putting in the work without a big brand deal behind them. Bustle’s walkthrough of the sender experience confirms the preset-plus-custom-amount setup is consistent across accounts.
Pro Tip: If you want your support to go to a specific charitable cause instead of an individual creator, look for a donation sticker or fundraiser link. Those route through vetted nonprofit partners, not the creator’s personal Tips balance.
How Do Creators Set Up Tips (and What If You’re Not Eligible Yet)?
Once you’re accepted into Creator Next, turning on Tips is mostly a matter of paperwork:
- Apply for Creator Next through the app’s Creator Tools menu.
- Link and verify a Stripe account, which includes identity checks and bank details.
- Enable Tips inside the Creator Next dashboard once Stripe confirms the connection.
If you don’t meet the thresholds yet, you’re not stuck. A large share of creators rely on external tipping links placed in their bio, often through a dedicated tipping page rather than a raw payment app username, making an AI TikTok Ad Generator useful for creators monetizing content efficiently. This sidesteps TikTok’s eligibility gate entirely and gives you control over the page, the branding, and sometimes the fee structure. A tool like Tipper works this way, generating a personalized link that fans can use without creating an account of their own.
Pro Tip: Mention your tipping link out loud during a video, not just in your bio text. Viewers rarely scroll to a profile mid-scroll, but they will screenshot a link they hear called out.
Tips vs. Live Gifts vs. Donation Stickers: Which One Fits?
These three tools solve different problems, and mixing them up costs creators money or credibility.
- Tips are direct, one-to-one payments from a specific fan to a specific creator, best for ongoing support outside of a live session.
- Live Gifts run on Coins and Diamonds, work well for real-time LIVE engagement, and come with a platform conversion built into the economics that creators should track closely.
- Donation stickers send money to registered nonprofits through partners TikTok has vetted, part of the expanded fundraising tools the platform rolled out for charitable campaigns.
If a fan wants to support you personally, point them to Tips or an external tipping link. If they want to back a cause, the donation sticker is the honest answer, since nonprofit-focused fundraising guides confirm that flow bypasses a creator’s personal account by design.
How Do Payouts and Recordkeeping Work?
Once a tip clears, the money sits in the creator’s connected Stripe balance before it moves to a linked bank account, usually on a standard payout schedule rather than instantly.
- Stripe handles the transfer from processor balance to bank account, and payout timing can vary by verification status and region.
- New accounts sometimes face a short hold while Stripe finishes identity checks, which can delay the first few withdrawals.
- Keep a simple log of tips received by date and amount. Tip income is still income, and a tax professional, not a TikTok help article, is the right source for how to report it.
Should Creators Rely on In App Tips or External Links?
In-app Tips win on convenience. There’s nothing to build, no separate app to promote, and fans already trust the checkout flow because it lives inside TikTok. But convenience comes with a locked door: no Creator Next, no Tips button, full stop.
External tipping links win on control. You set the page, you’re not waiting on a follower threshold, and you’re not tied to a single platform’s approval process. The smartest move isn’t picking one. It’s running Tips for the fans already inside the app and a tipping link for everyone else, including followers who found you on another platform entirely.
— Tipper
Add a Tipping Link Alongside Your TikTok Tips
If you’re waiting on Creator Next approval, or you just want a backup income stream that doesn’t depend on TikTok’s eligibility rules, a personalized tipping link solves the wait. Tipper lets fans send support through Apple Pay, Google Pay, or a card, without creating an account first, and creators keep 100% of what they earn.
Setup takes about the time it takes to film one video: create your link, drop it in your TikTok bio, and mention it on camera so viewers actually see it. Supporters can even leave a text, photo, or video thank-you note attached to their tip, which turns a payment into an actual connection with your audience. Start your tipping page and add the link to your bio today.
Sources
- How does tipping work on TikTok — TikTok help
- TikTok adds new ways for creators to raise money for charities — TechCrunch
- Here’s how to tip creators on TikTok — Bustle
FAQ
What Is Tipping on TikTok?
TikTok Tips are direct payments viewers send to eligible creators through a Tips button on their profile, processed by Stripe under TikTok’s Creator Next program.
What’s the 3-Second Rule on TikTok?
The 3-second rule refers to TikTok’s algorithm favoring videos that hook viewers within the first three seconds, keeping them from scrolling away; it’s a content strategy tip, not a tipping feature.
How Much Does TikTok Pay Per 1,000 Views?
TikTok doesn’t publish a fixed rate per number of views, since earnings depend on the Creator Rewards Program, video performance, and region, which is exactly why many creators add Tips or a tipping link as a more predictable income source.
How Many Views Do You Need on TikTok to Make $100?
There’s no fixed view count that guarantees $100, because Creator Rewards payouts vary by watch time, engagement, and content category, while direct Tips depend entirely on how many viewers choose to send money rather than view count alone.
Do Creators Keep All of a TikTok Tip?
TikTok states it doesn’t charge a fee for Tips, but Stripe’s processing fees are deducted before the payout reaches the creator’s account, so the final amount is slightly less than the tip sent.
Recommended

Collect Tips in an Hour: Add a Tip Button to Your Blog
You can accept one-off tips on your blog, and you don’t need a fundraising campaign or a Patreon-style membership to do it. The fastest path is a short tip link or embedded button that takes card payments plus Apple Pay and Google Pay, placed right where readers finish reading. Tools like Tipper build this exact function into a single personalized link. Set it up once, drop it into your post footer, and you’re collecting tips within the hour.
TL;DR:
- Using a personalized tip link supported by Apple Pay, Google Pay, and card payments ensures the highest convenience for mobile users, increasing tips.
- Placing the tip button immediately after the content or on confirmation pages yields better conversion rates than mid-article or top-of-page placements.
- Limiting preset tip amounts to four between $3 and $10, along with an optional custom field, appeals to most readers without overwhelming choices.
- Keep the tipping process simple by skipping account requirements and additional fields, reducing friction and encouraging spontaneous tips.
- Testing a $1 tip beforehand and adding a genuine thank-you message significantly boosts repeat tipping and overall success.
Table of Contents
- How Do You Add a Tip Button or Tip Link to a Blog?
- Where Should You Place a Tip Link for the Best Conversions?
- Which Payment Methods Should You Offer, and What Do They Cost?
- How Do You Promote a Tip Link Without Sounding Pushy?
- What Should You Know About Privacy, Payouts, and Taxes?
- What Actually Works Once You’ve Set Up Tipping
- Start Collecting Tips With a tipping platform
- Sources
- FAQ
How Do You Add a Tip Button or Tip Link to a Blog?
Every platform handles the technical part a little differently, but the sequence is the same everywhere.
- Build the tip page or personalized link. Set two to four preset amounts, write one line of microcopy explaining what the money supports, and skip anything that looks like a fundraising goal, since tip jars work better as a no-strings gesture than a campaign with a target.
- Embed the button inline or use a short redirect URL. Something like yoursite.com/tip is easier to say out loud in a podcast or read aloud in a video than a long checkout link.
- Test the full flow on both desktop and mobile, confirm the payout destination, and check that a receipt actually gets sent.
For WordPress specifically, you have three real options: a dedicated tip jar plugin, a WooCommerce product priced at $0 with a “name your price” field, or a simple shortcode that embeds a hosted tip button. Shopify creators can do something similar with a product page and a Buy Button widget, while Substack writers typically just link a tip URL from their bio or use an embedded footer button. A step-by-step blog tip button walkthrough covers the screenshots platform by platform if you want the exact clicks.
Keep the whole thing simple. A tip jar is not a donor management system. It’s meant for individuals and small creators, so skip the account requirements and campaign tracking that bigger fundraising tools push on you.
Pro Tip: Run one test tip yourself for $1 before you announce the button publicly. It’s the only way to catch a broken redirect or a payout account that’s still pointed at the wrong email.
Where Should You Place a Tip Link for the Best Conversions?
Placement matters more than most bloggers assume, and the data on this is consistent: tip requests convert best when they show up right after a reader has already gotten something valuable, not before.
- End-of-post, immediately after the content, is the single strongest spot because readers who finish an article have already decided it was worth their time.
- Confirmation pages (after a download or newsletter signup) work well because the reader just completed an action, which puts them in a “yes” mindset.
- Avoid placing tip requests above the fold or mid-article, where they compete with the content itself.
Best-practice research on tip jars for blogs and online platforms backs this up directly: jars placed alongside free content, with clear customization and multiple payment options, outperform generic sidebar widgets.
Amounts matter almost as much as placement. Four preset tiers plus one open “enter your own amount” field covers the widest range of readers without overwhelming anyone with choices. Lower numbers work better than you’d think. Guidance on tip jar amounts suggests $3 to $10 as the range that gets clicked most, because it feels closer to a coffee than a donation.
Most of the specific tip jar recommendations in the best-practice checklist come down to reducing friction: fewer fields, familiar payment logos, and no forced account creation. Name is optional. Email is optional. Every extra field you require is a reason for someone to close the tab instead of tapping “send.”
Language changes behavior too. “Buy me a coffee” reads as casual and low-stakes. “Donate” reads as formal, sometimes even like you’re running a nonprofit, which can make a reader hesitate if they’re not sure their $5 belongs in that category.
Pro Tip: Pair each preset amount with a one-line impact statement, like “$5 covers my coffee while I edit next week’s post.” Creators who explain what a tip actually funds report higher willingness to give, even at the same dollar amount.
Which Payment Methods Should You Offer, and What Do They Cost?
Card payments combined with Apple Pay and Google Pay give you the lowest friction on mobile, where most blog traffic actually lands. A reader who has to type in a 16-digit card number is far less likely to finish than one who taps their phone once.
- Card + Apple Pay/Google Pay: fastest checkout, best for impulse tips under $20.
- PayPal: less slick on mobile, but it’s the processor readers already trust, and broad coverage advice still recommends including it for readers who don’t want to enter card details anywhere new.
- Crypto tip jars: efficient for audiences that already hold crypto, and non-custodial gateways settle tips directly to a creator-controlled wallet without holding funds in between.
Two separate fees usually apply on any tip: a platform fee for the tipping tool itself, and a payment processor fee for moving the money. Before you go live, confirm exactly when payouts hit your bank, whether that’s instant, daily, or weekly, and double check where the money actually lands.
How Do You Promote a Tip Link Without Sounding Pushy?
The tone that works is closer to a friend mentioning something in passing than a sponsor read. Nobody wants a hard pitch after a helpful tutorial.
- Add a casual line at the end of high-performing posts: “If this saved you time, tips are always appreciated” reads very differently than “Please donate now.”
- Put a version of the same line in your email newsletter footer and your social bio, so the ask shows up in three places without ever feeling repetitive.
- Show what a specific amount does. Impact-focused language increases perceived value far more than a bare “tip me” button ever does.
- Test the phrasing and placement on your two or three best-performing posts first, then roll out whatever gets the higher click rate everywhere else.
Timing beats volume. Placing the ask right after a direct value moment, like the end of a tutorial or right after you’ve answered someone’s comment, consistently outperforms a permanent sidebar widget that readers learn to tune out.
Pro Tip: Screenshot a thank-you note from a supporter (with their permission) and use it sparingly as social proof near your tip link. Seeing that someone else already tipped lowers the psychological barrier for the next reader.
What Should You Know About Privacy, Payouts, and Taxes?
Keep the data you collect to the bare minimum. Name and email should be optional fields, never required, since every unnecessary field reduces completion on a small transaction.
- Tips are generally taxable income in the United States, so keep a simple record of every payout for your own bookkeeping.
- Talk to a tax professional about how to categorize tip income for your specific situation. This article isn’t tax advice.
- Before launch, confirm whether your tipping tool holds funds temporarily or forwards them immediately, and note the payout schedule so you’re not caught guessing where your money is.
What Actually Works Once You’ve Set Up Tipping
Most advice about blog tipping focuses on the button. That’s the easy part. What actually determines whether tipping generates real income is whether creators treat it as a persistent, low-key feature rather than a one-time announcement.
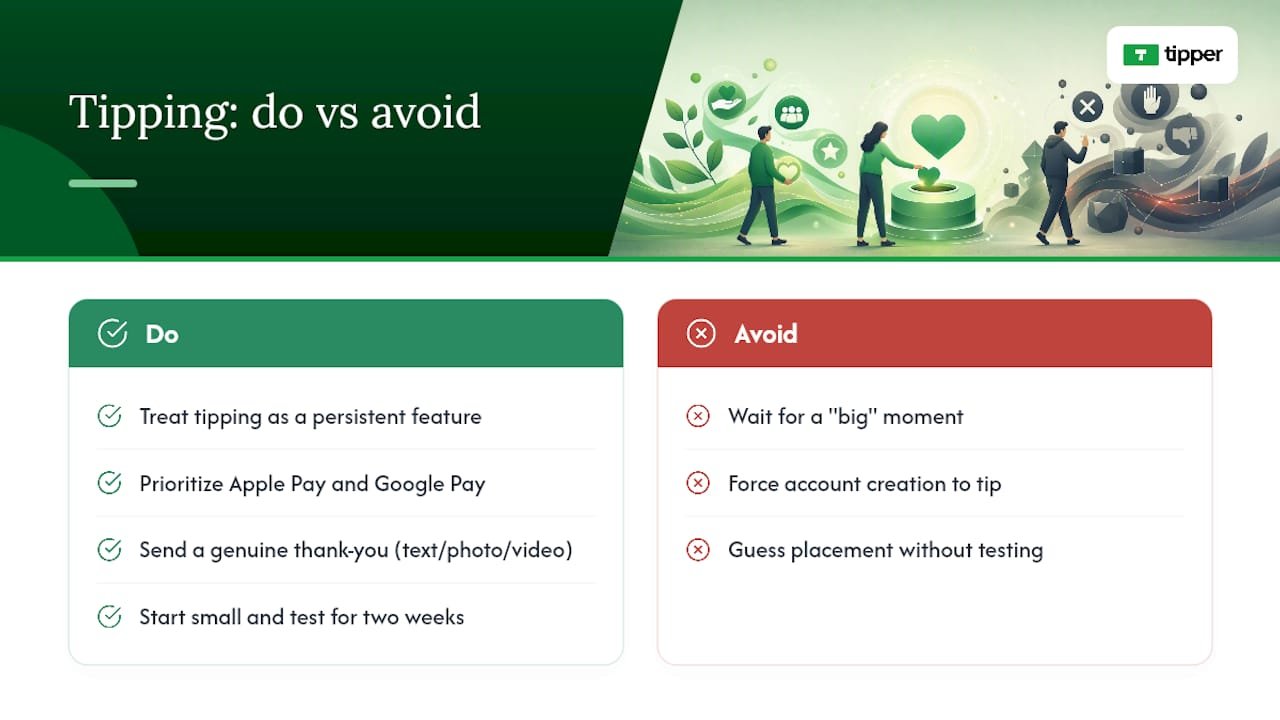
Personalized links and in-page buttons prioritize Apple Pay and Google Pay specifically because that’s where mobile friction dies fastest. A sender doesn’t need an account, which removes the single biggest drop-off point in any tipping flow. Thank-you notes, whether that’s a short text, a photo, or a video, help with retention. A reader who gets a genuine thank-you is far more likely to tip again next month.
The honest takeaway: don’t wait for a “big” moment to add a tip link. Start small, put it in one spot, watch what happens for two weeks, then adjust placement or wording based on what you actually see. Guessing wastes more time than testing.
— Tipper
Start Collecting Tips With a tipping platform
Some platforms provide a personalized tip link and an embeddable button that accept Apple Pay, Google Pay, and card payments, with no account required on the sender’s side.
Getting started takes less time than writing your next post. Sign up, build your tip link or button, add it to your post footer or social bio, and send yourself a $1 test tip to confirm the whole flow works before your readers see it. If you’re weighing rails and tools first, this rundown of digital tip jar tool types is worth a quick read. Once tipping is live, you’ll have a clearer sense of whether it can eventually reduce your dependence on ad revenue altogether.
Sources
- How to Add a Tip Jar to Your WordPress Site – FundCollector
- How to Set Up a Crypto Tip Jar on Your Website (WordPress & Shopify)
- 5 Best Tip Jar Practices For Blogging and Online Platforms – Attention Insight
FAQ
Is Blog Tipping Legal in the United States?
Yes. Accepting one-off tips through a payment processor is legal, but tip income is generally taxable, so keep records and consult a tax professional for your specific situation.
What’s the Best Payment Method for a Blog Tip Button?
Card payments paired with Apple Pay and Google Pay give the lowest friction on mobile, though including PayPal helps cover readers who prefer a processor they already trust.
How Much Should I Set as Preset Tip Amounts?
Four preset tiers between roughly $3 and $10, plus an open custom-amount field, tend to convert best because they feel closer to a small everyday purchase than a formal donation.
Do I Need a Recipient Account to Use Tipper?
No. Tipper lets senders tip through a personalized link using Apple Pay, Google Pay, or a card, with no account required on their end.
Where Should I Put My Tip Link for the Best Results?
End of post is the strongest spot, since readers who just finished your content are already in a positive mindset, right before they’d otherwise navigate away.
Recommended

5 Minutes to a Working Facebook Tip Link That Lets You Keep 100%
Yes, you can share a tip link on Facebook, and the fastest path takes about five minutes: create the link, set your post’s audience to Public, then place it in your Page’s About section or a pinned post. A tool like Tipper generates that link instantly, no bank paperwork or app download required from the person sending the tip.
TL;DR:
- Creating a shareable tip link on Facebook can be done in about five minutes using tools like Tipper, without needing bank paperwork or app downloads.
- Placing the tip link in your About section or as a pinned post ensures maximum visibility and discoverability for supporters.
- Setting your Facebook post audience to Public is necessary to enable sharing options and prevent the Share button from remaining hidden.
- Frequent promotion with tip links can reduce reach; instead, post regular native content and only occasionally include promotional links to maintain visibility.
- Testing your tip link with a small payment ensures it functions correctly and provides a clear preview of what your supporters will see.
Table of Contents
- How to Create a Facebook Tip Link Step by Step
- Where Should You Put Your Tip Link on Facebook?
- How Do You Make a Facebook Post Shareable?
- What Content Strategy Keeps Tip Links From Getting Buried?
- Fixing Common Tip Link Problems on Facebook
- Why Tip Links Change the Way Creators Get Supported
- Get Your Tip Link Live on Facebook Today
- Sources
- FAQ
How to Create a Facebook Tip Link Step by Step
Building a tip link doesn’t require a developer or a merchant account with a bank. Most creators can go from zero to a working, shareable URL in under ten minutes.
The generic process looks like this:
- Choose a payment method your supporters already use, such as Apple Pay, Google Pay, or a debit card.
- Create the payment or donation link through whichever platform you’re using, making sure it points to a page that accepts one-time payments.
- Set your payout details (bank account, email, or linked card) so money actually lands somewhere.
- Test the link with a low-value payment, a dollar or two, before you post it publicly.
With Tipper, those four steps compress into three: create an account, customize your tip page with your name, photo, and a short thank-you note, then save and copy the link. Senders don’t need an account of their own. They can tip through Apple Pay or Google Pay directly from the link, and because Tipper doesn’t take a cut of your earnings, creators keep 100% of what comes in.
Before you share anything, run a quick checklist: does the link open on both mobile and desktop, does your payout method match your legal name or business name, and is your profile photo or page name recognizable to the people you’re asking to support you?
Pro Tip: Send the link to yourself first and complete a $1 test tip. It confirms the checkout works and shows you exactly what your supporters will see before you put it in front of an audience.
Where Should You Put Your Tip Link on Facebook?
Placement matters almost as much as the link itself. A tip link buried three scrolls down your feed gets a fraction of the clicks one sitting in your About section gets.
- About section on a Page: this is the most persistent option. Once it’s there, it’s discoverable any time someone visits your Page, not just when they happen to scroll past a specific post.
- Pinned post: pin a post with your tip link to the top of your Page or profile so it’s the first thing visitors see, useful during a launch or a specific ask.
- Profile or bio: works well for personal profiles where an About section edit is quicker than managing a Page.
- Stories: good for short-lived, timely asks tied to a specific moment, like a live event or a single piece of content.
- Post text vs. comments: putting the link directly in the post body is more discoverable, but dropping it in the first comment keeps your caption cleaner. If discoverability matters more than aesthetics, the post body wins.
How Do You Make a Facebook Post Shareable?
The Share button isn’t a separate switch you flip. It’s tied directly to who can see the post. If a post’s audience is set to Friends or something narrower, Facebook hides the Share button automatically because sharing publicly a post that’s meant to stay private would defeat the purpose of that privacy setting.
Here’s the fix, step by step:
- Open the post and click the three dots in the top right corner.
- Select Edit audience.
- Change the setting to Public, which Facebook defines as visible to anyone on or off the platform.
- Save, then check that the Share button has reappeared beneath the post.
To copy a post’s link for reuse elsewhere, click the same three-dot menu and select Copy link, available on both mobile and desktop.
One catch: if a post lives inside a private or closed group, the Share option often stays unavailable no matter what audience setting you choose, since group privacy rules override individual post settings. In that case, repost the same content on your Page or personal profile set to Public instead.
What Content Strategy Keeps Tip Links From Getting Buried?
Posting tip links too frequently trains Facebook’s algorithm to treat your account as promotional, and promotional accounts generally get shown to fewer people. The fix isn’t to stop asking. It’s to change the ratio.
- Post native content, videos, images, behind-the-scenes clips, most of the time, and treat the tip-link post as the exception, not the rule.
- Keep experts’ general guidance in mind: prioritize educational, entertaining, or inspiring content and hold promotional posts to a smaller slice of your overall feed.
- Write CTAs that give the sharer a reason, not just an instruction. “Share this if you know someone starting out” works better than “please share.”
- Post consistently, twice a week is a reasonable baseline, rather than in bursts, and check Meta Insights to find when your specific audience is actually online.
- Reply to comments fast, pin a supporter’s kind message as social proof, and send a quick thank-you video when someone tips. That loop is what turns a one-time tip into a repeat one.
Pro Tip: A post that earns comments and watch time before you ever mention money performs better than a cold ask, because Facebook’s algorithm rewards the retention signal first.
Fixing Common Tip Link Problems on Facebook
Most tip link problems trace back to one of four causes, and all four have quick fixes.
- No Share button showing up: check the post’s audience setting first. If it’s anything other than Public, or the post lives in a private group, that’s almost always the reason.
- Link preview looks broken or blank: the page’s Open Graph tags may not be loading correctly. Run the URL through Facebook’s Sharing Debugger, then delete and repaste the link so Facebook refreshes its cached preview.
- Facebook won’t let you add a donate button to your Page: this happens with some account types. Adding the giving link to your About section and reinforcing it with pinned posts works as a reliable substitute.
- Unsure if the link actually works: send yourself a small test payment before promoting it, and confirm the payout lands where you expect.
Why Tip Links Change the Way Creators Get Supported
Tip links work because they remove the two biggest obstacles to spontaneous generosity: friction and formality. A supporter who has to sign up, download an app, or hunt for a “donate” button often just closes the tab. A link that opens straight to Apple Pay does not give them time to reconsider.
What we see repeatedly is that tipping behaves less like fundraising and more like a tip jar. Amounts tend to be small, frequency matters more than size, and the creators who thank people personally, a short note or video, build the kind of repeat support a one-off donation drive never does. Read more on how creators build tip link strategy around this pattern, and how payment links can boost engagement rather than just collect money passively.
— Tipper
Get Your Tip Link Live on Facebook Today
Tipper turns the multi-step process above into something you can finish before your coffee gets cold. There’s no waiting on a bank to approve a merchant account and no cut taken from what people send you.
Here’s what you get: an instant, personalized tip link, support for Apple Pay and Google Pay so senders skip the account creation step entirely, and 100% of every tip since Tipper doesn’t take a percentage. Getting started takes three moves: sign up, build your tip page with a photo and short bio, and copy your link into your Page’s About section or a pinned post. Most creators see their first tip within a day of posting, often smaller amounts sent by people who wanted to say thanks without leaving a comment.
If you run a storefront or take payments in person too, point-of-sale tipping works the same way, one link, no app required from the customer. Set up your tip page now and have a link ready to paste into Facebook within minutes.
Sources
- How to Make Facebook Posts Shareable (2026): Fix the Share Button
- Facebook Marketing: A Practical 2026 Guide for Businesses
- How to make a post shareable on Facebook
- Facebook marketing for small business: A complete guide for 2026
FAQ
How do I get my Facebook post link?
Click the three dots in the top right corner of the post, then select Copy link. This works the same way on mobile and desktop.
How do I post a clickable link on Facebook?
Paste the URL directly into your post text, About section, or comment. Facebook automatically generates a preview and makes it clickable once the post is set to Public.
Is TP-Link related to Facebook tip links?
No. TP-Link is a networking equipment company that makes routers and Wi-Fi devices, unrelated to tipping or donation links on Facebook.
What are some quick tips and tricks for using Facebook effectively?
Set posts to Public before expecting shares, mix native content with occasional links, and post consistently rather than in bursts, twice a week is a solid starting cadence to build around.
Can I add a tip link to my Facebook Page if the donate button isn’t available?
Yes. Add the link to your Page’s About section and reinforce it with a pinned post. A platform like Tipper makes the link itself take seconds to generate.
Recommended

Creators: Make Your Email Signature Tip Link Work in Gmail and Outlook
The quickest reliable fix is to skip raw pasted URLs and use your email client’s built-in link tool: highlight your text, click “insert link,” and type the full address starting with https:// (or mailto:/tel: for contact info). Images can carry a link too, but text is more reliable across Gmail, Outlook, and Apple Mail. Whatever you build, send a test email to a second account before trusting it.
TL;DR:
- Using your email client’s link tool with a full
https://prefix ensures your signature links remain clickable across Gmail, Outlook, and Apple Mail.- Place your primary call to action at the top of your signature, with clear hierarchy and only one focused link to avoid confusing recipients.
- Inline text links with descriptive anchor text outperform social icon rows in visibility and engagement, especially on mobile devices.
- Properly formatted image icons need individual anchor tags and should be hosted over
https://to prevent broken icons or blocked content.- Testing your signature by forwarding emails or checking in dark mode and on mobile devices helps ensure links work reliably for all recipients.
Table of Contents
- Getting Your Email Signature Tip Link Right: What Comes First
- How to Add a Clickable Link Using Gmail, Outlook, and Apple Mail
- Hand-Coded HTML Signatures That Actually Survive Client Quirks
- Linking Images and Social Icons the Right Way
- Accessibility and Mobile Considerations for Clickable Links
- Trackable Links and Simple UTM Tips for Signature CTAs
- Ready-to-Use Signature Templates by Goal
- Troubleshooting: When the Link Just Won’t Click
- A Working Signature Link Is a Small Habit With Outsized Payoff
- Turn Your Signature Into a One-Click Way to Get Tipped
- Sources
- FAQ
Getting Your Email Signature Tip Link Right: What Comes First
Before you touch the link tool, decide what your signature is actually for. A signature crammed with five competing calls to action confuses readers and none of them get clicked. Get the basics locked down first. Then give the link a clear home.
Your name, title, and company go at the top, in that order of visual weight, because that’s what a recipient scans for first to confirm who’s emailing them. Below that, list one or two direct contact methods, phone or email, not both plus a fax line nobody uses anymore. HubSpot’s guidance on professional email signatures makes a point worth repeating here: brevity and hierarchy matter more than cramming in every possible detail.
Then comes the decision that actually matters for this article: your one primary call to action. That might be a website, a booking page, or an email signature tip link if you’re a creator or freelancer who wants supporters to send appreciation directly. Pick one. A signature with a “Book a call,” a “Follow me,” and a “Buy my course” link all fighting for attention performs worse than a signature with just one clear ask.
A few things to settle before you build anything:
- Decide if your CTA is inline text (“Schedule a 15-minute call”) or an icon row for social links, not both competing for the same visual space.
- If you email both clients and coworkers, consider a stripped-down internal signature and a fuller external one with your CTA link.
- Keep your primary link visually separate from social icons so it doesn’t get lost in a row of logos.
- Reserve icon-only rows for secondary links; your main CTA deserves its own line of text.
How to Add a Clickable Link Using Gmail, Outlook, and Apple Mail
Each major client handles this differently, and the button labeled “insert link” isn’t always where you’d expect it. Here’s what actually works in each one.
- Gmail: Open Settings (the gear icon), go to “See all settings,” and scroll to the Signature section. Type your text, highlight the words you want linked, click the link icon in the small toolbar above the signature box, and paste the destination. Always include the
https://prefix, since Gmail sometimes won’t auto-detect a bare domain as clickable. - Outlook (web and desktop): In Outlook on the web, go to Settings > Mail > Compose and reply > Signatures. Highlight your CTA text, click the link icon in the toolbar, and enter the URL. Desktop Outlook works almost identically through File > Options > Mail > Signatures, though older versions sometimes show a plain “Hyperlink” button instead of an icon. Some versions also let you insert a styled button image if you want something more visual than underlined text.
- Apple Mail: Open Mail > Settings > Signatures, write your text, select it, and choose Edit > Add Link (or right-click and pick the same option) to paste your URL. Apple Mail is notoriously picky about formatting carried over from other apps, so if you’re pasting in a signature built elsewhere, strip the formatting first and rebuild the link natively.
The single biggest reason links fail across every client is a missing or malformed protocol. Typing “tipperapp.com” without https:// often gets treated as plain text, not a hyperlink, and the same rule applies to mailto: for email addresses and tel: for phone numbers, according to Stripo’s breakdown of clickable signature links.
Pro Tip: Send yourself a test email, then forward it to a completely different email address and check the link again. Forwarding sometimes strips formatting or converts hyperlinks to plain text, and that’s a failure mode you won’t catch by just sending to yourself.
Hand-Coded HTML Signatures That Actually Survive Client Quirks
If you’ve outgrown the built-in editors, hand-coding gives you more control, but only if you respect how email clients render HTML, which is nothing like how a browser does. Outlook in particular still renders parts of your signature using Microsoft Word’s HTML engine, which breaks modern CSS in ways that would surprise most web developers.
A few non-negotiable rules for this approach:
- Use absolute URLs everywhere:
https://yoursite.com, never a relative path, and usemailto:andtel:schemes for contact links. - Build your layout with HTML tables instead of CSS flexbox or grid; tables are the one layout method nearly every client renders consistently.
- Apply styling with inline CSS attributes on each element rather than a
<style>block, since many clients strip embedded stylesheets entirely. - Keep your signature under roughly 10KB of HTML; some clients silently drop parts of oversized signatures.
For actual patterns, think in three types: a simple text link (“Tip my work” underlined and colored), a button-style link (a colored table cell wrapping an anchor tag to mimic a real button), and a linked logo or headshot placed as its own image with its own <a> tag. Never combine all your information into one giant linked image. Image-only signatures break the moment a recipient’s client blocks images by default, which happens often enough that MailerLite’s signature guidance recommends staying text-first rather than image-first.
Pro Tip: Keep a plain-text version of your CTA link directly under any image-based button. If the image doesn’t load, the reader still sees a working link instead of a blank space.
Linking Images and Social Icons the Right Way
Every icon needs its own individual link, not a shared one. Image maps, where a single image has multiple clickable regions, aren’t reliably supported by email clients, so an icon row should always be built as separate images sitting side by side, each wrapped in its own anchor tag, as Stripo notes in its clickable-links guidance.
A few practical details make the difference between icons that work and icons that quietly fail:
- Host every image over
https://, neverhttp://, since mixed content gets blocked or flagged by some clients and corporate mail filters. - Add descriptive alt text to each icon (“LinkedIn profile,” not just “icon”), so the link still makes sense if images don’t render.
- Place a small text link near your main image CTA as a fallback, since text links survive forwarding and reply chains far better than images do.
- Keep icons small, roughly 20 to 24 pixels square, and compress image files so the whole signature loads fast even on a slow connection.
Accessibility and Mobile Considerations for Clickable Links
A link that only certain readers can find isn’t doing its job. Color alone should never be the only signal that text is clickable, because that fails for color-blind readers and disappears entirely in dark mode, where blue links can render as a color barely distinguishable from body text. Pair color with an underline and slightly bolder weight so the link is obvious regardless of display settings, a combination Stripo recommends specifically for signature links.
Anchor text matters just as much as styling. “Click here” tells a screen reader user nothing about where the link goes; “Schedule a call” or “Tip my work” does. This lines up with basic WCAG link-purpose guidance on writing descriptive alt text and maintaining sufficient contrast so signatures work for people using screen readers or low-vision settings.
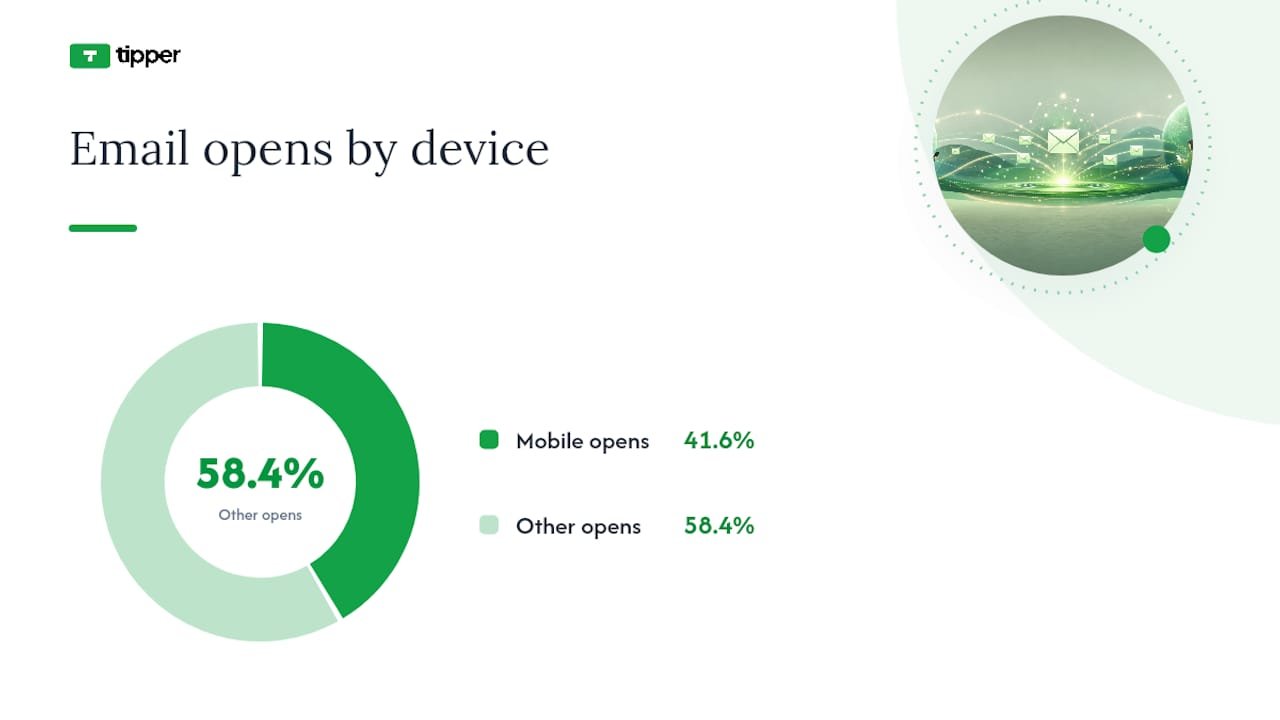
Mobile clients account for roughly 41.6% of email opens, according to MailerLite’s data, which means a signature that only looks good on a desktop screen is failing a huge share of your recipients. On mobile, keep link text large enough to tap accurately and give tappable elements enough surrounding space that a thumb doesn’t accidentally hit the wrong link.
Before you consider a signature finished:
- Test in both light and dark mode, since underlines and color contrast behave differently in each.
- Check on an actual phone, not just a resized browser window.
- Run through a screen reader if you can, or at minimum confirm every link has real anchor text, not a bare URL or “click here.”
Trackable Links and Simple UTM Tips for Signature CTAs
If you’re running a business signature or a marketing campaign through email, a basic UTM tag on your signature link lets you see how much traffic actually comes from it. A minimal pattern looks like ?utm_source=signature&utm_medium=email, added once to your CTA link, nothing more elaborate needed for most individual or small business use. HubSpot’s guidance on professional signatures treats trackable links as a standard part of measuring signature performance, not an advanced move reserved for marketing teams.
Personal signatures, on the other hand, usually don’t need tracking parameters at all. A creator sharing a tip link with friends and followers gains little from UTM clutter, and a long tagged URL looks worse than a clean one.
- Use UTMs on business or marketing signatures where results get reported; skip them on personal or creator signatures unless you specifically want the data.
- A branded short link or a simple redirect page keeps the visible URL clean even if tracking happens behind it.
- For payment or tip links specifically, avoid stuffing query strings with anything beyond basic source tracking. Payment pages should collect exactly what’s needed to process a tip, nothing extra riding along in the URL.
Ready-to-Use Signature Templates by Goal
Different goals call for different phrasing, and the anchor text you choose should tell the reader exactly what happens when they click.
For cold outreach, keep it low-friction: “Jordan Reyes, Account Manager, Acme Co. / [Schedule a 15-minute call]” works better than a generic “Contact me,” because it names the exact ask and the exact time commitment.
For client-facing service providers, a booking-first signature reads cleaner: name and title, then a single line, “[Book a consultation],” styled as a button rather than plain text, since a visual button reads as more official in a client relationship.
For creators and freelancers, this is where a tip link earns its place. Something like “Maya Chen, Illustrator / [Tip my work]” placed directly under your name performs better than burying it in a social icon row, since a labeled text link gets noticed in a way an icon rarely does.
For social-first creators, an icon row still has a place, but pair it with one dominant text link above it: “[Support my work]” as the headline CTA, then Instagram, YouTube, and X icons below as secondary options.
For small business owners, a mix works well: name, business name, phone with tel: link, and a single CTA like “[Leave a tip]” or “[Book an appointment],” depending on which action matters more to that business.
If you’re deploying signatures across a team, hosting one shared asset with per-user insertion links prevents the slow drift where everyone’s signature quietly diverges over time, a pattern SigFinch outlines for keeping organizational signatures consistent without re-editing each person’s HTML by hand.
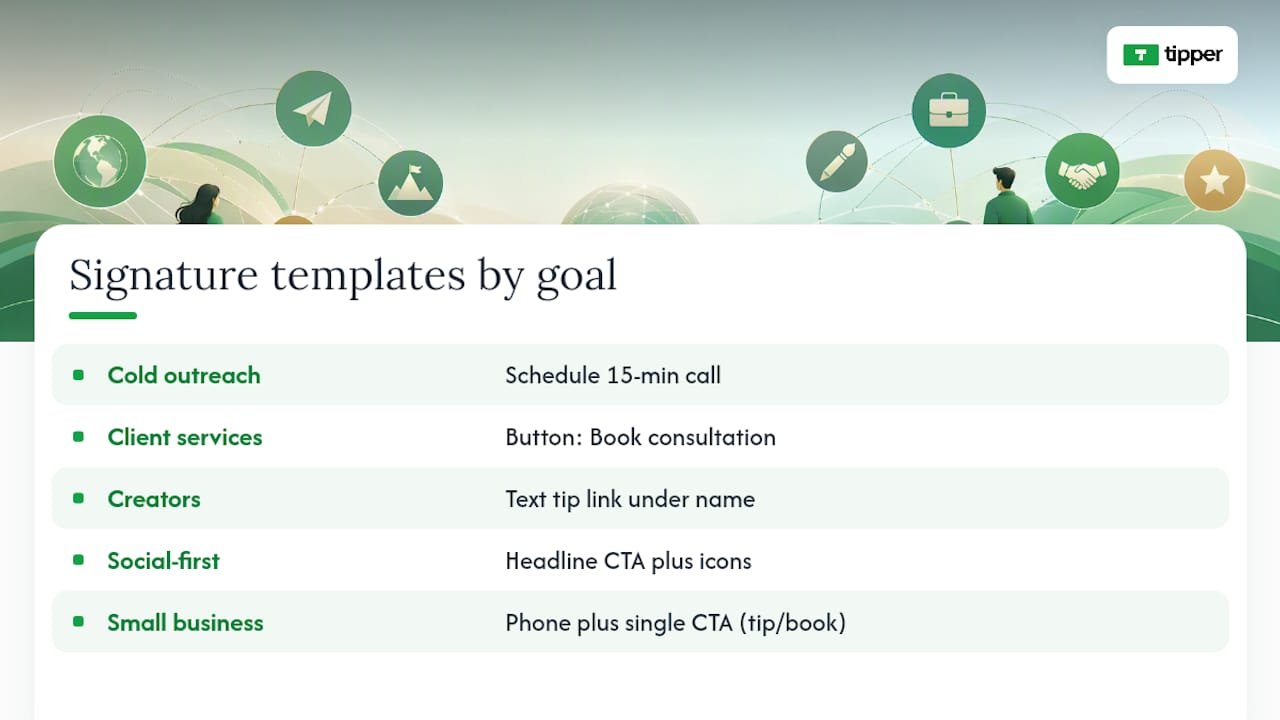
Troubleshooting: When the Link Just Won’t Click
Start with the boring explanations before assuming something’s fundamentally broken.
- Check the protocol first. A link missing
https://,mailto:, ortel:is the single most common cause of a “link” that’s actually just plain text. - If you’re on Gmail and your signature has a lot of formatting or images, check whether you’ve hit Gmail’s signature size limit, since oversized or overly complex HTML can get silently truncated, taking your link with it.
- Confirm you haven’t built an image-only signature with no underlying text link. If the image doesn’t load, there’s nothing left to click.
- Send test emails to Gmail, Outlook, and Apple Mail addresses, then forward and reply to each to see if the link survives.
- If nothing else works, fall back to a plain-text URL on its own line. It’s not elegant, but a visible, copyable link beats an invisible broken one every time.
A Working Signature Link Is a Small Habit With Outsized Payoff
A tip link sitting quietly under your name doesn’t ask anything of the reader, and that’s exactly why it works. Nobody has to remember to visit your page later or dig up a payment app; the option is just there, every time you email someone who already trusts your work enough to be corresponding with you.
The engagement is usually modest per email, but it compounds across every message you send for the rest of the year without you doing anything else. Tipper builds its tip links specifically so creators can drop one into a signature without asking senders to create an account first, which removes the exact friction point that kills most passive monetization attempts.
— Tipper
Turn Your Signature Into a One-Click Way to Get Tipped
Tipper is the fastest way to turn that signature line into money in your account, without asking a single sender to sign up for anything. You create a personalized tip link in a few minutes, drop it into your signature with anchor text like “Tip my work” or “Support my work,” and every sender can pay instantly with Apple Pay, Google Pay, or a card, no account required on their end.
Supporters can even leave a text, photo, or video thank-you note back to you, which turns a one-off tip into an actual moment of connection rather than a silent transaction. If you want a head start on wording, Tipper’s guide to why payment links boost engagement and its walkthrough on building a working tip link fast both give templates you can adapt directly into your signature. Set up your link now and add it to your next outgoing email.
Sources
- How to create an email signature with clickable links (Stripo)
- Email signature best practices (MailerLite)
- Professional email signatures (HubSpot)
- Accessibility guidance for email content (FitNYC)
- How to create an email signature (SigFinch)
FAQ
How Do I Put a Clickable Link in My Email Signature?
Open your email client’s signature settings, highlight the text you want linked, click the insert link icon, and paste your URL starting with https://. Always send a test email to a second account to confirm it works before relying on it.
What Are Some Good Taglines for a Tip Link in a Signature?
Short, direct phrases work best: “Tip my work,” “Support my work,” or “Buy me a coffee” all tell the reader exactly what happens when they click, which outperforms vague phrasing like “Click here.”
What Are the Best Practices for Email Signatures in 2026?
Keep the signature text-based rather than image-only, use one clear primary call to action instead of several competing links, and make sure every link uses a full protocol like https:// so it stays clickable across Gmail, Outlook, and Apple Mail.
How Do I Link an Image to a URL in an Email Signature?
Select the image in your signature editor and use the same insert-link tool you’d use for text, pasting the full URL with https://. Add descriptive alt text and a nearby text link as backup in case the image doesn’t load for the recipient.
Why Did My Signature Link Stop Working After Forwarding?
Forwarding and replying sometimes strip formatting or convert hyperlinks into plain text, which is why text-based links with full protocols tend to survive better than image-based ones. If a link consistently breaks on forward, fall back to a plain visible URL on its own line.
Recommended

Accept Tips With One Link, Photographers, Keep More and Stay Tax Aware
The fastest way to start collecting tips as a photographer is to create a personalized tip link or QR code, turn on Apple Pay, Google Pay, and card payments, set three preset amounts, and put that link everywhere clients already look: your bio, your gallery, and your delivery email. Do those two things first, then refine placement and copy later.
TL;DR:
- Using a personalized tip link or QR code placed in social bios, gallery footers, and emails offers a quick, frictionless way to start collecting tips without requiring support account creation.
- Setting three preset tip amounts—low around $3, middle around $7, and high near $15—improves conversion by guiding supporters with visually emphasized options.
- Testing the full payment process with a small transaction from a non-logged-in device ensures smooth payout flow before promoting your tip link widely.
- Platforms like Stripe or PayPal typically take around 3% plus $0.30 per tip, with direct payment rails generally retaining more of the supporter’s intended amount.
- Record and reconcile tips monthly, noting gross, platform fees, and net amounts to stay compliant with IRS guidelines on reporting business income.
Table of Contents
- What’s the Fastest Way to Accept Tips Online?
- How Do You Set Up a Tip Page Step by Step?
- Where Should You Place Your Tip Link for Best Results?
- How Do Fees and Taxes Work for Photography Tips?
- Tipper’s Perspective: Tipping Belongs in Every Photographer’s Income Mix
- Start Collecting Tips With Tipper
- Sources
- FAQ
What’s the Fastest Way to Accept Tips Online?
You have four real options, and they’re not mutually exclusive. Most photographers should stack them in order of effort.
A tip link page is the fastest to launch. You create one page, drop in your name and a short note about what tips fund, and share the URL anywhere text fits: an Instagram bio, a website footer, a text message after a shoot. No app download required on the sender’s end, which matters because friction kills tips faster than almost anything else.
QR codes solve the in-person problem a link can’t. Print one on a business card, tape it to your camera bag, or add it to the last page of a printed proof sheet. A QR code tip page turns a physical moment, the handoff of prints, the end of a session, into an instant payment opportunity without you saying a word.
Embedded tip buttons live inside your online gallery delivery, right next to the download button where a happy client is already primed to act. Stream overlays matter far less for photographers than for live-streamers, but if you do behind-the-scenes livestreams or Instagram Lives during shoots, an overlay works the same way a tip jar sign does at a coffee shop.
Add embedded buttons once you have a gallery delivery workflow. Overlays are a nice-to-have, not a priority.
How Do You Set Up a Tip Page Step by Step?
Here’s the exact sequence, and none of it should take more than half an hour.
- Create your account and tip page. Tipper is built specifically for this: no sender account needed, personalized link, and a QR code generated automatically.
- Connect a payout rail. Link a bank account and complete basic identity verification. This is standard KYC (know your customer), the same process any payment processor requires, and it usually takes a few minutes.
- Set three preset amounts. A low option for casual support, a highlighted middle default, and a higher option for your biggest fans. Creator playbooks consistently recommend this exact structure, low, highlighted middle, high, because a lone “enter custom amount” box depresses conversion compared to presets.
- Enable Apple Pay, Google Pay, and card payments, then run a small test transaction, something in the $1 to $5 range, and confirm when the payout lands in your bank account. Testing the full loop before you promote the link is a step creator payment guides specifically call out, because a broken link discovered after launch costs you trust you don’t get back easily.
- Turn on thank-you messages (text, photo, or video) and set up a simple bookkeeping sheet with three columns: gross tip, platform fee, net received.
Pro Tip: Do the test transaction from a phone that isn’t logged into your own accounts. That’s the actual experience a client has, and it’s the only way you’ll catch a confusing checkout screen before a real supporter does.
Where Should You Place Your Tip Link for Best Results?
Placement decides whether your tip link gets seen at all, and copy decides whether it gets clicked. Get both wrong and even the best payment setup goes nowhere.
Put your link or QR in five spots, roughly in this order of impact:
- Your social bio and website header, where anyone curious about you lands first.
- The footer of every gallery you deliver.
- The final page of a delivered gallery or the closing line of a delivery email.
- A printed QR card handed off at in-person sessions.
- An occasional, sparing mention in a social caption tied to a specific moment, not every post.
Copy matters more than most photographers assume. “Tip me” is abstract and easy to scroll past. “Help fund my next lens” or “Buy me coffee for the late-night edit sessions” gives the tip a purpose, and creator UX research shows outcome-specific asks outperform vague ones. Say what the money does, not just that you want it.
On preset pricing, round numbers convert better than odd ones. A common structure is $3 low, $7 highlighted middle, $15 high, with the middle option visually emphasized so it becomes the path of least resistance.
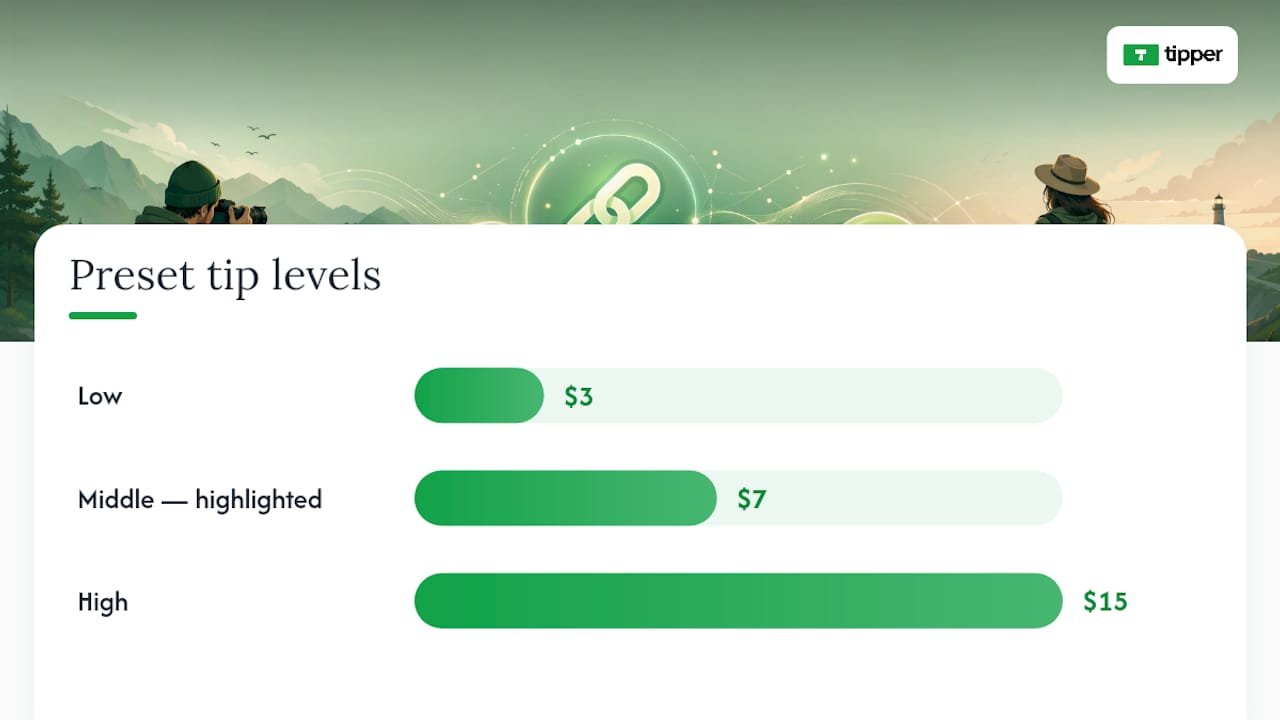
One freelance creator who added a tipping option reported an earnings increase within three months of launch, a reminder that a well-placed link isn’t a gimmick, it’s measurable revenue. Track three numbers going forward: your tip conversion rate, your repeat-tipper rate, and your net receipts after fees. Repeat tippers are the real signal that your work and your thank-you follow-through are landing.
How Do Fees and Taxes Work for Photography Tips?
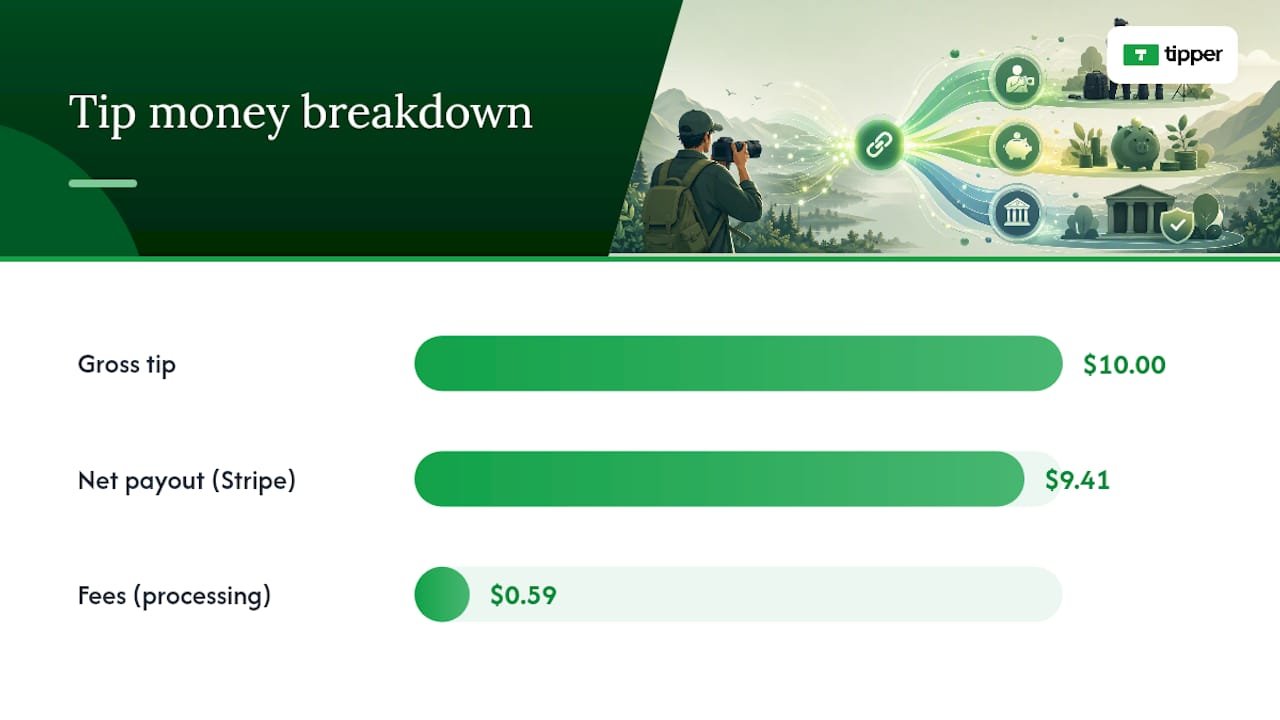
Money moves through one of two rails: a platform that takes a cut on top of processing costs, or a more direct rail like Stripe or PayPal that charges only standard processing. On a $10 tip, a typical Stripe-style structure (2.9% plus $0.30) nets a creator around $9.41. Platforms that layer an additional fee on top eat further into that number, so a direct-rail structure generally preserves more of what a supporter actually intended to give you.
On the tax side, the IRS draws a real line: a payment required to unlock content is compensation, but a voluntary payment given after access is a tip. Keep your copy voluntary. “Support my work if you’d like” holds up; “pay $5 to view this gallery” does not.
- Record gross tip amount, platform fee retained, and net payout for every transaction.
- Reconcile monthly rather than waiting until tax season.
- Watch your 1099 thresholds since tipping income counts as business income.
- Talk to a tax professional about your specific filing situation before you scale up.
Tipper’s Perspective: Tipping Belongs in Every Photographer’s Income Mix
Tipping works because it’s low-friction income layered on top of work you’re already doing. It doesn’t require a new product, a new client pitch, or a new invoice. It requires a link that’s easy to find and a thank-you that feels personal.
The photographers who get the most out of it aren’t the ones who tip-jar every post. They’re the ones who treat repeat tippers as relationships worth nurturing, a quick video thank-you goes further than most people expect. Most mistakes we see are fixable in five minutes: a link buried three taps deep in a bio, a payout never tested before launch, or copy so vague nobody understands what the tip is for. Fix the placement, test the payout, name the purpose. That’s most of the job.
— Tipper
Start Collecting Tips With Tipper
Tipper gives you a personalized link and QR code, Apple Pay and Google Pay support, and no requirement for the sender to create an account, which removes the single biggest reason a supporter abandons a tip halfway through. You set your own preset amounts, add thank-you messages in text, photo, or video, and route payouts directly to your bank.
Check the product page for current processing specifics.
Here’s your next step. Create your tip page, copy the link and QR code, run a small test tip to confirm the payout lands, then add that QR to your next client packet or delivered gallery. If you run a storefront or in-person sessions alongside your photography work, point-of-sale tipping options extend the same idea to walk-in clients.
Sources
For deeper reading on the tax side, see the IRS guidance on digital creator tips and LegalClarity’s breakdown of reporting rules. For UX and placement tactics, the creator tips playbook covers preset amounts and copy in more depth, and Tipper’s guide on contactless tip collection has more setup examples. Photographers exploring other monetization channels can also read about photo licensing royalties.
This article is general information, not a substitute for advice from a qualified financial advisor. Consult a qualified financial professional about your own circumstances before acting on anything here.
- Creator Tips Playbook — How to Earn From Your Audience With
- IRS Clarifies Tips for Digital Creators (Apr 27, 2026): How to Turn Audience Tips into Clean, Predictable Revenue — A Revenue‑First Playbook
- The Rise of Digital Tipping: Best Practices for Tipping Platforms and Content Creators – DirectPayNet
- No Tax on Tips for Digital Creators: How It Works – LegalClarity
FAQ
What Is the Best Way to Start Accepting Tips Online as a Photographer?
Create a personalized tip link or QR code, connect a payout rail, and share it in your bio, gallery footer, and delivery emails. Tipper lets senders tip you without creating an account, which removes a common source of drop-off.
Do I Need a Business Account to Receive Tips?
You need a payout account (like a linked bank account through your tipping platform) and basic identity verification, but this is separate from needing a formal business entity. Check with a tax professional about your specific setup.
Are Photography Tips Taxable Income?
Yes, tips are business income and should be tracked monthly, recording gross amount, platform fee, and net payout. The IRS treats voluntary post-access payments as tips, distinct from required payments, which count as compensation.
How Much Should I Set as Preset Tip Amounts?
A common structure is a low option around $3, a highlighted middle default around $7, and a high option around $15, with the middle amount visually emphasized to guide the click.
Does Tipper Charge Photographers a Subscription Fee?
No. Tipper is free to create and maintain an account, with a small transaction-based fee applied per tip rather than a recurring subscription cost.
Recommended
Beat 20% Tip Tolerance Chargebacks with POS Fixes for Restaurants
Yes, tips can trigger chargebacks, and it usually happens when the final settled amount runs past what the customer’s card was authorized for, typically beyond the card network’s tip tolerance of around 20%. The immediate move: pull your authorization and capture logs plus the receipt before you do anything else, and for small-dollar disputes with thin evidence, a quick refund often costs less than fighting. The rest of this guide covers exactly what triggers these disputes, what evidence wins them, and how to stop them before they start.
TL;DR:
- Maintaining a tip amount within the card network’s 20% tolerance threshold prevents automatic flags for amount mismatches during settlement.
- Clearly disclosing mandatory service charges separately from tips on menus and receipts reduces misrepresentation claims and dispute risks.
- Using in-transaction tip capture, digital receipts, and instant electronic confirmation significantly lowers post-authorization tip disputes.
- Gathering comprehensive evidence such as signed receipts, audit logs, and authorization records is crucial before contesting a chargeback.
- Implementing digital tipping methods with timestamped confirmations streamlines dispute defense and minimizes amount-mismatch conflicts.
Table of Contents
- How Card Networks Treat Tip Chargebacks and the 20% Tolerance Rule
- Tips vs. Service Charges: Why the Distinction Matters for Disputes
- Preventing Tip Chargebacks: POS Setup and Staff Workflow
- Responding to a Tip Chargeback: Evidence and Representment Steps
- How Digital Tipping Cuts Down on “I Don’t Recognize This” Disputes
- The Real Tension Between Protecting Tips and Avoiding Disputes
- Cut Tip Disputes With Electronic Confirmation at the Source
- Sources
- FAQ
How Card Networks Treat Tip Chargebacks and the 20% Tolerance Rule
Card networks built a buffer into how they handle restaurant and hospitality transactions, because tips get added after the initial swipe or tap. That buffer is commonly known as the tip tolerance, and it typically runs around 20% above the original authorized amount. Stay under that ceiling and the settled charge usually clears without a second look. Go over it, and you’ve created an amount mismatch between what the cardholder approved and what actually posted.
That mismatch is exactly what issuers watch for. Here’s the mechanical sequence that creates risk:
- A card gets pre-authorized for the bill total (say $100).
- The customer adds a tip after the fact, either on a receipt or through a POS prompt, pushing the final charge to an amount that can exceed the usual tip tolerance threshold, which is commonly near 20%.
- The issuer’s system can flag this automatically, sometimes without ever asking the cardholder first.
The reason codes attached to these disputes usually point to “amount exceeds authorization,” which shows up under different labels depending on the network. Some processors reference it by code (Amex uses A01), but the underlying issue is the same across networks: the settled amount doesn’t match what was approved. This is also why post-authorization tip adjustments carry more scrutiny than tips collected in the original transaction. The longer the gap between authorization and final capture, the more room there is for a mismatch to slip through unnoticed until the cardholder’s statement arrives.
Tips vs. Service Charges: Why the Distinction Matters for Disputes
A voluntary tip and a mandatory service charge are not the same thing, and treating them interchangeably is one of the fastest ways to lose a chargeback you should have won. A tip is optional, chosen by the customer, and typically goes straight to staff. A service charge (an 18% gratuity added automatically for parties of six or more, for example) is a business-set fee, and depending on your state, it may be taxed differently and processed through payroll rather than tip pooling.
Networks and issuers expect clear, prominent disclosure whenever a mandatory fee gets added to a bill. Skip that disclosure, or bury it in fine print, and you’re inviting a misrepresentation claim on top of the standard amount dispute, weakening your position on both fronts.
A few places disclosure has to be unmistakable:
- On the physical or digital menu, near the item or party-size threshold that triggers the charge.
- On the payment screen or receipt, before the customer signs or taps to confirm.
- On the final printed or emailed receipt, itemized separately from the tip line.
Pro Tip: Never label a mandatory service charge as a “suggested tip” on your receipt. That single word choice can shift how a chargeback gets categorized and can create payroll tax exposure you didn’t intend.
Preventing Tip Chargebacks: POS Setup and Staff Workflow
Most tip disputes trace back to operational gaps, not fraud. Confusing receipts, delayed batch closings, and tip amounts entered after the original authorization account for a large share of avoidable cases. Fixing this is mostly about tightening your workflow, not buying new hardware.
- Close batches daily. The longer a transaction sits open, the more likely a tip adjustment slips outside the tolerance window unnoticed.
- Require verification on unusually high tips. A manager sign-off on tips well above your typical range catches entry errors before they become disputes.
- Retain your tip-adjustment audit logs for at least 120 days. Many POS systems only keep detailed logs for 30 to 90 days by default, which can fall short of network representment windows.
- Collect tips in-transaction where your POS allows it. Pre-authorizing with an estimated tip, or capturing the tip before the card is released, eliminates the entire category of post-authorization mismatch disputes.
- Turn on customer-facing confirmation screens. A visible final total before the customer walks away removes the “I didn’t agree to that amount” argument before it starts.
- Send digital receipts immediately. An instant text or email receipt lets the customer reconcile the charge while it’s still fresh, which cuts down on “I don’t recognize this” claims.
For businesses handling prepaid cards or gift cards, partial-authorization behavior deserves extra attention. A gift card partial auth that doesn’t fully cover a tipped total can trigger a decline or a split transaction that confuses both your POS and your customer, so test that flow specifically if you accept prepaid payment methods.
Pro Tip: If your POS lets you choose between “tip on receipt” and “tip in app before final capture,” pick the in-app option every time you have a choice. It’s the single biggest lever for cutting post-authorization disputes.
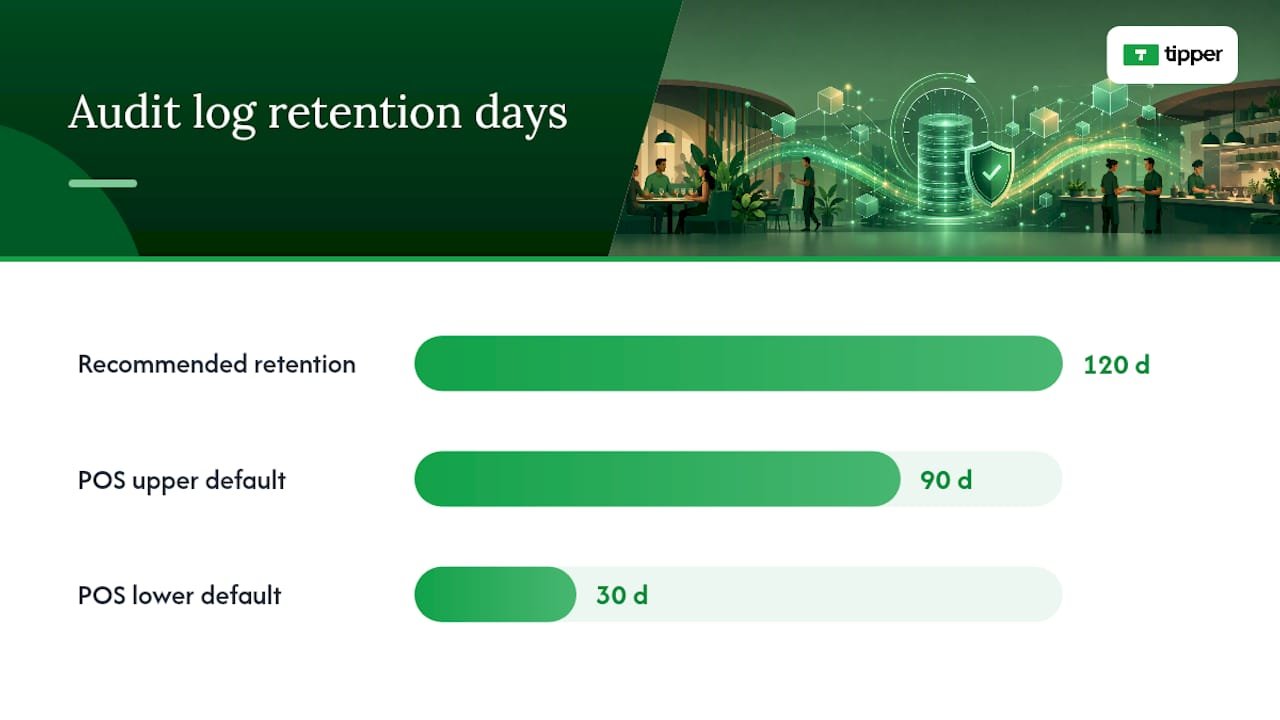
Responding to a Tip Chargeback: Evidence and Representment Steps
The moment a chargeback notice arrives, you’re on a clock, and what you gather in the first 24 hours often decides the outcome. Start by pulling four things: the original POS receipt, the tip-adjustment audit trail, the auth-and-capture record, and any guest communication or timestamped footage that confirms presence and service.
Issuers and networks weigh objective transaction records far more heavily than subjective claims, as explained in this guide on how payment disputes are evaluated. A signed receipt or electronic tip confirmation paired with authorization and capture logs tends to carry a dispute; a staff statement about good service on its own rarely does.
That evidence gap is also why a decision framework helps before you commit time to fighting a claim:
- Refund it when the dollar amount is small and your evidence trail is incomplete or missing.
- Represent it when you have a full package: signed or electronic receipt, complete auth-to-capture record, and a clean audit log showing when and how the tip was added.
- Escalate internally when you notice a pattern of disputes from the same terminal or shift, since that usually points to a training or workflow issue rather than isolated customer disputes.
Timing matters on both sides. Cardholders generally have 60 days from the statement date to file written notice of a disputed charge, and once a dispute is opened, your representment window is typically measured in days, not weeks. Some processors also note that even a small overage above the tip tolerance can trigger a dispute, and the chargeback fee alone can exceed the disputed tip amount, which is another reason quick refunds sometimes make more financial sense than a fight over a few dollars.
How Digital Tipping Cuts Down on “I Don’t Recognize This” Disputes
A tip collected through a link or QR code with instant electronic confirmation creates a timestamped record the moment the payment clears, which is exactly the kind of evidence issuers want to see. Instant digital receipts sent by text or email let the customer reconcile the final amount right away, cutting off the “no recognition” dispute before it forms.
Practical steps for building this into your operation:
- Send an electronic tip confirmation the moment payment processes, not at the end of the shift.
- Keep confirmation records tied to the transaction ID so they surface instantly during representment.
- Support the payment methods customers already trust and use daily, including Apple Pay and Google Pay.
- Use a checkout-integrated tip prompt so the tip amount is locked in before authorization closes, not adjusted afterward.
Merchants who shift to digital tip capture generally see fewer amount-mismatch disputes simply because there’s less time between the tip decision and the record of it.
The Real Tension Between Protecting Tips and Avoiding Disputes
Staff depend on tips to make a living wage in a lot of hospitality jobs, and that reality shouldn’t get lost in a conversation about chargeback prevention. The goal isn’t to make tipping harder or slower for the customer. It’s to close the gap between when a tip gets decided and when it gets recorded, because that gap is where nearly every dispute originates.
The businesses that handle this well aren’t the ones with the most complicated fraud rules. They’re the ones with a simple, written playbook everyone on staff actually follows, and a monthly habit of checking their POS logs before a problem becomes a pattern.
— Tipper
Cut Tip Disputes With Electronic Confirmation at the Source
Tipper gives merchants a direct way to close the evidence gap that causes most tip chargebacks: every tip sent through a personalized link or QR code comes with an instant electronic confirmation, timestamped and tied to the transaction the moment it clears.
That confirmation record is exactly what networks ask for during representment, alongside your existing receipt and authorization data. Pairing this with the frictionless tipping practices outlined for 2026 gives you a workflow that’s faster for guests and better documented for you. Set up your Tipper and start generating confirmed, auditable records on your very next transaction.
Sources
- MasterCard 20% Tip Tolerance reinstated for card-not-present restaurants (Toast support)
- How do I dispute a charge on my credit card bill? (CFPB)
FAQ
Can I Dispute a Tip Charge on My Card?
Yes, cardholders can dispute a tip charge, generally by sending written notice within 60 days of the statement that includes the charge, most commonly when the final amount exceeds what they believe they authorized.
Can a Business Legally Take Back a Tip?
A business generally can’t simply reclaim a tip a customer voluntarily gave once it’s processed, though a merchant can refund or adjust a charge to resolve a billing error or a documented dispute.
Is a 10% Tip Disrespectful?
Tipping norms vary by region and service type and aren’t governed by card network rules; what matters for chargeback risk isn’t the tip percentage but whether the final charged amount matches what the customer actually authorized.
Can You Go to Jail for Disputing a Chargeback?
Filing a legitimate chargeback dispute isn’t a criminal matter, but knowingly filing a false dispute to reverse a valid charge (friendly fraud) can expose someone to civil liability and, in serious or repeated cases, fraud-related legal consequences.
What Evidence Do I Need to Fight a Tip Chargeback?
You need objective transaction records: the signed or electronic receipt, tip-adjustment audit log, and authorization-to-capture record, since issuers weigh these far more heavily than staff testimony about service quality.
Recommended

Set Up Credit Card Tipping in 20 Minutes for Creators
Yes, you can accept tips by credit card and mobile wallet today, and you don’t need a merchant account to do it. The three practical routes are a shareable payment link, an embedded tips block on your own page, or a QR code that points to a hosted checkout. Each one, once connected to a processor, takes cards, Apple Pay, and Google Pay, lets you set preset or custom amounts, and sends payouts straight to your bank.
TL;DR:
- Using a hosted payment link, embedded tips block, or QR code allows quick acceptance of credit card and mobile wallet tips without a merchant account.
- Setting up involves linking a processor like Stripe or PayPal, configuring preset amounts, enabling wallets, and testing with a small tip before sharing publicly.
- In-person tips benefit more from QR codes for instant mobile payments, while online or remote tips favor links or embedded options for broader reach.
- Tips are taxable income, and you should keep records and consult a tax professional to ensure proper reporting and reconciliation.
Table of Contents
- Quick options: the real ways to accept card tips
- How do you set up card and wallet tipping?
- What fees come out of a credit card tip?
- How can you get more people to actually tip?
- Is it safe to collect card tips, and what about taxes?
- Where should you actually share your tipping link or QR code?
- Why Tipper bets on frictionless, account-free tipping
- Start Accepting Card and Wallet Tips With Tipper
- Sources
- FAQ
Quick options: the real ways to accept card tips
Every card tipping setup boils down to three shapes, and picking the right one depends on where your audience already is.
- Payment links. A hosted checkout page you can drop into a bio, email, or text. Stripe’s Payment Links let you build one without writing a line of code, and it works for a one-time tip or a recurring pledge. PayPal’s Payment Links do the same, accepting cards, Apple Pay, and Google Pay where enabled.
- QR codes. Same hosted link, different delivery. Print it on a table tent, a merch tag, or a slide at a live show, and anyone can scan and pay in seconds.
Links win on reach and simplicity. In-page blocks win on conversion, since the visitor never leaves your content. QR codes win when you’re standing in front of someone and a link would be clumsy.
How do you set up card and wallet tipping?
Getting a working tip flow live doesn’t take a developer. It takes about twenty minutes if you already have a bank account ready to link.
- Pick a processor and finish onboarding. Stripe or PayPal both work well; you’ll verify your identity and connect a bank account before you can accept live payments.
- Create your link or activate a tips block. Set your preset amounts (commonly three or four choices) and decide whether to allow a custom amount field.
- Turn on mobile wallets. Most processors enable Apple Pay and Google Pay automatically once your account is verified, but check your settings, and confirm domain verification if you’re embedding a block on your own site.
- Generate a QR code for the same link. Add your branding, write a short thank-you note that will trigger after payment, and run one real test transaction before you share it publicly.
- Check your payout settings. Confirm your bank routing details are correct and note how often payouts land in your account.
Pro Tip: Send yourself a $1 test tip before you share the link anywhere. It’s the fastest way to catch a broken wallet setting or a typo in your payout details before a real supporter hits the same wall.
Once wallets are confirmed live, Apple Pay and Google Pay tend to convert better on mobile than typing in a full card number, since the phone autofills everything.
What fees come out of a credit card tip?
Card processing isn’t free, and knowing the math up front keeps you from being surprised at payout time. A typical US processor fee runs around 2.9% plus $0.30 per transaction, though you should always check your processor’s live rate, since these shift.
Card processing fees reduce a $5 tip by about the processor’s percentage plus a fixed fee, leaving most of the tip amount in your account. Similarly, larger tips have a slightly larger total fee but still leave the majority of the amount to you.
The bigger question is whether your tipping tool only passes along that processor fee, or adds its own percentage on top. Some platforms take a cut of every tip beyond what the card network charges; others don’t touch it at all. That distinction is worth confirming before you commit to a tool, since a 5% platform fee on top of standard processing meaningfully changes what you keep. Payouts themselves usually land in your bank within one to a few business days, depending on the processor and your account history.
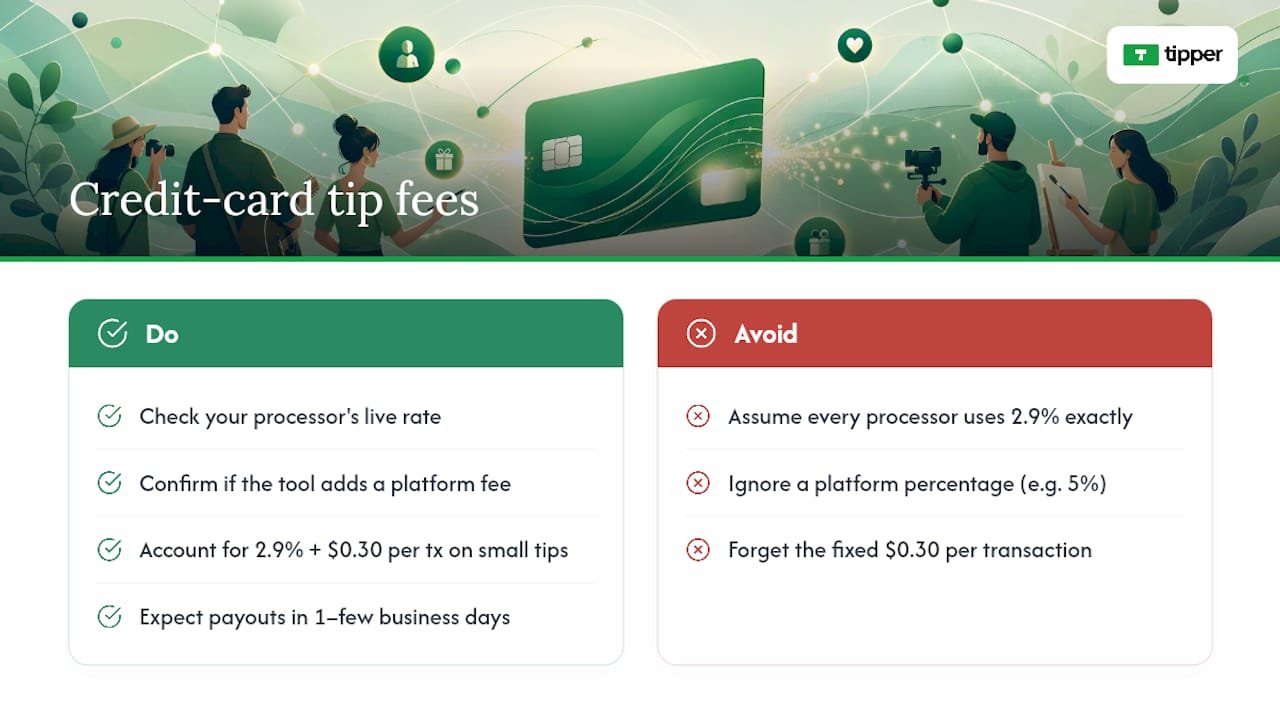
How can you get more people to actually tip?
Getting the payment flow working is the easy part. Getting people to tap the button is where most creators leave money on the table.
- Put the option where attention already is. End of a video, your bio link, the footer of a newsletter, a QR code on a receipt or merch tag. Don’t bury it on a page nobody visits.
- Offer three preset amounts with an obvious middle choice, plus an optional custom field for the person who wants to go bigger. Most tips blocks default to this structure for a reason: choice paralysis kills conversions.
- Write one line of context above the button. “Buy me a coffee” or “Support this week’s episode” does more work than a bare “Tip” label, because it gives permission and sets expectations in the same breath.
- Send a thank-you the moment the tip lands. A short text note, a photo, or a quick video reply reinforces the gesture and makes the next tip more likely.
- Change one variable at a time. Swap the preset amounts, then measure. Swap the copy, then measure. Stacking changes makes it impossible to know what actually moved the needle.
Pro Tip: If you only test one thing this month, test your preset amounts. A middle option that’s slightly higher than you’d guess often lifts average tip size without hurting conversion at all.
Keeping the flow embedded rather than sending people to an external page tends to help here too, since every extra click or redirect is a chance for someone to lose momentum and change their mind.
Is it safe to collect card tips, and what about taxes?
A hosted checkout page does more than look clean. It also keeps most of the compliance burden off your plate.
- PCI scope stays small. When Stripe or PayPal hosts the actual checkout, you’re not storing card numbers on your own server, which limits your PCI compliance obligations considerably compared with building your own payment form.
- Collect only what you need. Ask for a name or note if you want it, but don’t require personal details that aren’t necessary for the transaction, and be upfront about what appears on a receipt.
- Tips are income. Keep records of what comes in, reconcile it against your payouts periodically, and talk to a tax professional about how to report it. Occasional gifts from friends are different from a steady tipping stream tied to your work, and that distinction matters for how you categorize it.
Where should you actually share your tipping link or QR code?
The best tip flow in the world does nothing if nobody sees it. A few channels consistently outperform the rest for creators and small businesses.
- Social bios and link pages. Tools like Linktree’s Commerce Links let you accept cards and wallets right from your bio without sending anyone off-platform.
- Email footers and newsletter CTAs. A direct payment link at the bottom of every send costs nothing and reaches people already invested enough to open your email.
- QR codes at live shows and events. Print one on signage, merch, or a tip jar sign, and let people scan and pay in a few seconds.
- An embedded tips block on your own site or storefront, similar to how businesses use customizable payment request pages to make paying (and tipping) feel like a natural part of checkout rather than an afterthought.
Why Tipper bets on frictionless, account-free tipping
We built Tipper around one observation: every extra step between “I want to tip you” and “the money moved” costs you supporters. Requiring an account, a login, or a redirect to some unfamiliar checkout page kills impulse generosity, and impulse is most of what tipping actually is.
Keeping the flow on the creator’s own page, backed by Apple Pay and Google Pay, mirrors what helps creators build sustainable tipping revenue instead of one-off donations that never repeat. The tools that win here aren’t the ones with the most features. They’re the ones that get out of the way fastest.
— Tipper
Start Accepting Card and Wallet Tips With Tipper
If you’ve been weighing a payment link against an embedded block against a QR code, here’s the shortcut: Tipper gives you all three from a single personalized link, no account required for the person sending the tip. You get card payments, Apple Pay, and Google Pay support out of the box, a customizable tip page that matches your brand, and thank-you messages you can send back as text, a photo, or video.
Setup takes a few minutes: connect your payout details, set your amounts, and you’re live. Before you share it anywhere, send yourself a real $1 tip to confirm the whole flow works end to end. Then head to Tipper and build your link.
Sources
For the setup details covered here, the official documentation is worth bookmarking: Stripe Payment Links, PayPal Payment Links, and UniLink’s Tips block guide. For platform-specific comparisons, see Tipper’s guide to digital tipping platforms.
FAQ
Can I accept credit card tips without a merchant account?
Yes. A processor like Stripe or PayPal handles the merchant relationship for you, and a hosted payment link or a personalized page from a platform like Tipper lets you accept cards without ever setting up your own merchant account.
Does Apple Pay or Google Pay cost more to accept than a regular card?
No, mobile wallets typically run through the same processor fee as a standard card transaction. The benefit is speed and conversion on mobile, not a different price.
How much of a $5 tip do I actually keep?
After a typical processing fee of around 2.9% plus $0.30, a $5 tip nets most of its amount, though your exact rate depends on your processor and whether your tipping tool adds its own platform fee on top.
Is a QR code or a payment link better for in-person tipping?
A QR code is usually better in person since it turns a physical sign or receipt into an instant scan-and-pay moment, while both options point to the same hosted checkout page behind the scenes.
Do I have to report credit card tips as income?
Yes, tips are income and should be tracked and reconciled against your payouts; consult a tax professional for how to report them based on your specific situation.
Recommended

5 Minutes to a Working Twitter Tip Link That Actually Pays
Turn on Tips inside Edit Profile, connect at least one payment method, then put the link where people actually see it, your bio or a pinned post, instead of burying it in every tweet. That’s the whole job. The setup itself takes about five minutes; getting people to actually use it depends far more on what you post than on which payment app you pick.
TL;DR:
- Connecting your payment accounts correctly and testing the tip link beforehand ensures supporters can send money without errors or delays.
- Placing your tip link in your bio or a pinned post, rather than in every tweet, significantly increases the chances of receiving spontaneous tips.
- Offering multiple payment options and using a link service like Tipper reduces friction, encouraging more supporters to tip with a single tap.
- Verifying that your profile displays the money icon and testing each payment method helps prevent missed tips and builds trust with supporters.
- The cost of tips depends on the payment provider’s fees, especially if supporters use credit cards, which can add around 3% to the tip amount.
Table of Contents
- How Do I Set Up a Twitter Tip Link?
- Which Payment Methods Actually Get You Tipped?
- Where Should You Put Your Tip Link, and How Often Should You Mention It?
- How Do You Verify Your Tip Link Is Actually Working?
- Why a Frictionless Link Changes the Outcome
- What Should You Know About Privacy When Turning on Tips?
- What Happens After Someone Sends You a Tip?
- Who Can Turn on Twitter Tips?
- What Does It Cost to Receive Tips?
- The Setup Advice Nobody Emphasizes Enough
- Get Your Tip Link Running Without the App-Juggling
- Sources
- FAQ
How Do I Set Up a Twitter Tip Link?
The native Tips feature sits inside your profile settings on both mobile and web, and the path is nearly identical either way. Twitter (now X) built this as a direct pipeline to third-party payment services rather than its own processor, so setup is really about connecting accounts you may already have.
Here’s the sequence:
- Open the X app or go to x.com and tap your profile icon, then Edit profile.
- Scroll to Tips and open it. You’ll be shown the General Tipping Policy, which covers acceptable use and payment provider terms. Read it before you accept, since violating it can get the feature disabled.
- Toggle Allow tips on.
- Enter your payment usernames or links in the fields provided. Formatting matters here. A Cash App tag needs the “$” prefix, a Venmo handle needs to match exactly what’s on your Venmo profile, and a PayPal.me link needs the full URL. A typo in any of these sends someone’s money to the wrong place or nowhere at all.
- Save your profile.
- Confirm the small money icon now appears next to your profile, near the message and follow buttons.
Mobile and web walk-throughs show the exact same flow, just with slightly different menu depths, so don’t expect the Android version to differ meaningfully from iOS. One common snag: the icon doesn’t always appear instantly. If it’s missing after a minute, back out of Edit Profile completely and reopen it rather than refreshing the page, which sometimes fails to pull the update.
Which Payment Methods Actually Get You Tipped?
X’s Tips menu typically surfaces a handful of familiar names, Cash App, Venmo, PayPal, and in some regions Patreon or a personal Chime handle. Which ones show up depends on your account region and app version, so check your own Edit Profile screen rather than assuming a list applies to you.
The method you pick matters more than most people think. A supporter who has to download a new app or create an account just to send $5 will abandon the process more often than one who can tap Apple Pay and confirm with Face ID in three seconds. That gap between “willing to tip” and “actually tipped” is almost entirely about friction, not generosity.
A few practical notes on formatting and choice:
- Double-check your Venmo and Cash App usernames match your public profile exactly, including capitalization.
- If you have a PayPal.me link, use the full URL, not just your username.
- Consider listing two options instead of one. Some supporters have Apple Pay set up but not Venmo, and vice versa.
- A dedicated link service like Tipper consolidates Apple Pay, Google Pay, and card payments into a single one-click page instead of routing to separate apps.
Pro Tip: Test every payment link yourself from a phone that isn’t logged into your own accounts. It’s the only way to catch a broken username before a supporter does.
Where Should You Put Your Tip Link, and How Often Should You Mention It?
Your bio and your pinned post are the two spots that actually convert, and for a specific reason: they’re visible without requiring the visitor to scroll through your timeline or catch a tweet at the right moment, as suggested by practical guidance on using profile bios and pinned posts from Link in Bio Hub.
The mistake most new creators make is leading with the ask. A tweet that opens with “Tip me here” and a link tends to underperform posts that lead with value, because the link itself eats into the punch of the first sentence and reads as a pitch before it reads as content. Twitter’s own character economics reward front-loading your hook and pushing links toward the end of a post, not the start.
A better structure looks like this:
- Pin a post that teaches something useful or shares a genuinely interesting take, then mention the tip link as a secondary line, not the headline.
- Use your bio for the permanent, always-visible link, since that’s where curious new followers look first.
- Reply to your own threads with something like “If this helped, the tip jar’s in my bio” rather than repeating the ask in every original post.
- Space out direct mentions. A tip request in every third or fourth post reads as promotional; one every couple of weeks paired with strong content reads as an update.
Sprout Social’s research on tipping etiquette backs this up directly: framing a tip as appreciation for value already delivered, rather than a request made before you’ve built any goodwill, measurably increases follow-through. That’s a sequencing problem, not a persuasion problem. Earn the relationship first through replies and useful posts, then let the tip option sit quietly where people can find it.
How Do You Verify Your Tip Link Is Actually Working?
Don’t assume the toggle worked just because the app didn’t show an error. Check it the way a stranger would encounter it.
- Open your profile from a browser you’re not logged into, or ask a friend to pull it up on their phone, and confirm the money icon appears next to your name.
- Tap the icon yourself and walk through what a supporter sees. Does it list the payment options you expect, and do the links land on the right accounts?
- Send yourself or ask a friend to send a small test tip, a dollar or two, through each connected method to confirm the money actually arrives.
- If a tip fails or the icon is missing, go back to Edit Profile, re-check your username formatting for typos, and re-save. A mismatched username is the single most common cause of a failed payment.
- If the icon still won’t appear after re-saving, log out and back into the app entirely. Cached profile data sometimes prevents the icon from updating on the first try.
Testing before you promote the link matters more than testing after. A broken tip flow discovered by a supporter, rather than by you, usually means that supporter doesn’t try again.
Why a Frictionless Link Changes the Outcome
That matters for the small, spontaneous tips that make up most creator income, the $3 and $5 gestures sent in the moment right after someone reads something useful. Anything that adds a signup screen kills a chunk of those.
A supporter who has to leave the app, install something new, and create a login before paying you $5 is a supporter who, more often than not, just closes the tab instead.
Creators who pair a pinned, value-first post with a one-tap link tend to see steadier tip flow than those who post the link cold. Add a short thank-you note or video reply through Tipper after a tip lands, and the relationship compounds. Supporters who feel personally acknowledged tip again.
What Should You Know About Privacy When Turning on Tips?
Enabling Tips means putting a payment identifier, a Cash App tag, a Venmo handle, a PayPal.me link, in front of anyone who visits your profile, including people who don’t follow you. That’s a different exposure level than posting content, so it’s worth thinking through before you flip the toggle.
Your payment username is not the same as your bank details, but it does let a stranger find your public payment profile, which on some apps shows a transaction history or friend list unless you’ve locked that down separately. Check your Venmo and Cash App privacy settings independently of your Twitter settings; making a payment string public on Twitter does nothing to protect what’s visible once someone clicks through.
Avoid connecting a payment account that’s tied to your real name if you post under a pseudonym, since some services display your registered name at checkout regardless of your display name on Twitter. A few practical habits reduce risk here: use a payment handle you don’t rely on for private transactions with friends and family, review each connected app’s own privacy settings before saving your profile, and periodically confirm nothing has changed after an app update. A link service that doesn’t require the sender to create an account, like Tipper, also reduces the amount of your payment history a stranger can browse, since the transaction happens on a page you control rather than inside someone else’s app.
What Happens After Someone Sends You a Tip?
Once your Tips setup is live, the actual receiving process happens almost entirely inside whichever payment app you connected, not inside Twitter itself. Twitter doesn’t hold or move the money; it’s purely a signpost pointing to your Cash App, Venmo, or PayPal account.
That means your notifications come from the payment app, not from Twitter. If someone sends $5 through Venmo, you’ll get a Venmo notification, and it may not mention Twitter at all unless the sender leaves a note referencing your post. This disconnect trips people up early on. Check your connected apps directly rather than expecting Twitter to alert you when a tip lands.
Payout timing follows each individual service’s own schedule, not a unified Twitter payout system. Cash App and Venmo balances are typically available instantly or within one to three business days for a bank transfer, depending on which transfer speed you choose, while PayPal balances can be withdrawn on your own schedule. A platform like Tipper, by contrast, handles the tip and the notification (including any thank-you note or video the sender attaches) in one place, so you’re not piecing together where a payment came from across three different apps.
It’s worth checking each connected service weekly at minimum, especially early on, so a tip doesn’t sit unnoticed for weeks because you weren’t watching the right app.
Who Can Turn on Twitter Tips?
Twitter’s Tips feature isn’t universally available the moment you create an account. It rolled out gradually after its 2021 launch, and access has historically depended on account age, region, and whether Twitter has flagged the account for policy violations. A brand-new account created yesterday may not see the Tips option at all yet.
Beyond eligibility timing, the feature itself carries restrictions worth knowing before you build a promotion plan around it. Accounts that violate the General Tipping Policy, soliciting tips in exchange for prohibited content, misrepresenting what a tip funds, or using the feature for scams, risk having it disabled. Twitter also doesn’t guarantee every payment provider is available in every country, so a creator outside the US or a handful of other markets may find Cash App or Venmo simply absent from their options, leaving PayPal or a third-party link as the practical fallback.
There’s also a subtler limitation: Tips is a pass-through to external services, so if you’re not eligible for a Cash App or Venmo account for any reason, age, region, banking access, you won’t be able to use that particular option regardless of whether Twitter’s own feature is enabled. This is where a service like Tipper offers a workaround, since its personalized link doesn’t require the supporter to have any specific app installed and doesn’t require the creator to hold accounts with multiple regional payment providers.
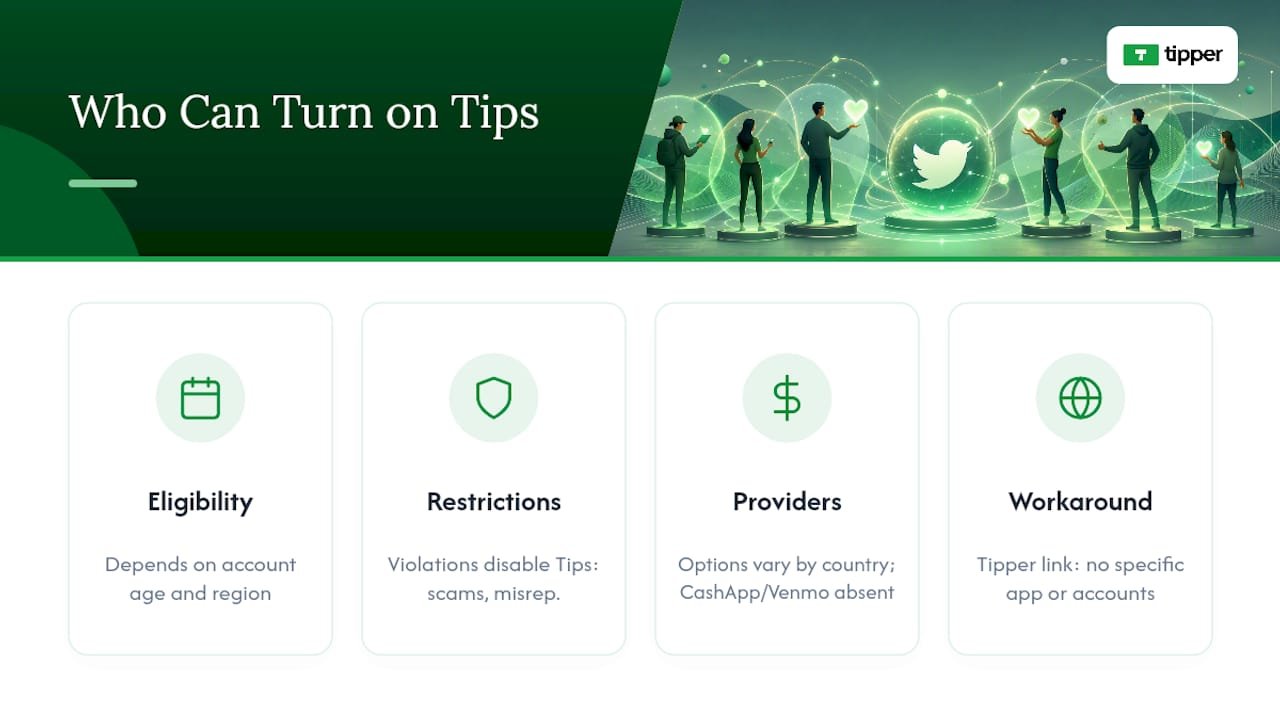
What Does It Cost to Receive Tips?
Twitter itself doesn’t charge a platform fee for using the native Tips feature, but that doesn’t mean tipping is free. Every payment still routes through a third-party processor, and each one has its own cost structure that applies whether the tip comes through Twitter, a QR code, or a direct request.
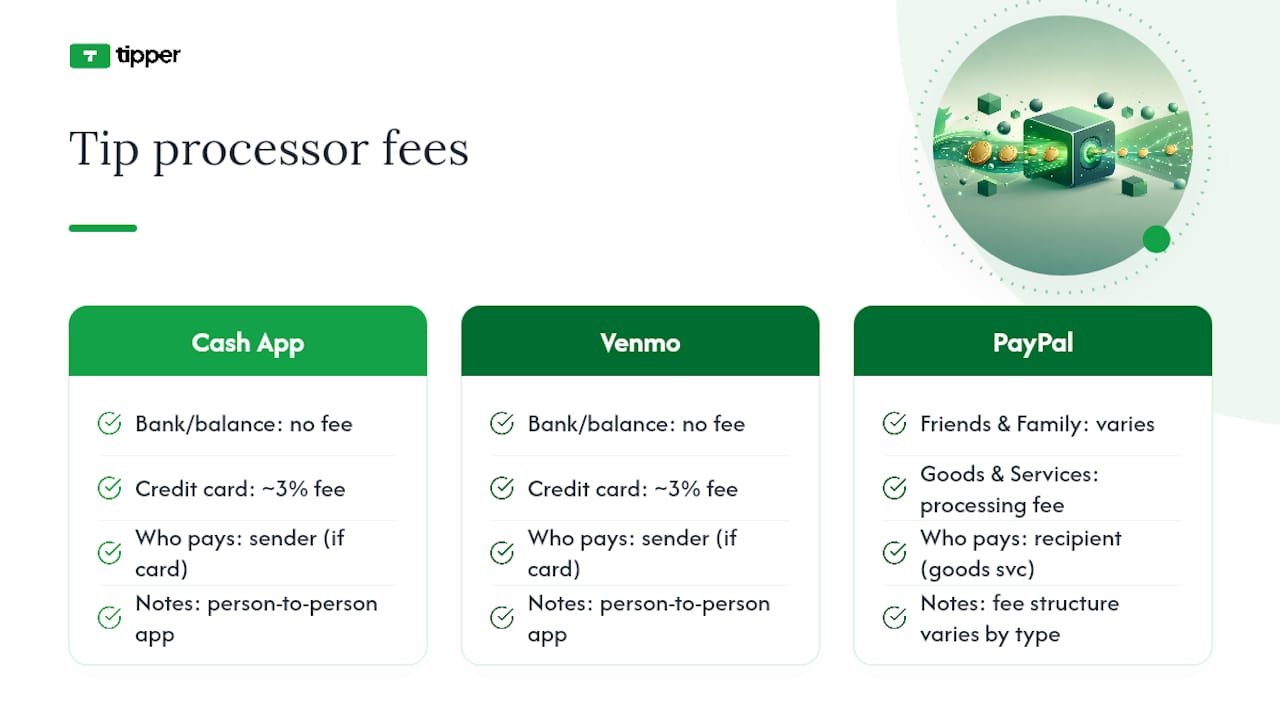
Cash App and Venmo generally process person-to-person payments funded by a bank account or balance without a fee, but a fee typically applies when the sender pays with a credit card, often in the range of 3%, charged to whoever initiates the payment depending on the app’s current terms. PayPal’s fee structure varies by transaction type and whether the payment is sent as “friends and family” or “goods and services,” with the latter carrying a processing fee absorbed by the recipient in most cases.
This is where the math shifts depending on your setup. Compare that against a native Tips setup where you might unknowingly lose a percentage to card processing fees you never explicitly agreed to, buried in the payment app’s own terms rather than Twitter’s.
The Setup Advice Nobody Emphasizes Enough
Most tutorials treat enabling Tips as the finish line. It’s the easy part. The actual leverage sits almost entirely in what you post around the link, not in which toggle you flip.
The conventional wisdom, “add the link, mention it often,” gets the sequencing backward. Buffer’s own guidance on link-first posts confirms what most creators discover the hard way: a tweet that opens with an ask reads as a pitch, and pitches get scrolled past. The creators who build steady tip income are the ones who treat the link as something supporters discover after they’ve already gotten value, not something they’re pitched before they know you.
If you take one thing from this guide, prioritize the five minutes of setup, then spend real time on the pinned post and bio placement rather than treating those as afterthoughts. A perfectly configured Tips toggle attached to a spammy timeline still won’t convert. A modest setup paired with genuinely useful, consistent posting will outperform it every time.
— Tipper
Get Your Tip Link Running Without the App-Juggling
Tipper skips the part where a supporter has to hunt down your Venmo, install Cash App, or create an account just to send you $5.
That matters most for the creators this guide is written for: people collecting small, frequent tips rather than occasional large ones, where every extra step between “I want to tip you” and “payment sent” costs you money. Tipper also lets you send a thank-you note, photo, or video back to each supporter, which the native Twitter flow simply doesn’t offer. If you’ve already built the habit of pointing followers to a tip link, set up a Tipper page and swap it into your bio in place of a scattered list of payment handles.
Sources
- How to Use Twitter (X): Complete Beginner’s Guide for 2026 – Buffer
- Introducing Tips – Blog – Twitter
- How to Enable Twitter Tip Jar – TryPostBase
- Twitter tips best practices – Sprout Social
FAQ
How do I add a tip link on Twitter?
Go to Edit Profile, open Tips, accept the tipping policy, toggle Allow tips on, and enter your payment usernames or links, then save and confirm the money icon appears on your profile.
What is the 4-1-1 rule on Twitter?
It’s a content-mix guideline suggesting that for every four value-driven or entertaining posts you share, post one soft promotional message and one direct ask, keeping self-promotion, including tip requests, a small minority of your overall posting.
How do I get a link to a specific Twitter post?
Tap the share icon on the tweet and select “Copy link to Tweet,” or click the timestamp on the post to open it individually, then copy the URL from your browser’s address bar.
How do I get more tips on Twitter?
Lead with genuinely useful or entertaining content, place your tip link in your bio or a pinned post rather than in every tweet, and use a frictionless payment option like Tipper so supporters can tip in one tap without creating an account.
Recommended

Instagram Tipping: How Creators Get Paid With Gifts and Badges
Instagram tipping means fans can send creators money directly through Gifts on Reels or Live Badges during broadcasts. Both convert into real payouts once you connect a payout account. The fastest path forward: open your Professional Dashboard, check eligibility, and turn on Gifts if it’s available to you.
TL;DR:
- Creators need to have a professional account and meet follower and regional eligibility criteria to turn on Gifts or Badges features.
- Instagram pays about $0.01 per Star sent via Gifts, but app store fees reduce actual earnings, especially on larger tips.
- Both Gifts and Badges are driven by different user habits: Gifts favor frequent Reels posting, while Badges are better for regular live streamers.
- Using a personalized tipping link off-app can help supporters give larger tips directly, bypassing platform fees and increasing actual earnings.
- Consistent engagement and active promotion of tipping features significantly boost support from followers.
Table of Contents
- What Instagram Tipping Features Actually Do
- How Do You Qualify for Gifts and Badges?
- What Do Creators Actually Earn From Tips?
- How Can You Get More Tips on Reels and Live?
- When Does an Off-App Tipping Link Make Sense?
- Building Tips Into a Real Income Strategy
- Get Paid Directly With a Tipper Link
- Sources
- FAQ
What Instagram Tipping Features Actually Do
Instagram tipping comes in two distinct forms, and confusing them will cost you money and momentum. Gifts work on Reels: fans buy Stars, a virtual currency purchased inside the app, and send them on any Reel through the Send Gift button. It’s asynchronous, meaning a fan can tip a Reel you posted three weeks ago while scrolling at 2 a.m. Live Badges only work during live broadcasts. A viewer buys a badge, and it shows up next to their name in the comment thread instantly, giving you the chance to shout them out on camera.
The mechanics shape who should focus on what:
- Gifts favor consistent Reels posters. If you upload multiple times a week, Gifts accumulate quietly in the background without you doing anything extra.
- Badges favor regular live streamers. The real-time recognition is the entire draw, so if you rarely go live, badges will sit unused as a feature.
- Badges tend to convert better per interaction because the buyer gets instant social proof (their name lighting up on screen), while Gifts rely on the fan feeling generous after watching a clip.
Neither replaces the other. Most active creators eventually run both, since they serve completely different viewing habits.
How Do You Qualify for Gifts and Badges?
Instagram doesn’t hand tipping access to every account. You need a professional account (Creator or Business), and Meta reviews follower counts, age, and location before turning on either feature. Typical thresholds run in the low hundreds of followers for Gifts and the low tens of thousands for Badges, though Meta adjusts these as it rolls features out by region.
Here’s the setup sequence that actually works:
- Switch to a professional account if you haven’t already, under Settings.
- Check your Professional Dashboard for a Gifts eligibility notice; toggle it on if it appears.
- Confirm you’re 18 or older and located in an eligible country since Instagram restricts payouts by region.
- Set up payouts by linking a bank account or PayPal and submitting tax documentation. In the US, that means a completed W-9.
- Confirm your payout minimum of $25 before expecting your first deposit.
- Enable badges separately inside your Live settings once you meet the follower threshold.
If Gifts or Badges never appear as an option, the usual culprits are a personal (not professional) account, a recent community guidelines strike, or simply not yet qualifying by follower count.
Pro Tip: Check your Professional Dashboard every few weeks even if you were previously ineligible. Meta rolls these features out gradually by account activity and region, so a “not available” status today can flip without warning.
What Do Creators Actually Earn From Tips?
The published rate is straightforward: Meta pays creators $0.01 per Star a fan sends through Gifts. Badges work differently, sold in price tiers that start at $0.99 and climb from there depending on the tier a viewer selects.
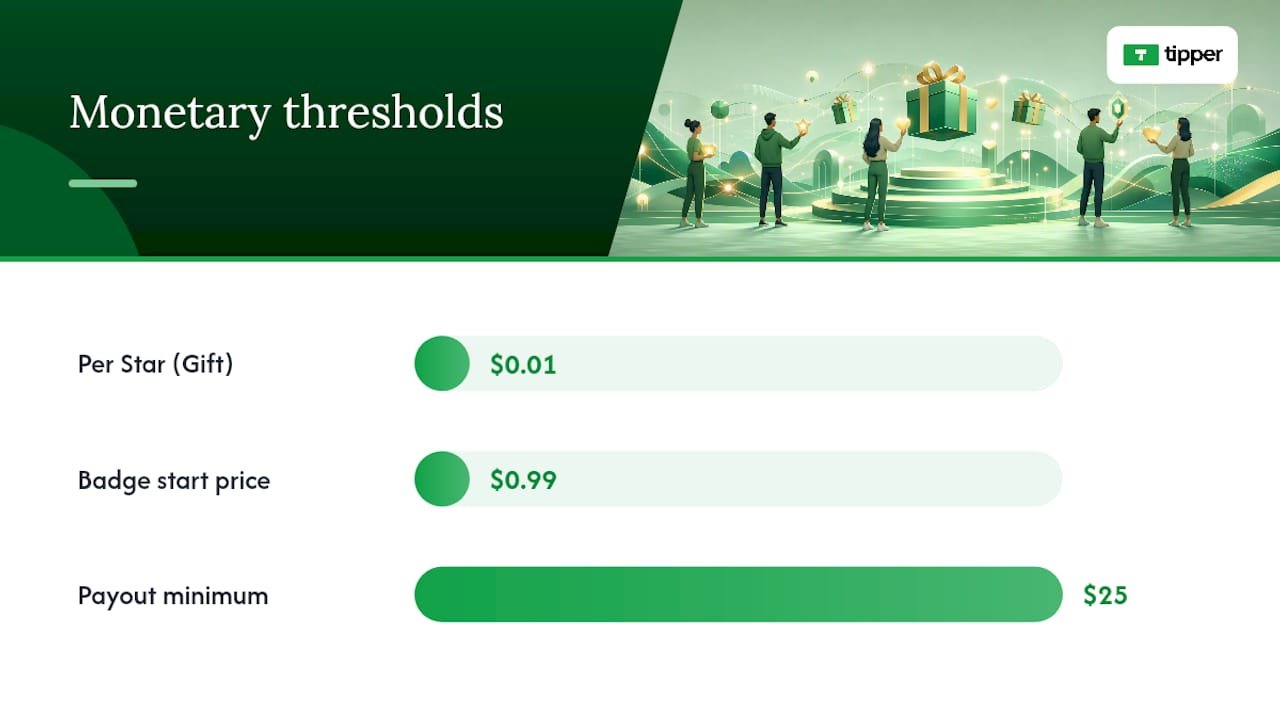
The gross number isn’t what lands in your account, though. In-app purchases run through Apple’s or Google’s payment systems, and those platforms take a cut of roughly 30% on the purchase side before Stars or badge revenue ever reaches Instagram’s ledger. Meta itself doesn’t add an extra platform fee on top of that for badges, but the app-store cut still shapes what a fan’s dollar is actually worth to you.
Payout logistics matter just as much as the rate:
- Payouts process on a monthly cycle, generally around the 21st.
- You need a $25 minimum balance before Instagram releases anything.
- US creators file a W-9 for tax reporting, and earnings count as taxable income.
A nano creator posting a few Reels a week might see tips amount to grocery money. A micro creator with an engaged live audience could see meaningfully more. For most people, though, tipping supplements brand deals and subscriptions rather than replacing them, since creators generally rely on stacked income streams rather than any single source.
How Can You Get More Tips on Reels and Live?
Fans rarely tip unprompted. They tip when a creator makes the ask feel natural instead of desperate.
- Say it out loud during Lives. A simple “if you’re enjoying this, badges show up right in the comments” works better than a hard sell.
- Use text overlays on Reels that mention Gifts without derailing the content itself.
- Announce new features in your Stories the first time you enable Gifts or Badges, since a lot of your audience won’t notice the button otherwise.
- Thank tippers by name, live, the moment their badge appears. That immediate acknowledgment is what makes Badges convert better than almost any other prompt.
- Pin a comment during Lives thanking recent supporters to keep the momentum visible to new viewers.
- Follow up in DMs for larger Gifts, and send a Story shout-out for repeat supporters.
Your Instagram Insights will tell you which Reels or Live topics actually drove Gifts, not just views. Creators who treat that data seriously, testing formats and adjusting based on what earns tips rather than just what earns likes, tend to build steadier tipping habits among their audience over time.
Pro Tip: Recognition compounds. A fan who gets a genuine thank-you the first time they tip is far more likely to tip again than one who sends a Gift into the void.

When Does an Off-App Tipping Link Make Sense?
Native Gifts and Badges are frictionless for small, spontaneous tips, but they’re not your only option once a supporter wants to give more. Tipper lets creators generate a personalized tip link or QR code that fans can pay through instantly, using Apple Pay or Google Pay, with no account required on their end.
That matters because routing larger or recurring payments off-app sidesteps the app-store fees that eat into Stars and badge purchases. Creators also keep 100% of what comes through Tipper, which changes the math meaningfully on a $50 tip compared to the equivalent in Stars.
A practical hybrid approach:
- Keep Gifts and Badges on for casual, in-the-moment tipping during Reels and Lives.
- Drop your Tipper link in bio, Stories, or during a Live when you want to invite a bigger, direct contribution.
- Use Tipper for audiences or platforms where native tipping isn’t available at all, like a podcast or a newsletter tied to your Instagram presence.
Running both isn’t redundant. It’s covering two different moments in how someone decides to support you.
Building Tips Into a Real Income Strategy
Creators who treat tipping as a bonus, not a backup plan, tend to build it into something sustainable. The mistake we see most often is over-asking, mentioning tips in every single post until it reads as pressure instead of appreciation. The second mistake is worse: creators enable Gifts, forget to finish payout setup, and leave earnings stuck in limbo for months.
Stack your income sources deliberately. Native tipping catches the casual, impulsive supporter. A direct link catches the fan who wants to give more and skip the app-store cut entirely. Neither works if you treat it as an afterthought instead of a real part of how you get paid.
— Tipper
Get Paid Directly With a Tipper Link
Native Gifts and Badges are great for casual support, but if you want fans to send you a real tip without app-store fees eating into it, Tipper gives you a direct alternative. Set up a personalized link or QR code in minutes, and supporters can pay instantly with Apple Pay, Google Pay, or a card, with no account or sign-up required on their end.
You keep 100% of what comes through, and every tip can carry a thank-you note, photo, or video back to the person who sent it. That’s the kind of connection Stars and badge tiers can’t replicate. If you’re ready to add a direct option alongside your native Instagram tools, create your tipping link and drop it in your bio today.
Sources
FAQ
What is the 5-3-1 rule for Instagram?
It’s a posting framework suggesting five pieces of curated content, three original posts, and one video per week to keep an account active without burning out on content creation. It has nothing to do with tipping eligibility, but consistent posting under a rhythm like this helps Gifts accumulate since more Reels means more chances for fans to tip.
What is the 3-2-1 rule on Instagram?
It’s a content-mix guideline: three engagement-focused posts, two educational posts, and one promotional post per week. Creators who diversify content this way tend to keep audiences engaged longer, which supports both organic reach and tipping activity over time.
How do I start receiving tips on Instagram?
Switch to a professional account, check your Professional Dashboard for Gifts eligibility, and set up your payout method with tax information. Once approved, you can also enable Live Badges separately if you meet the higher follower threshold.
What are the best tips for posting on Instagram to encourage tips?
Announce new tipping features in Stories, thank supporters by name during Lives, and use text overlays on Reels that mention Gifts without disrupting the content. Consistency matters more than any single tactic, since regular posting gives fans more opportunities to tip.
Can I use both Instagram Gifts and an off-app tipping link like Tipper?
Yes, and many creators run both simultaneously. Native Gifts and Badges handle small, impulsive tips inside the app, while a Tipper link works better for larger contributions since it avoids app-store fees and lets creators keep 100% of what they receive.
Recommended
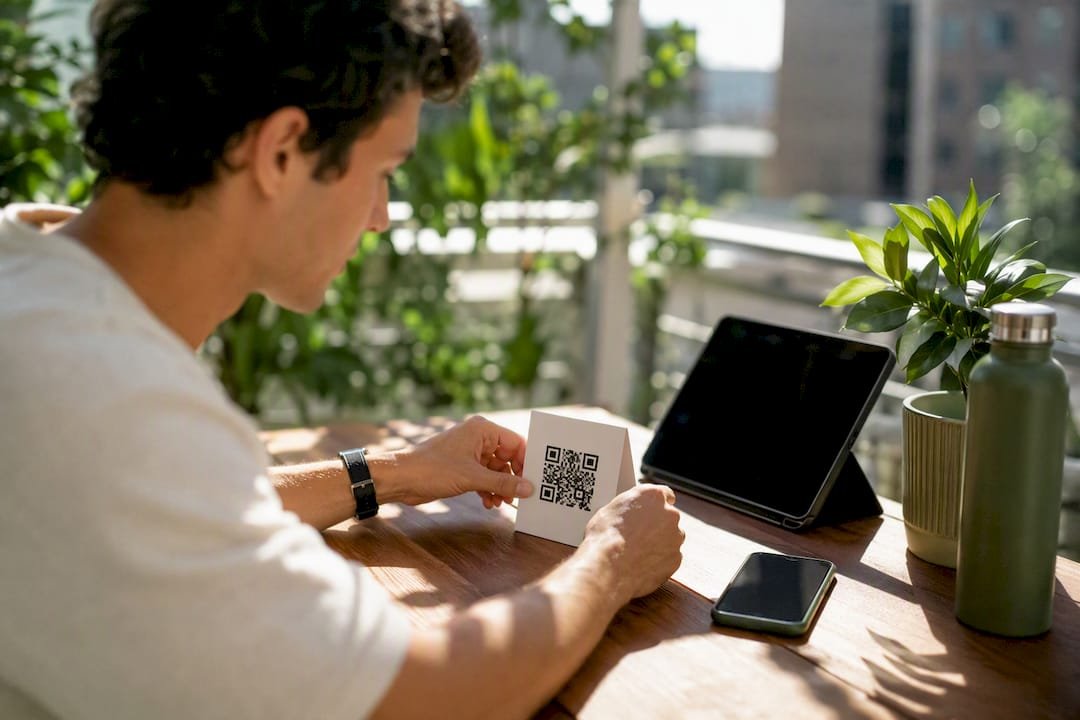
How to Set Up Payment Processing for Tips as a Creator
The fastest way to accept gratuities is a personalized tip link or QR code that supports Apple Pay, Google Pay, and card payments, no account needed on the sender’s end. Set one up today, run a $1 test tip through it, and label every prompt “optional” or “voluntary” so it stays classified as a tip rather than payment for access or services.
Two moves matter most before you promote your link anywhere:
- Create your tip page or QR code and confirm Apple Pay/Google Pay both trigger correctly.
- Write your call-to-tip copy so it reads as clearly voluntary, not a paywall or condition of access.
On taxes: track net receipts separately from gross, since platform fees get deducted before the money reaches you, and save your monthly statements. You’ll need them whether a 1099-K arrives or you’re reporting the income yourself.
Key Takeaways
Accepting tips successfully comes down to choosing a direct payment rail, keeping the ask genuinely voluntary, and separating gross tips from net deposits for tax purposes.
| Point | Details |
|---|---|
| Choose a direct rail | Personalized links and QR codes with wallet support net more than platform-native tools after fees. |
| Keep the ask voluntary | Use “optional” phrasing and place tip prompts after content, not before, to align with IRS examples. |
| Track gross versus net | Fees get deducted before payout, so log both figures separately for accurate tax reporting. |
| Save records for three years | Export monthly statements and fee breakdowns from every rail you use. |
| Use Tipper for setup | Tipper offers no-account sending and Apple Pay/Google Pay support for creators. |
Table of Contents
- Practical Methods for Payment Processing for Tips
- How Much of a $5 Tip Do You Actually Keep?
- Setting Up a Tip Link, QR Code, and Payouts
- Wording and Placement That Keep Tips Voluntary
- Bookkeeping and Tax Steps for Tip Income
- What Creators Get Wrong About Tip Compliance
- Start Collecting Tips Without Asking Supporters to Sign Up
- Sources
- FAQ
Practical Methods for Payment Processing for Tips
Your choice of rail affects both what you keep and how easy taxes are later. Here’s how the main options stack up.
Personalized tip links work anywhere you can paste a URL: a bio, a video description, a Discord pin, an email signature. They’re the most portable option because they don’t depend on which platform the viewer is using.
QR codes solve the in-person problem: a table tent, a business card, a tip jar sticker. A customer scans, pays, and walks away in under fifteen seconds with no app download required.

Apple Pay and Google Pay buttons cut friction to almost nothing since the payment method is already saved on the phone. That one-tap flow is a big reason mobile wallet tipping converts better than manual card entry for spontaneous, low-dollar tips.

Platform-native tip tools (built into a streaming or social app) are convenient because they’re already there, but they usually take a larger cut and report the income under the platform’s own rules, not yours.
Stream overlays and in-video prompts work best as a nudge, not the mechanism itself, pointing viewers to your link or QR rather than trying to process payment inline.
- Direct links: most portable, best for cross-platform audiences
- QR codes: best for in-person, no typing required
- Wallet buttons: fastest checkout, highest completion rate
- Platform-native tools: easiest to enable, costliest long-term
How Much of a $5 Tip Do You Actually Keep?
A typical card transaction carries a processing rate around 2.9% plus a fixed fee near $0.30, on top of whatever percentage the platform itself takes before payout.
Pro Tip: Run the same $5 tip through both a direct-link rail and a platform-native tool once, side by side. The gap in what lands in your account tells you more than any fee schedule.
On a direct processing rail, a $5 tip loses roughly $0.45 to card processing, leaving you close to $4.55. Route that same $5 through a platform that also takes a revenue-share cut on top of processing, and you can lose another 5 to 20 percent depending on the platform, landing closer to $3.80 to $4.30.
- Card processor rate: typically 2.9% + a fixed per-transaction fee
- Platform take-rate: separate from processing, and stacks on top of it
- Fixed fees hurt small tips disproportionately more than large ones
The reporting side matters just as much as the math. Processors and platforms both report gross payment volume, not your net take, so reconciling gross figures against fee statements is the only way to know what you actually earned versus what shows up on paper.
Setting Up a Tip Link, QR Code, and Payouts
Here’s the sequence that gets you live in under 30 minutes.
- Pick a direct tip rail first. A rail that pays you directly, rather than pooling funds inside a platform, gives you cleaner net receipts and simpler records come tax season.
- Build your tip page. Add your name or brand, a short thank-you line, two or three preset amounts ($3, $5, $10), and a custom-amount field. Tipper’s tip page setup lets you add a text, photo, or video thank-you note that plays after the tip lands, doing more for repeat tipping than a generic receipt ever will.
- Generate your QR code. Most tip-link tools generate this automatically from your page URL. Print it or screenshot it, then scan it yourself on a second phone to confirm it opens the right page.
- Enable Apple Pay and Google Pay. These should show up automatically on supported tip pages. Run one real test transaction, even a small one, before sharing the link publicly.
- Set up payouts. Add your bank details, complete identity verification (standard KYC for any payment platform), and confirm your payout schedule so you know exactly when funds actually hit your account.
Pro Tip: Test your link on both an iPhone and an Android device before posting it anywhere. A broken wallet button on one operating system will quietly cost you tips you’ll never know you missed.
Wording and Placement That Keep Tips Voluntary
How you phrase the ask affects both conversion and your legal footing. The IRS’s recent guidance on digital creator tips makes voluntary, post-access payments more clearly classifiable as tips rather than compensation, which is exactly the distinction you want on your side.
- Use phrasing like “If you’d like to leave a tip” or “Completely optional” near every prompt.
- Place your link where it doesn’t gate content: a pinned comment, a post-stream overlay, or a printed QR on a receipt, never a wall before access.
- Offer three preset amounts plus a custom field. Round numbers convert better than odd ones, and a visible custom option signals you’re not fishing for a specific figure.
- Never preselect or pre-check a tip amount at checkout. That single UX choice is what turns a tip into something that looks compulsory.
Bookkeeping and Tax Steps for Tip Income
Tip income is taxable regardless of whether a form arrives in your mailbox, so build your bookkeeping around your own records, not just what a platform sends you.
Form 1099-K reporting covers gross payment volume, including cash tips reported in Box 1c, while 1099-NEC or 1099-MISC typically covers payments for services rather than voluntary gratuities. That distinction, voluntary tip versus paid compensation, is exactly why your on-page wording matters for how income gets classified in the first place.
- Export monthly statements from every rail you use and store them somewhere searchable.
- Log gross tips and net deposits separately; the difference is your fee history.
- Keep a running note of which platform charged what, since rates change.
- Save everything for at least three years in case of a reporting question.
Creator tax guidance generally treats tip income as self-employment earnings, which means quarterly estimated payments and, per TurboTax’s guidance for content creators, reporting through Schedule C. Many creators set aside 25 to 30 percent of net tip income for taxes and bring in a CPA once volume gets consistent month over month.
What to Verify Before You Trust a Tip Rail
Direct processors typically pay out in 1 to 7 business days; platform-native tools often run slower. Confirm the rail uses tokenized card data (never stores raw numbers) and is PCI compliant. Decide upfront whether tips stay anonymous or record sender details, since some supporters expect to send a tip without creating an account at all.
What Creators Get Wrong About Tip Compliance
Most advice on this topic treats tip collection as purely a UX problem: pick a nice-looking button, add some preset amounts, done. That’s backwards. The wording problem comes before the design problem. A gorgeous tip page with checkout copy that implies payment is expected, or worse, required, undoes any compliance benefit from choosing a “tip” rail at all.
The overlooked piece is timing. Tips requested before someone accesses your content read differently than tips requested after, and that sequencing shows up directly in how the IRS’s own examples treat voluntary payments. Ask for support after you’ve delivered value, not as a condition of it.
If you take one thing from this guide, take this: set up your link, make the ask genuinely optional in both wording and placement, and keep your fee records separate from day one. Everything else, overlays, preset amounts, wallet buttons, is optimization on top of a foundation that has to be right first.
— Tipper
Start Collecting Tips Without Asking Supporters to Sign Up
Tipper gives creators a personalized link and QR code that accepts Apple Pay, Google Pay, and card payments, and the person sending a tip never has to create an account. That removes the single biggest drop-off point in tip collection: the moment someone has to sign up just to give you money.
Every tip page can include a thank-you note back to the supporter, in text, a photo, or a short video, which turns a one-time tip into a reason someone comes back. Set up your personalized tip page today, generate your QR code, and send yourself a $1 test tip before you share the link anywhere public.
Sources
FAQ
Do I Have to Report Tips If I Don’t Get a 1099-K?
Yes. Tip income is taxable whether or not a form arrives, and you’re responsible for reporting it based on your own records.
What Makes a Tip “Voluntary” Instead of a Payment?
Voluntary tips are requested after access is granted, with clear optional wording and no preselected amount, which is the distinction the IRS’s guidance draws between tips and compensation.
Does Tipper Require Supporters to Create an Account?
No. Tipper lets supporters send a tip through Apple Pay, Google Pay, or a card without signing up, which removes a major source of drop-off at checkout.
How Much Should I Set Aside for Taxes on Tip Income?
Many creators set aside a substantial portion of their net tip income as a reserve for taxes, since it’s generally treated as self-employment earnings subject to quarterly estimated payments.
Which Fees Reduce a Small Tip the Most?
Fixed per-transaction fees hurt small tips disproportionately, since a $0.30 charge takes a much bigger bite out of a $5 tip than a larger one.
Recommended

The Fastest Way to Add an Instagram Tip Link
The quickest way to start collecting tips from your Instagram audience is to create a dedicated tip link, like the one Tipper generates, and drop it into your bio. A tip link is different from a regular URL: it opens a mobile-first checkout where a supporter can pay with Apple Pay, Google Pay, or a card in a few taps, with no account or app download required on their end. You get a notification the moment someone tips, and the money lands in your account directly.
Here’s what that setup actually gets you:
- A checkout built for phones, since almost every click will come from someone scrolling Instagram on their phone
- Instant alerts so you know exactly when and how much someone sent
- Direct payouts without waiting on a middleman platform to release your earnings
The next move is simple: create your tip page, copy the link, and paste it into your Instagram bio or add it through the Links editor in your profile settings.
Key Takeaways
A working Instagram tip link needs a no-account checkout, correct payout setup, and placement in your bio’s top link slot to actually convert.
| Point | Details |
|---|---|
| Use a dedicated tip page | Choose a provider like Tipper that supports Apple Pay, Google Pay, and cards without requiring the sender to sign up. |
| Claim the top bio link slot | Instagram’s Links editor allows up to five links, but the first one gets the most visibility. |
| Test before promoting | Send yourself a small test tip and confirm the notification, receipt, and payout all arrive correctly. |
| Confirm payout details early | Missing bank or tax information can delay or forfeit funds that already came through. |
| Tipper keeps creators fully paid | Creators keep 100% of their earnings on Tipper, with thank-you notes and videos available for supporters. |
Table of Contents
- How to Set Up Your Instagram Tip Link
- Where to Put Your Tip Link on Instagram
- Getting Tips Without Annoying Your Followers
- What to Check Before You Promote Your Link
- Test Your Tip Link Before You Go Live
- Why Tipper Fits What Creators Actually Need
- The Real Priority Creators Miss
- Start Collecting Tips With Tipper Today
- Sources
- FAQ
How to Set Up Your Instagram Tip Link
Getting a tip link live takes less time than editing a Reel. Here’s the order that works.
-
Pick a tip page provider and create your account. Tipper is built specifically for this job, letting anyone send a tip without creating an account of their own, which removes the single biggest source of drop-off on payment pages.
-
Customize your page. Add your display name, a profile photo people recognize from your Instagram grid, and a short line explaining what the tips support. Include at least one micro-tip option ($1 to $3) so first-time supporters have a low-pressure way in.
-
Connect your payment methods. Cards, Apple Pay, and Google Pay should all be active before you share the link anywhere. Bio sites with tip jar features typically route these through a processor like Stripe, and some tools let you choose between an external payment link or an integrated checkout that keeps the sender on your page instead of bouncing them to another app or site.
-
Set up payouts. Add your bank details and any required tax information now, not after your first tip arrives. Skipping this step is the most common reason creators see a payment go through but never see the cash.
-
Generate your shareable URL and QR code. Copy the link for your bio, and grab the QR version for in-person use, like a tip jar at a pop-up shop or a sticker on a merch table. If you want to track which posts drive tips, shorten the link and tag it with a UTM parameter first.
Pro Tip: Create two versions of your link before you post anything: one plain link for your permanent bio slot, and one UTM-tagged short link you swap into captions or Stories for specific campaigns. That split lets you see which content actually drives tips instead of guessing.
Where to Put Your Tip Link on Instagram
Your bio is prime real estate, and Instagram’s Links editor now lets you add up to five external links to your profile. The first link you add is the one that shows with the most visibility, so your tip link should almost always take that top slot, especially if you’re not running it through a separate link-in-bio hub.
Beyond the bio, a few placements consistently outperform a single static link:
- The link sticker in Stories, used right after a tutorial or a piece of content that clearly helped someone
- A pinned post with your tip link in the caption, so it stays visible at the top of your grid
- Direct messages, reserved for higher-value asks or one-on-one requests where a personal touch matters
Keep your link title and bio copy short and low-pressure. “Buy me a coffee” or “Send a tip if this helped” reads friendlier than “Donate here,” and it sets the expectation that tipping is optional appreciation, not an obligation. Bitly’s guidance on bio links recommends pairing one permanent bio link with trackable short links for individual campaigns, which lets you measure which specific posts actually convert into tips instead of lumping everything into one number.
Getting Tips Without Annoying Your Followers
Nobody likes a feed that feels like a nonstop ask. The creators who tip well tend to follow a pattern, not a script.
- Offer three price points. Offer three price points with low, mid, and higher options to accommodate casual supporters, regular followers, and your biggest fans.
- Use a short CTA tied to value, not guilt. “If this saved you time, leave a tip” works better than a bare “Donate now,” because it reminds people why they’d want to give in the first place.
- Time the ask around value-first content. Attach your tip link to the post where you actually delivered something useful. A tutorial, a template, or a thread that solved a real problem earns a tip request far better than a random selfie.
- Acknowledge every tip. A quick public shoutout or a private thank-you note (or video) turns a one-time tipper into a repeat one. Visible acknowledgment tends to increase repeat tipping, since it makes the transaction feel like a relationship instead of a payment.
Pro Tip: Save your best-performing CTA line and reuse it. Followers respond to consistency, and a familiar phrase like “Send a tip” builds recognition the same way a catchphrase does.
What to Check Before You Promote Your Link
A few unglamorous checks now save you a frustrating email later.
- Fees: expect a standard payment processing fee on card, Apple Pay, and Google Pay transactions, plus any platform fee your provider charges. Confirm the exact numbers in your account settings before you promote the link widely.
- Payouts: enter your bank details and tax information correctly the first time. Incomplete payout setup can delay or forfeit funds that already came through on the sender’s end.
- Privacy: make “no account required” messaging visible near your link so first-time supporters aren’t confused about what’s expected of them, and keep any privacy note short enough that people actually read it.
Test Your Tip Link Before You Go Live
Don’t promote a link you haven’t tried yourself. Run through this before it hits your bio.
- Open the link on a few different devices. Check that Apple Pay, Google Pay, and card fields all render correctly on both iPhone and Android.
- Send yourself a small test tip. A dollar is enough. Confirm you get the notification, the sender gets a receipt, and the money shows up in your payout account.
- If nothing shows up, check three things first: your payout settings, your email for a receipt you might have missed, and the transaction log in your dashboard. If it’s still missing, contact support with the transaction ID ready.
Why Tipper Fits What Creators Actually Need
Most friction in online tipping comes from asking supporters to create an account just to send a few dollars. Tipper skips that step entirely, letting anyone tip through a personalized link or QR code using Apple Pay, Google Pay, or a card, with no sign-up on the sender’s side.
The bigger draw for creators is what happens after the tip lands.
A tipping tool only earns trust if the person sending money feels zero friction and the person receiving it feels fully rewarded. That’s the gap Tipper is built to close.
A few specifics worth knowing before you set up your page:
- Thank-you messages can be sent as text, photo, or video, so appreciation feels personal instead of automated
- Notifications arrive in real time, so you know the instant a tip comes through
- Setup guidance and onboarding resources walk you through connecting payments and generating your link
The Real Priority Creators Miss
Most advice on this topic obsesses over link placement and ignores what actually determines whether someone tips: how much friction sits between the tap and the payment landing in your pocket. Creators spend hours debating whether the link sticker or the bio slot converts better, and almost no time checking whether their payout details are even filled in correctly.

That’s backward. A perfectly placed link that fails at checkout is worse than a mediocre placement with a flawless payment flow, because a failed tip rarely gets retried. Test the entire path, sender tap to your payout landing, before you worry about optimizing where the link sits.
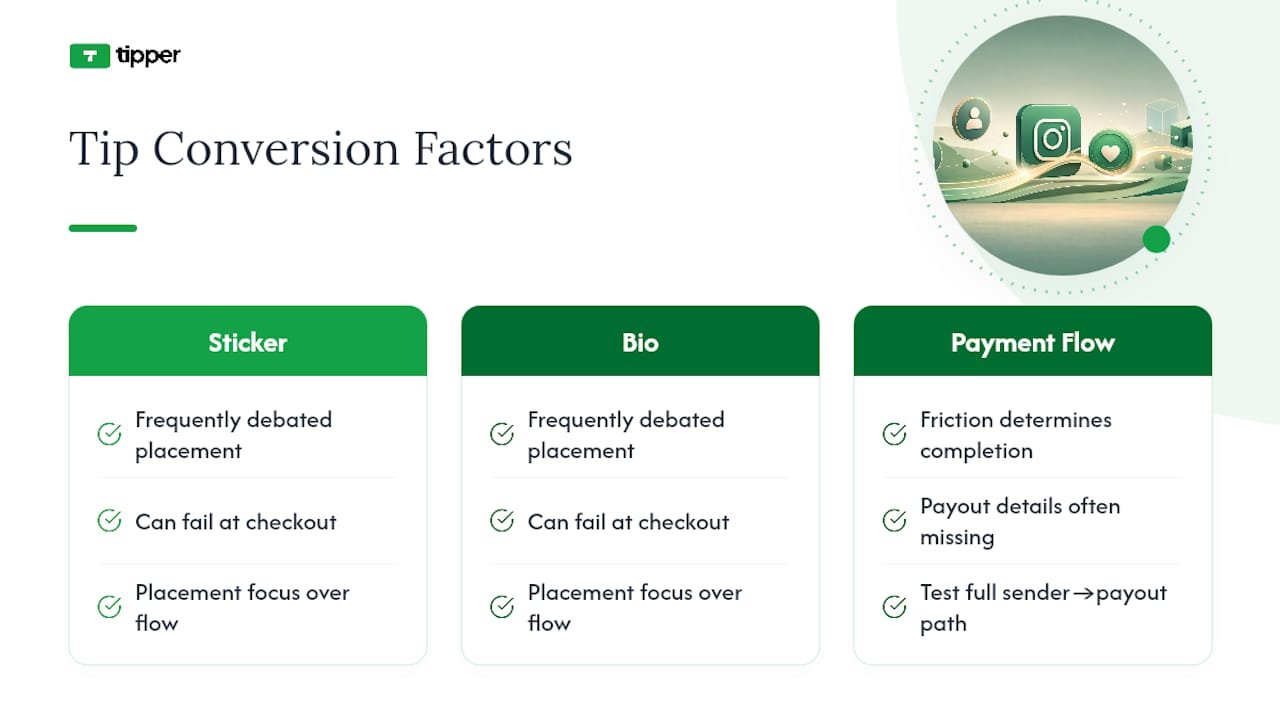
The other overrated habit is treating tip requests like a marketing campaign. The creators who build real recurring tipping income tend to ask rarely and only after delivering something worth paying for. Ask constantly, and even generous followers start to tune it out.
If you take one thing from this: fix the payment experience first, keep the ask occasional and specific, and let the placement details come second.
— Tipper
Start Collecting Tips With Tipper Today
Tipper is the alternative to juggling app downloads and account sign-ups just to collect a few dollars from a follower. Supporters tip through a personalized link or QR code using Apple Pay, Google Pay, or a card, with nothing to install and no account to create, and you keep 100% of what comes in.
Setting up takes about the same time as writing a caption. Create your page, add a short description and your suggested tip amounts, connect your payment methods, and copy your link straight into your Instagram bio. If you already run a bio hub with multiple links, you can add tipping to that setup without disrupting anything else you’re linking to. Creators who also teach or sell courses can look at platforms like Hopper for combining a linked storefront with payments in one place.
Ready to see it live? Create your Tipper page and have a working tip link ready before your next post goes up.
Sources
- How to Use Link in Bio on Instagram (Bitly)
- Instagram now allows 5 links in bio — here’s how to add them (CNET)
- Monetize your link in bio (Squarespace)
- Linktree payments: how to add payment links (Shuttle/Linktree guide)
FAQ
What Is the Easiest Way to Add a Tip Link to Instagram?
Create a tip page through a provider like Tipper, then paste the link into your Instagram bio using the Links editor or add it as your top link if you use multiple.
Do Supporters Need an Account to Send a Tip?
No. Tipper lets anyone send a tip through Apple Pay, Google Pay, or a card without creating an account first.
Where Should I Place My Tip Link for the Best Results?
Put it in the top slot of your bio, then reinforce it with Story link stickers and pinned posts tied to your most valuable content.
How Do I Know My Tip Link Is Actually Working?
Send yourself a small test tip and confirm you receive the notification, the sender gets a receipt, and the payout appears in your account.
What Fees Should I Expect on Instagram Tips?
Expect standard payment processing fees on card, Apple Pay, and Google Pay transactions, plus any platform fee, both visible in your account settings before you promote your link.
Recommended

Best Creator Tip Link Strategy: Setup, Presets, and Payouts
The best creator tip link strategy starts with an in-page tip block or a branded tip link, not a redirect to a generic donation page. Set three preset amounts, highlight the middle one, and put the link where your audience already looks: your bio, your video description, your newsletter footer. Do this today and you can collect your first tip within the hour.
Here’s the immediate playbook:
- Create your tip link or embed a tip block on your profile.
- Set three presets (a low, a highlighted middle, and a fan tier).
- Drop the link into your bio and pin it in your latest post’s link-in-bio dashboard comments.
Pro Tip: Mobile saved-payment methods like Apple Pay and Google Pay cut checkout to two taps. If your tip flow requires typing a card number on a phone, you’re losing tips before they happen.
Key Takeaways
A creator tip link strategy works best when it pairs a low-friction preset structure with a fast thank-you follow-up and consistent placement across a creator’s existing content.
| Point | Details |
|---|---|
| Pick the right category first | Validate with an external link, then upgrade to native or branded routing once repeat tippers appear. |
| Use three presets | A low, highlighted middle, and fan-tier amount converts better than a single custom field. |
| Track every placement | Add UTM tags to your bio, footer, and pinned-comment links to see which spot actually produces tips. |
| Thank supporters fast | A personal reply within 24 hours meaningfully increases the odds of a second tip. |
| Choose payout-friendly tools | Tipper lets creators keep 100% of tips beyond processing fees, with no account required for supporters. |
Table of Contents
- Choosing Your Creator Tip Link Strategy: Three Approaches Compared
- How Do You Set Up a Tip Link From Scratch?
- What Preset Amounts and Copy Convert Best?
- Where Should You Place Your Tip Link for Best Conversion?
- How Do You Turn One-Time Tippers Into Repeat Supporters?
- Which Payment Methods and Integrations Actually Matter?
- How Tipper Puts This Strategy Into Practice
- Comparing Fees, Commissions, and Payout Timing
- Keeping Tips Secure and Supporters’ Data Private
- Measuring and Improving Your Tip Link Performance
- Legal and Tax Realities of Accepting Tips as a Creator
- Does Your Tip Link Actually Work on Mobile?
- Sources
- FAQ
Choosing Your Creator Tip Link Strategy: Three Approaches Compared
Every creator tip link strategy falls into one of three buckets, and picking the wrong one for your stage costs you real money.
External hosted tip services send supporters off your page to a dedicated tipping site. They’re the fastest to set up, often live in minutes, and require zero technical work. Native or in-page tips keep the transaction on your own page or post, using a widget or block so nobody leaves your content to pay you. Branded short link routing uses a link you control (something like yourname.tip/creator) that redirects to whichever tipping destination converts best, letting you swap the backend without changing the link everywhere it’s posted.
The trade-off is speed versus control. External links win on setup speed. In-page tips win on conversion because tips blocks with quick-pick presets convert better than campaigns that require reading a goal or a tier list — supporters tap and pay without context-switching. Branded routing wins on measurement: a short link with per-platform slugs lets you re-point traffic instantly and see exactly which platform sends paying supporters.
Start where you are. If you’re testing whether your audience tips at all, validate with an external link first before investing in anything more custom. Once you see repeat tippers, upgrade to native tips or branded routing so you keep more control over the experience and the data.
- Under 1,000 followers: external link, no setup friction.
- Growing audience with repeat engagement: native in-page tip block.
- Multi-platform creator running promotions: branded short link with routing.
How Do You Set Up a Tip Link From Scratch?
Getting a working tip link live takes less time than editing your next post. Here’s the fast path.
- Pick a destination and processor. Choose a tipping platform that supports Stripe or PayPal for payouts, then connect your bank details so money actually lands somewhere.
- Set your presets. Configure three tap amounts, plus an optional custom field for outliers who want to give more.
- Write short, human button copy. Skip generic “Donate” language. Something like “Buy me a coffee” or “Tip — thanks!” performs better because it sounds like a person, not a nonprofit form.
- Place the link. Add it to your bio, embed it in a post, or paste it into your link-in-bio dashboard alongside your other links.
- Send one live test tip. Use your own card or ask a friend to send $1 so you confirm the money actually reaches your payout account before you promote it publicly.
- Add UTM tags. Tag the link by placement (bio, video description, newsletter) so you know which spot actually produces tips, not just clicks.
That last step matters more than most creators realize. Tracking from day one with UTM parameters lets you test one variable at a time, whether that’s your button copy or where the link sits on the page, instead of guessing why conversion changed.
Watch two numbers after launch: click-through rate on the link itself, and tip conversion rate once someone lands on the page. If clicks are healthy but tips are low, the friction is on your payment page, not your promotion.
What Preset Amounts and Copy Convert Best?
A structure of a small low option, a highlighted middle, and a bigger fan tier is the most common effective preset setup, and it’s not arbitrary. The middle amount anchors the decision. Most people don’t want to pick the smallest option (it feels cheap) or overthink the largest (it feels like a real financial choice), so they default to the option in the visual center.

A workable starting range looks like $2 / $5 / $10, or $1 / $3 / $5 if your audience is younger or your content is short-form. Both a low/mid/high structure with the middle highlighted show up consistently as the best-converting preset pattern. across creator tipping tools.
Button copy matters almost as much as the amount. Compare these:
- “Donate now” — reads transactional and slightly cold.
- “Buy me a coffee” — casual, low pressure, widely recognized.
- “Support my work — $5” — direct, states the ask and the amount together.
- “Tip — thank you!” — short, warm, works well on mobile where space is tight.
Should you include a custom amount field? Yes, but keep it secondary. A visible custom field next to your presets adds almost no friction and captures the rare supporter who wants to give $50 instead of $10. Making custom the default option, with no presets, does the opposite: it forces a decision instead of offering one, and decisions kill impulse tips.
Where Should You Place Your Tip Link for Best Conversion?
Placement decides whether your tip link ever gets seen, let alone clicked. The strongest spots share one trait: they show up right after someone has already gotten value from you.
- Profile bio. The first place anyone checks when they want to support you.
- End of content. A video outro, the last line of a newsletter, or a podcast sign-off, right when goodwill is highest.
- Pinned comment. On platforms where bios are buried, a pinned comment under your best-performing post keeps the link visible.
- Newsletter footer. Recurring readers see it every send, which builds familiarity without repeating the ask loudly.
- Link-in-bio dashboard. If you run a multi-link page, position the tip link above the fold, not buried under merch and socials.
Promotion rhythm matters more than promotion volume. Mention the tip link around real moments: hitting a subscriber milestone, publishing something that took unusual effort, or answering a reader’s question in depth. Thank tippers publicly when appropriate (with permission), then go quiet again. A once-weekly light mention beats a link stapled to every single post.
Pro Tip: Tag each placement with its own UTM parameter. If your newsletter footer converts three times better than your bio link, that tells you exactly where to double down next month.
How Do You Turn One-Time Tippers Into Repeat Supporters?
The first tip is nice. The second tip is the real signal, since a supporter who tips twice is far more likely to become an ongoing source of income than someone who tips once and disappears.
Respond fast and personally. A quick DM, a short thank-you video, or a shoutout (with permission) after a tip lands does more for retention than any feature you could build. Small, low-cost rewards reinforce the relationship without turning your tip page into a paywall: early access to a new video, a heads-up before you publish, or a small digital extra like a wallpaper or behind-the-scenes note.
- Send a personal thank-you within 24 hours of the tip.
- Offer one small, easy-to-deliver perk for repeat supporters.
- Track your repeat-tipper rate monthly, not just total tips collected.
A healthy early target is getting a meaningful share of first-time tippers to tip again within a couple of months. If you’re below that, your thank-you process probably needs to feel more personal, not more elaborate.
Which Payment Methods and Integrations Actually Matter?
The payment rails behind your tip link decide how many people finish the transaction they started. Saved-payment methods matter most on mobile, since a tipper who already has Apple Pay or Google Pay loaded on their phone can confirm a tip in two taps instead of typing out sixteen digits of a card number.
- Prioritize Apple Pay and Google Pay support above almost anything else on mobile.
- Expect similar percentage-based processing fees between Stripe and PayPal, with payout timing varying by provider and account history.
- Check that your billing descriptor (what shows on a supporter’s bank statement) clearly names your brand, not a generic processor string that looks unfamiliar and triggers disputes.
- Confirm your platform has a clear refund and dispute process, since even small tips occasionally get contested.
Keeping the transaction on your own page rather than redirecting off-site also preserves context and lets saved-payment methods complete the checkout faster, which is exactly why native tip blocks tend to convert better than external redirects for casual, in-the-moment tips.
How Tipper Puts This Strategy Into Practice
Tipper builds the entire strategy above into one flow. Creators get a personalized link or QR code, supporters pay with Apple Pay, Google Pay, or a card with no account required on their end, and creators keep 100% of what they earn minus standard payment processing.
A quick worked example:
- Create your Tipper link and set three presets, say $3, $7, and $15.
- Add the link to your bio and pin it under your most-viewed post.
- Send yourself or a friend a test tip to confirm the payout flow works end to end.
- Record a 15-second thank-you video and attach it to your tip page so first-time supporters see it immediately.
A tip page that shows a real thank-you message, not just a payment confirmation screen, turns a transaction into a moment of connection between creator and supporter.
That personal layer, thank-you notes as text, photo, or video, is what separates a tipping tool from a payment form. Try it with one friend before you promote it publicly, and see how the flow feels from the supporter’s side.
Comparing Fees, Commissions, and Payout Timing
Fee structures across tip link services generally fall into two categories: platform commission plus payment processing, or payment processing alone with no platform cut. The difference compounds fast for creators earning small, frequent tips rather than occasional large ones.
Most standard card processing runs in the 2.9% plus a small fixed fee per transaction range, industry-standard territory regardless of which tipping tool sits on top of it. What varies is whether the platform adds its own commission on top of that processing fee.
Payout schedules matter just as much as the fee itself if you’re relying on tips for regular income. Some platforms batch payouts weekly or on a fixed monthly date; others offer near-instant transfers to a linked debit card for an added fee. If you’re a freelancer covering rent with tip income, a platform that holds funds for two weeks before releasing them creates a real cash flow problem, even if its percentage fee looks competitive on paper.
Before committing to any tip link service, check three things: the platform commission (if any), the processing fee percentage plus fixed cost per transaction, and the standard payout timeline. A slightly higher processing fee with next-day payouts often beats a lower fee with a two-week hold, depending on how tight your cash flow runs.
Keeping Tips Secure and Supporters’ Data Private
Security on a tip link cuts two ways: protecting the creator’s payout information and protecting the supporter’s payment details. Neither should require either party to hand over more information than the transaction actually needs.
For supporters, the strongest privacy feature is simply not requiring an account. A tip link that lets someone pay with Apple Pay or Google Pay without creating a login, verifying an email, or saving a password reduces the amount of personal data exposed anywhere, and it removes the single biggest reason people abandon a tip halfway through.
For creators, look for a platform that uses established payment processors like Stripe or PayPal on the back end rather than handling raw card data itself. That matters because these processors carry PCI compliance and fraud protections that would take a small platform years to build independently. Ask, too, how the platform displays your payout details: your bank account number should never be visible to a supporter, only a masked reference or nothing at all.
Dispute and refund handling deserves attention before it becomes a problem, not after. A supporter who doesn’t recognize a charge on their statement, often because a billing descriptor is unclear, is far more likely to file a chargeback than contact the creator directly. Clear, brand-recognizable billing descriptors reduce that risk substantially. Creators should also know their platform’s stance on refunds for accidental tips, since a supporter who tips the wrong amount by mistake needs a straightforward path to a fix that doesn’t involve emailing customer support and waiting a week.
Measuring and Improving Your Tip Link Performance
A tip link without tracking is a guess dressed up as a strategy. The minimum setup is three data points: link clicks, tip conversions, and repeat-tipper rate, tracked separately for every placement where you share the link.
UTM parameters make this possible without any custom development. Tag your bio link, your newsletter footer link, and your pinned-comment link with different UTM codes, and your analytics will show you exactly which placement produces tips rather than just clicks. Instrumenting this funnel early also lets you run low-budget retargeting toward people who clicked but didn’t tip, which tends to recover conversions that a single visit misses.
Once you have baseline data, test one variable at a time. Change your button copy for two weeks and compare conversion against the prior two weeks before touching your preset amounts. Changing both at once tells you something moved, but not what moved it.
Beyond your own dashboard, visibility across the wider internet matters too. Consistent, diverse mentions of your tip link across communities, podcasts, and forums increasingly function as trust signals for AI-driven search, not just for human readers clicking through. A creator whose tip link shows up naturally in fan-run wikis, Reddit threads, or guest podcast show notes builds a kind of discoverability a paid ad can’t replicate.
Set a simple monthly review: total clicks, conversion rate, repeat-tipper percentage, and top-performing placement. Adjust one thing based on what the numbers show, then check again in 30 days.
Legal and Tax Realities of Accepting Tips as a Creator
Tips you receive through a personal link are taxable income in the United States, the same as freelance payment or ad revenue, regardless of which platform processes the transaction. The IRS doesn’t distinguish between a $5 tip from a stranger and a $500 invoice from a client; both count as self-employment income that you’re responsible for reporting.
Most payment processors issue a 1099-K form once you cross certain transaction thresholds, which vary by processor and have shifted in recent years, so check your specific platform’s current reporting rules rather than assuming last year’s threshold still applies. Even if you don’t receive a 1099-K because you’re under the threshold, you’re still legally required to report the income yourself.
Keep basic records as you go: total tips received per month, the platform’s processing fees (which are typically deductible as a business expense), and any related costs like equipment or software you use to create the content people are tipping for. A simple spreadsheet updated monthly saves a scramble come tax season.
One nuance creators miss: tips sent as a genuine personal gift with no expectation of content in return are treated differently under tax law than tips sent as payment for your work or access to it. In practice, nearly all creator tipping falls into the second category, since supporters are tipping because of content you produced, so treat it as income by default. If your situation is unusual, a licensed tax professional familiar with self-employment income is worth the consultation fee before your first filing season.
Does Your Tip Link Actually Work on Mobile?
Most tips happen on a phone, often seconds after someone finishes watching a video or reading a post, so a tip page that loads slowly or requires zooming to tap a button loses money you never see.
Test your tip page the way a real supporter would encounter it: from a social app’s in-app browser, not your desktop Chrome window. In-app browsers on platforms like Instagram and TikTok render pages differently, and a layout that looks perfect on your laptop can break, overlap, or force horizontal scrolling inside those environments.
Three checks matter most. First, confirm your preset buttons are large enough to tap accurately with a thumb, not sized for a mouse cursor. Second, verify Apple Pay or Google Pay appears as the default option on supported devices, since forcing a manual card entry on mobile is where most abandoned tips happen. Third, time how long the page takes to load from a tap. Anything over two or three seconds on a typical mobile connection will cost you supporters who simply move on.
Keep the page itself short. One clear thank-you line, three preset amounts, and a button are enough. A tip page with multiple sections, a long creator bio, and unrelated links buried above the actual tip button asks a mobile user to scroll past friction to reach the one thing they came to do.
Why Testing Beats Perfection in Your Tip Strategy
No tip link strategy works perfectly on the first try, and chasing a flawless setup before launching just delays real data. Keep every ask light and tied to genuine value, then revisit your presets, copy, and placement every 30 days using the click and conversion numbers you’re already tracking.
— Tipper
Start Testing Your Tip Link With Tipper Today
Everything in this article, presets, placement, thank-you follow-up, mobile-first checkout, is built directly into Tipper. Sign up, create your personalized link or QR code, set your three preset amounts, and connect payouts in a single session with no subscription fee to maintain the page.
Payout timing depends on your linked bank and payment method, and the only cost on your side is the processing fee applied at checkout, no platform commission on top. If you run a physical business alongside your content, Tipper’s point-of-sale tipping options extend the same no-signup-required model to in-person tips. The fastest way to know if this fits your audience is the smallest possible test: create your link right now and send yourself or a friend a $1 tip to see the full flow, thank-you message included, before you ever share it publicly.
Sources
- How to Use the Tips Block in UniLink (Accept Tips and Micro-Payments on Your Page)
- Creator Tips Playbook — How to Earn From Your Audience With
- Link-in-Bio Strategy for Creators: Beyond Linktree | Flyn
FAQ
What Are the Best Tips for Content Creators to Succeed With Tipping?
Keep your ask simple: three preset amounts, a highlighted middle option, and a link placed where supporters already look, then follow up with a genuine thank-you to encourage repeat tips.
What Are the Three C’s of Content Creation?
Definitions vary across sources, but a common version refers to Content, Community, and Commerce, the idea that consistent content builds a community, and that community eventually supports commerce, including tips.
Is Content Creation Still Profitable in 2026?
Content creation remains profitable for creators who diversify income beyond ad revenue, and tips through a personalized link are one of the lowest-effort additions since they require no new content, only a link and a payment method.
How Do I Know if My Tip Link Placement Is Working?
Track click-through rate on the link itself and tip conversion rate separately using UTM tags on each placement; a placement with high clicks but low conversion usually points to friction on the payment page, not the promotion itself.
Recommended

Simply Money: Instant Tips Made Simple for Creators
Simply money, in the way it actually works for creators today, means one thing: a personalized link or QR code that lets anyone tip you instantly through Apple Pay, Google Pay, or a card, with no account required on their end and the funds landing directly with you. Tipper builds exactly that.
Three things matter most before you set anything up:
- Who it’s for: content creators, freelancers, influencers, and small businesses who want appreciation payments without invoicing or awkward cash exchanges.
- The immediate value: supporters tip in seconds, privately, without creating a login or downloading an app.
- The trust signal: fees are shown transaction by transaction, not buried in fine print, and payout timing is stated up front rather than left vague.
Key Takeaways
An instant tipping link works because it removes every barrier between a supporter’s impulse to give and the payment actually landing in your account.
| Point | Details |
|---|---|
| Setup takes minutes | Create an account, connect payouts, verify identity, and generate your link and QR code in one sitting. |
| Placement drives conversion | QR codes at natural pausing points can raise tipping frequency by up to 22%. |
| Fees stay visible | Transaction-level fees are shown upfront instead of buried in a flat “service charge.” |
| Payout speed protects cash flow | Platforms with delayed payout cycles create real operational friction for creators and freelancers. |
| Tips count as income | Report tip earnings for taxes regardless of the payment method or platform used. |
| Tipper fits the workflow | Tipper combines a personalized link, Apple Pay and Google Pay support, and direct payouts built specifically for creators. |
Table of Contents
- Getting Started With Simply Money in Five Minutes
- Where Should You Put Your Tipping Link or QR Code?
- What Do Payments, Fees, and Payouts Actually Cost You?
- Why Do Supporters Trust One Tip Link Over Another?
- What Actually Makes People Tip More?
- Fixing Common Tipping Link Problems Fast
- What Makes Tipper the Right Tool for This?
- How Do You Track and Manage the Tips You Receive?
- Do You Owe Taxes on the Tips You Receive?
- What Kind of Support Can You Expect if Something Goes Wrong?
- An Honest Take on Tipping Links
- Start Collecting Tips Today
- Sources
- FAQ
Getting Started With Simply Money in Five Minutes
Setting up your tip link doesn’t require a developer or a design degree. Here’s the checklist, in order:
- Create your Tipper account with your name or brand.
- Connect a payout method (bank account or debit card).
- Verify your identity and basic tax information.
- Build your tip page: photo, short bio, and a clear purpose.
- Add preset tip amounts and, if it fits, a visible goal.
- Generate your dynamic QR code and short link.
- Send yourself a test tip to confirm the full flow works.
Creators consistently rank fast onboarding and simple identity verification among the top factors in choosing where to work, according to creator-platform research. A clunky signup kills momentum before you’ve collected a single tip.
Pro Tip: Test your link on both an iPhone and an Android phone before you share it anywhere. Confirm Apple Pay shows up at checkout on iOS and Google Pay shows up on Android. A missing payment button at checkout is the single most common reason a supporter gives up mid tip.
Before going live, run a quick audit: does the page load fast on mobile data, does the layout look right on a small screen, and does the billing descriptor on the card statement clearly say who the charge is from?
Where Should You Put Your Tipping Link or QR Code?
The link only works if it shows up exactly where someone feels generous. That moment is different for every type of creator.
- Live streams: a persistent on-screen QR code or link in chat.
- In-person services: a printed QR code at a barber chair, coffee counter, or tattoo station.
- Events and pop-ups: a table tent or wristband with the code printed large.
- Social bios: one link, permanently pinned, across every platform.
- Email newsletters and invoices: a text link at the sign-off.
- Video end screens: the QR code on the final slide, held for a few extra seconds.
A streamer needs an on-screen alert; a hairstylist needs a laminated card by the register. Match the format to how your audience actually interacts with you, not to what looks impressive on a slide deck.
Placement discipline pays off in measurable ways. Codes placed at natural pausing points, rather than buried mid-content, can increase tipping frequency by up to 22%. Stick to one link and one QR code across your platforms unless you’re running a specific campaign. Multiple codes confuse supporters about which one actually reaches you, and dynamic QR codes let you update the destination without reprinting anything.
What Do Payments, Fees, and Payouts Actually Cost You?
Supporters check out through Apple Pay, Google Pay, or a saved card, all without creating an account. That app-free checkout matters more than most creators realize: every extra step between “I want to tip” and “payment sent” is a chance for someone to change their mind. Guides on QR tipping conversion point to native camera scanning and instant browser checkout as the biggest lever against abandoned tips.
On the cost side, Tipper keeps two numbers separate: a small platform fee and standard payment processing costs, both shown transparently at the transaction level rather than folded into a vague “service charge.” You see exactly what a $10 tip nets before you ever cash out, and creators keep 100% of what the platform doesn’t take in processing.
Payout timing is where platforms genuinely differ. Some hold funds for days or batch them into weekly cycles, which quietly disrupts cash flow for anyone living tip to tip. Industry analysis on payout immediacy flags delayed access to earnings as a real operational cost, not just an inconvenience.
Typical timeline: tip sent → processed in seconds → routed to your connected payout method → available on your normal payout schedule, with no manual withdrawal request needed.
Why Do Supporters Trust One Tip Link Over Another?
Supporters hesitate for a specific reason: they don’t want to hand over a card number to create an account for a $5 tip. A no-account flow removes that entire objection before it forms.
What actually builds trust at checkout:
- No sender account required, ever.
- Transparent fees shown before the supporter confirms payment.
- A billing descriptor that clearly reads your name or brand, not a random code.
- Fraud protections like 3D Secure authentication and card tokenization running quietly in the background.
Research on donor behavior consistently finds that clear billing and visible fees drive more generosity than any discount or incentive could. People give more freely when nothing about the transaction feels hidden.
Pro Tip: Tell supporters exactly what their tip supports. “Help me upgrade my mic” converts better than a bare “Tip Me” button, and a short thank-you note afterward turns a one-time tipper into a repeat one.
What Actually Makes People Tip More?
Most creators undersell their ask, then wonder why tips stay flat. The fix usually isn’t a bigger audience. It’s better language, better placement, and better follow-through.
Do this:
- Use specific, dignified phrasing: “Support this stream” beats “Donate if you want.”
- Show a visible goal, like a progress bar toward a specific purchase.
- Send a personalized thank-you, text, photo, or short video, within a day.
Skip this:
- Vague asks with no stated purpose.
- Burying the link three menus deep.
- Silence after someone tips. That kills repeat generosity fast.
For placement and timing:
- Put the QR code at a natural pausing point, not mid-action.
- Hold it on screen or on the table long enough to scan, a few extra seconds matter.
- Keep the checkout path to one tap or one scan. Speed decides whether the tip happens at all.
A visible goal, like “$200 toward a new camera,” gives supporters context beyond a plain tip jar. It turns a generic gesture into a shared project, which tends to lift the average amount people give rather than just the number of people who give.
Fixing Common Tipping Link Problems Fast
Most issues have a boring, fixable cause. Run through this before assuming something’s broken:
- Card payment fails: check for typos, expired cards, or a bank flagging the charge as unusual.
- Apple Pay or Google Pay missing: confirm the supporter’s device and browser actually support it; not every browser does.
- QR won’t scan: check print size, contrast, and glare, and swap to a static image if a screen is reflecting light.
- Page loads slowly: clear cache and confirm you’re on a stable connection.
- Unfamiliar billing descriptor: update your account name so it reads clearly on statements.
If none of that resolves it, contact support with a screenshot of the error and the approximate time it happened. Specifics get you a faster fix than “it’s not working.”
What Makes Tipper the Right Tool for This?
Tipper was built around one idea: tipping should feel as easy for the supporter as it is rewarding for the creator. That shows up in the details.
- A personalized link and dynamic QR code, generated in minutes.
- Apple Pay and Google Pay support alongside standard card checkout.
- Fully customizable tip pages, your name, your photo, your purpose.
- Direct payouts with no long holding cycles.
- Transaction-level fee transparency, no hidden cuts.
- Thank-you messages in text, photo, or video, sent right from the platform.
Tipping platforms have matured into legitimate financial tools for creator monetization, not novelty add-ons. Tipper treats every tip as a real, professional transaction, not a digital tip jar, and positions the experience accordingly. Visit the Tipper landing page to see the setup flow yourself.
How Do You Track and Manage the Tips You Receive?
Every tip through your link generates a record: amount, timestamp, payment method, and any note the supporter left. That log matters more than most creators expect once tips start coming from multiple channels at once.
Check your dashboard weekly, not just when you’re curious. Patterns emerge fast: a spike after a specific video, a dead zone during certain hours, a platform where your bio link actually converts versus one where it just sits there. That data tells you where to put more effort, not just where tips happened to land.
Export your transaction history regularly, monthly at minimum, and keep it somewhere separate from your day-to-day banking app. Come tax season, you want a clean record instead of a scramble through months of notifications. If you run tips alongside other income, like freelance invoices or ad revenue, keep tipping income in its own column so you’re not guessing later which dollar came from where.
Reconcile your dashboard totals against your bank deposits once a month. It’s a five-minute check that catches a payout timing mismatch or a failed transfer before it becomes a bigger headache. Treat your tip income the same way you’d treat any other revenue stream. Because to the IRS, and to your own budgeting, it is one.
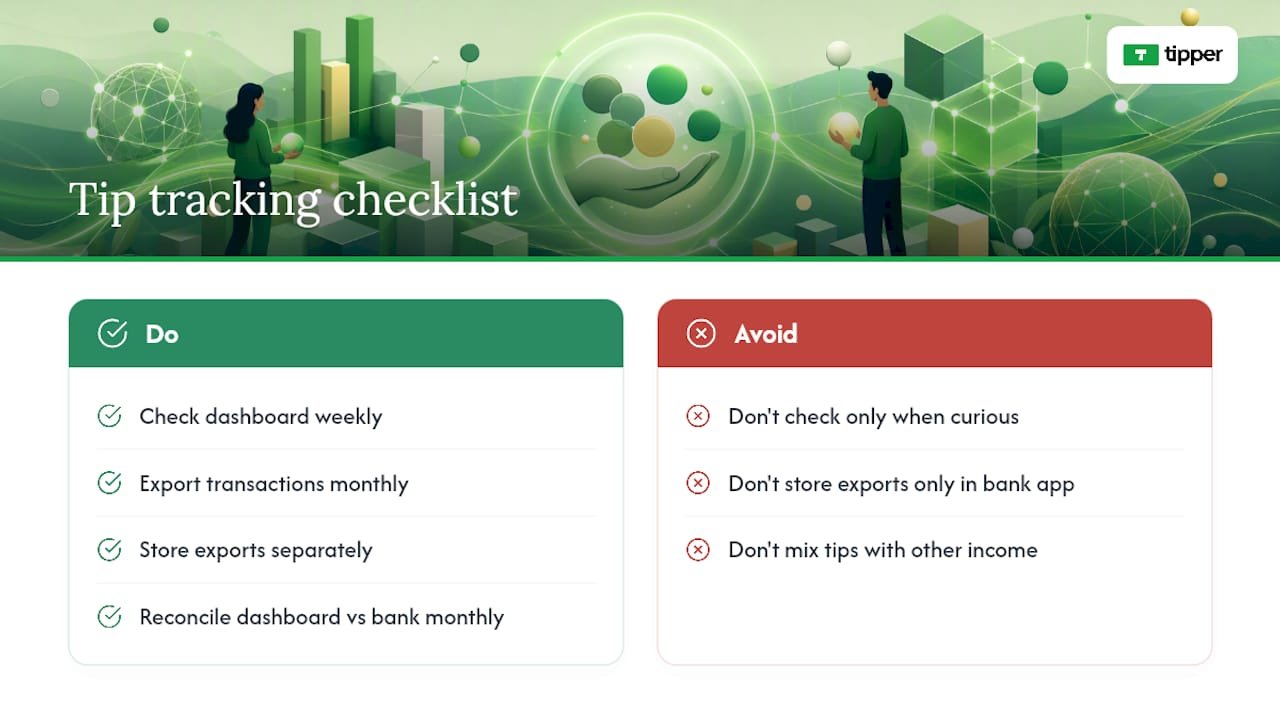
Do You Owe Taxes on the Tips You Receive?
Yes, in the United States, tips and gratuities you receive through a personal link or QR code count as taxable income, whether you’re a full-time creator or running it as a side project. The IRS treats tip income the same as any other earnings: it needs to be reported, regardless of the platform or payment method that delivered it.
If you’re operating as a freelancer or sole proprietor, tips typically fall under self-employment income, which means tracking them for quarterly estimated taxes rather than waiting until April. Keep a simple running total by month; retrofitting a year of scattered tips into a tax filing is far harder than logging them as they arrive.
Depending on your total earnings and how your payout provider reports transactions, you may receive a tax form summarizing the year’s activity. Requirements and thresholds vary by processor and by your business structure, so confirm your specific situation with a tax professional rather than assuming a flat rule applies. This is one area where getting it wrong costs more than the time it takes to get it right.
None of this makes tipping income complicated to manage. It just means treating it like real money from day one, because it is.
What Kind of Support Can You Expect if Something Goes Wrong?
A failed payment or a QR code that won’t scan during a live event isn’t a minor annoyance, it’s lost income in real time. Support responsiveness matters more here than it does for most software products.
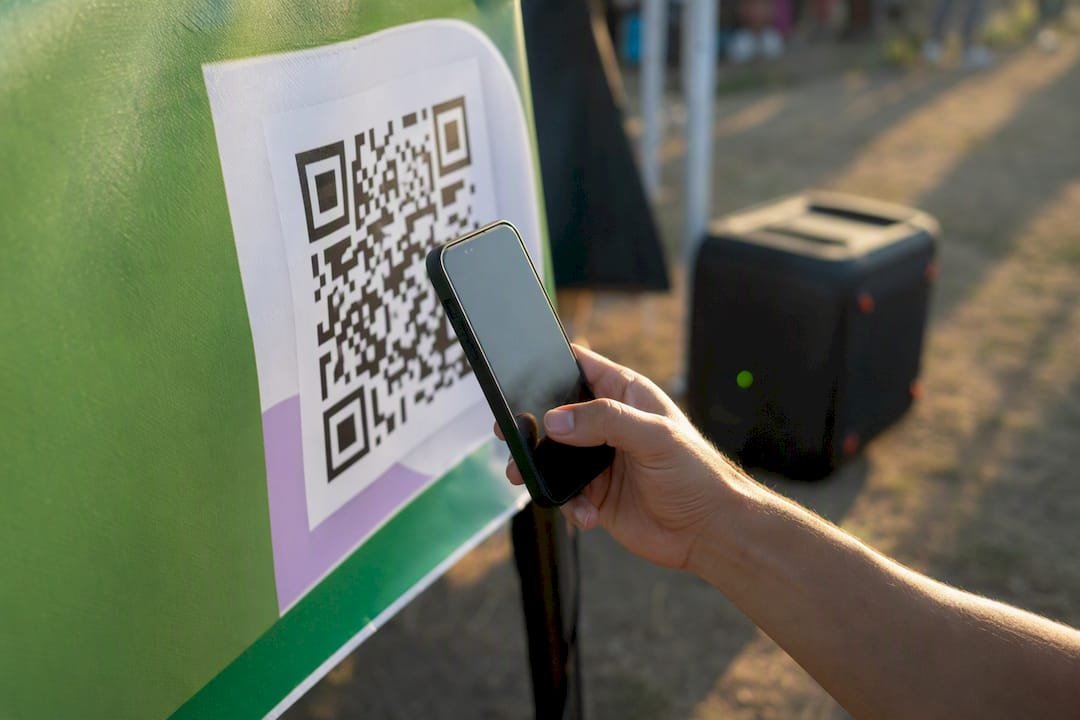
Look for a support channel that lets you attach screenshots and specifics directly, rather than routing you through a generic contact form with no context. The faster you can show exactly what happened, error message, device, approximate time, the faster a real fix comes back instead of a canned response.
Self-serve help matters too. A clear knowledge base or FAQ that covers setup, payout timing, and common checkout issues saves you from waiting on a reply for something you could resolve in two minutes yourself. Before committing to any platform, check whether support documentation actually answers real questions or just restates marketing copy.
An Honest Take on Tipping Links
Tipping links work best when treated as a professional payment channel, not a hopeful digital tip jar. Expect tips to scale with the trust you’ve already built. Fast payouts matter far more once cash flow depends on them.
Start Collecting Tips Today
Tipper gets you from zero to a working tip link faster than setting up a traditional payment processor account, and you keep 100% of what you earn beyond standard processing costs.
Create your link, connect a payout method, and send yourself a test tip today at Tipper. If you’re planning to lean on Apple Pay specifically, the setup walkthrough for businesses covers the exact checkout configuration. Support documentation is available in-app if you hit a snag along the way, but most creators are live and collecting their first tip within ten minutes of signing up.
Sources
FAQ
What Is a Simply Money Tipping Link?
It’s a personalized link or QR code that lets supporters send instant tips through Apple Pay, Google Pay, or a card, without creating an account, with funds paid out directly to the creator.
Do Supporters Need an Account to Tip Me?
No. Tipper’s checkout flow is built specifically so supporters can pay in seconds using a card or a digital wallet without signing up for anything.
How Long Does It Take to Receive a Tip After It’s Sent?
Tips process within seconds and route to your connected payout method on your normal payout schedule, without a manual withdrawal request.
Do I Have to Pay Taxes on Tips I Receive?
Yes. Tips received in the United States count as taxable income and should be tracked and reported, typically as self-employment income if you’re a freelancer or sole proprietor.
Can I Use One Link Everywhere, or Do I Need Multiple QR Codes?
One link and one dynamic QR code across all your platforms is usually best. Multiple codes confuse supporters about which one actually reaches you.
Recommended
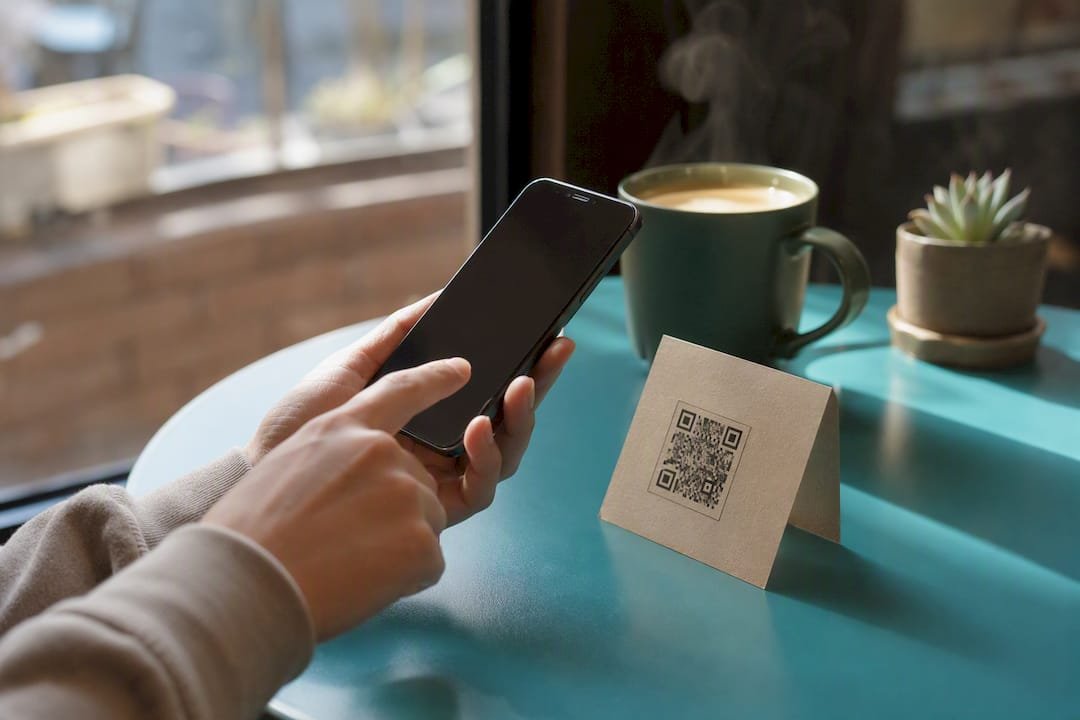
Coffee Donations: Set Up a Tip Link Today
The fastest way to start collecting coffee donations is a dedicated tip link or QR code you can put in your bio right now, and Tipper is the simplest place to build one. Three reasons to do it today instead of next week:
- Setup takes minutes, not days. A basic tip page goes live in under 30 minutes.
- Payouts hit fast. Instant tips arrive through Apple Pay, Google Pay, or card with no waiting on a donor to create an account.
- You lose nothing by starting small. There’s no subscription required to test whether your audience will tip.
Your next step: create a tip page or add a link/QR to your bio before you finish reading this.
Key Takeaways
A dedicated tip link with clear presets, minimal friction, and instant payment methods converts more coffee donations than any other setup a creator can build.
| Point | Details |
|---|---|
| Start with a tip link or QR | Create a page with three preset amounts and one line of context, then place it in your bio. |
| Test before promoting | Send yourself a small tip to confirm alerts, payout, and donor experience work correctly. |
| Expect standard fees | Processor and small platform fees apply; keep records since tips typically count as income. |
| Tie asks to real moments | Mention tipping around milestones or content drops rather than repeating a generic request. |
| Use Tipper to go live fast | Tipper offers no-account donor payments via Apple Pay and Google Pay, with creators keeping 100% of earnings. |
This article is general information, not a substitute for advice from a qualified financial advisor. Consult a qualified financial professional about your own circumstances before acting on anything here.
Table of Contents
- How Do Coffee Donations Actually Work?
- How Do You Set Up a Coffee Donation Link?
- What Fees and Payout Times Should You Expect?
- What Actually Increases Coffee Donations?
- Where Should You Promote Your Tip Link?
- What Do Donors Expect From a Coffee Donation Page?
- How Long Does It Take to Go Live?
- How Do You Handle International Coffee Donations?
- What Goes Wrong When Setting Up Coffee Donations?
- Why Coffee Donations Work Best as a Habit, Not a One-Off
- Start Accepting Coffee Donations With Tipper
- Sources
- FAQ
How Do Coffee Donations Actually Work?
A donor clicks your tip link or scans your QR code, picks a preset amount (or types a custom one), pays with Apple Pay, Google Pay, or a card, and you receive the payout after processor and platform fees come out. That’s the entire transaction. No donor account, no login screen, no cart. Understanding how digital tipping works helps explain why this model converts so much better than traditional donation forms.
What the donor sees:
- A short page with your name, photo, and one line about what the tip supports
- Three preset amounts plus a custom-amount option
- A one-tap payment button, then a thank-you screen
What you configure on the back end:
- Preset amounts and page copy
- Payout destination (bank account or connected wallet)
- Optional thank-you message triggers for new tips
Every extra click costs you conversions. A page that demands an account, a password, or a multi-field form loses donors who would have tipped in five seconds. Keeping the primary payment destination to one option and the alert and moderation setup minimal is what actually moves the needle, not fancier design.
How Do You Set Up a Coffee Donation Link?
You can have a working tipping link and QR code live in under 30 minutes. Here’s the exact sequence:
- Choose a platform. Pick a tool built for instant tips rather than a general payment processor you’d have to configure from scratch.
- Set three preset amounts. Use a low impulse tip, a highlighted middle amount, and a higher fan-level amount. This structure, recommended by creator monetization guides, consistently outperforms a single blank “enter amount” field.
- Write one contextual sentence. Tell donors what the tip funds. “Buy me a coffee to keep this newsletter free” beats a generic “Support me” every time.
- Generate your QR code. Most tipping tools generate this automatically once your page is live.
- Add the link to your bio and profiles. Bio, website footer, and email signature are the highest-visibility spots.
- Send yourself a small test payment. Confirm the alert fires, the payout lands, and the donor experience feels clean on mobile.
Pro Tip: If you have zero evidence your audience will tip, start with a simple external link for a quick test before switching to a native, on-platform page. Once tips start coming in, moving to a native tipping page removes extra clicks and tends to lift conversion further.
Testing matters more than people assume. Send $1 through your own link, watch what notification you get, and check how long the payout takes to show up. If anything feels clunky to you, it’ll feel worse to a stranger deciding whether to tip a person they’ve never met.
What Fees and Payout Times Should You Expect?
Expect a standard payment-processing fee plus a small platform fee on every tip. Here’s what typically shows up:
- Processor fees — charged by whatever rail handles the card, Apple Pay, or Google Pay transaction
- Platform fee — a small percentage the tipping tool takes to operate the service
- Currency conversion fees — applied when a donor pays in a currency different from your payout currency
- Chargeback or reversal fees — rare, but possible with card payments
- Optional add-ons — some platforms charge extra for native, on-platform tipping versus an external link
Tip tiers matter here too. Data from crypto tip jar implementations shows that offering tiers like $3, $5, and $10 commonly produces an average tip around $6 to $7, which is a useful benchmark whether you’re running fiat or crypto rails.
Payout timing varies by platform and payment method, but most instant-tip tools move money faster than traditional donation platforms that batch payouts weekly or monthly. One note that applies everywhere: tips generally count as income in most jurisdictions. Keep basic records of what you receive and talk to an accountant about how it applies to your specific situation.
What Actually Increases Coffee Donations?
Small, specific changes beat big redesigns. Placement, one line of context, and the right preset amounts drive most of the conversion gain you’ll ever see from a tip page.
Do:
- Put your link where attention is already highest: right under your bio, at the bottom of long-form content
- Name exactly what the tip funds (“keeps the podcast ad-free,” “buys my next batch of test ingredients”)
- Mention tipping when something real happens: a milestone, a free resource, a big post. Tying the ask to a real moment converts better than a generic recurring plea.
Don’t:
- Bury the link three menu clicks deep
- Ask constantly with no context, which trains your audience to tune it out
- Overload the page with too many payment options or fields
CTA copy that works leans into the coffee metaphor directly: “Buy me a coffee” or “Fuel the next episode” outperform vague asks like “Support me” because they give the tip a tangible purpose.
Pro Tip: A thank-you message costs you nothing and turns a one-time tipper into a repeat one. A short video or personal note acknowledging the tip is often what brings someone back a second time.

Where Should You Promote Your Tip Link?
Put your link in the highest-attention spots first, then mention it naturally tied to a real moment about once a week rather than constantly.
- Website footer: a permanent, low-pressure placement visitors see on every page
- Podcast show notes: mention it once near the top, link it in the notes
- YouTube description: first line, above the fold before the “show more” cutoff
- Twitter/X and Threads bio: the single highest-traffic real estate you own
- Instagram link-in-bio: pair it with a QR code shown in Stories for a scannable option
- Livestream panels and alerts: a visible on-screen link plus a real-time alert when a tip comes in
- Email signature: low-key, always-on visibility for every reply you send
The tone matters as much as placement. “If this helped, there’s a coffee link in the description” reads very differently than repeating “please tip me” in every post.
What Do Donors Expect From a Coffee Donation Page?
Donors overwhelmingly prefer flows that skip account creation and support instant payment methods like Apple Pay and Google Pay. Prioritize those payment rails wherever your platform offers them.
- Keep page copy short: your name, a photo, one sentence of context
- Show clear preset amounts instead of a blank field
- Display basic trust signals: secure checkout indicators and recognizable payment logos
- Offer an anonymous-tip option for donors who’d rather not attach their name
- Give a simple receipt or confirmation so donors know the tip went through
On privacy, never store card data yourself, rely on your payment processor for that. Add a one-line privacy note on your tip page explaining that you don’t see full payment details, and list a contact email for questions. Small trust cues like these are often what separates a page that converts from one that doesn’t, according to guidance on keeping tip pages simple and minimal.
How Long Does It Take to Go Live?
A basic tip link can go live in 10 to 30 minutes. A polished page with a QR code, tested payments, and promotion in place usually takes a few hours spread over a day or two.
- Choose your platform
- Set your three preset amounts
- Write one line of context copy
- Generate your QR code
- Place the link in your bio and top channels
- Send a test tip and confirm the payout
Timeline: Immediate test setup takes 10 to 30 minutes. A polished page with promotion across channels typically takes 1 to 3 days if you’re doing it around other work.
How Do You Handle International Coffee Donations?
If your audience spans multiple countries, your processor choice determines how much friction international donors face. For creators expecting mostly small tips under €5, low-cost local processors can win on fees. For broader international reach, a processor like Stripe often supports more currencies and card types, which matters if a meaningful share of your supporters live outside your home country.
Currency conversion happens automatically on most modern tipping tools. A donor in the United Kingdom paying a US-based creator typically sees the amount converted at checkout, and the creator receives payout in their home currency after conversion fees. The catch: those conversion fees stack on top of standard processing fees, so an international tip nets slightly less than a domestic one.
If a large portion of your audience is international, pick a processor with broad card and alternative-pay coverage rather than one built primarily for a single country. Losing a donor because their card type isn’t supported is a worse outcome than paying a slightly higher fee.
Some creators also add a crypto option for supporters who prefer it. Crypto tips settle directly to a wallet without a traditional bank intermediary, which can appeal to a subset of international donors, though it requires the donor to already hold crypto and shouldn’t replace your primary fiat option.
What Goes Wrong When Setting Up Coffee Donations?
Most setup problems come down to friction you didn’t notice was there. A few show up constantly:
The link is buried. Creators build a beautiful tip page, then bury the link three taps deep in a link-in-bio menu. Put it where it’s the first or second thing people see.
Too many payment options confuse donors. Offering five different ways to pay feels generous but actually slows people down. One clear primary path, with maybe one alternate, converts better than a menu.
No test payment before going live. Skipping the test step means you find out about a broken payout or a missing alert only after a donor tells you it didn’t work, which is the worst possible way to learn.
Vague or missing context copy. A page with no explanation of what the tip funds performs worse than one with a single honest sentence.
Ignoring the first tips. A donor who tips and hears nothing back is far less likely to tip again. Even a short automated thank-you note keeps the relationship warm.
Currency mismatches for international donors. If your processor doesn’t support a donor’s card type or local payment method, that donation simply doesn’t happen. Check your processor’s coverage before you promote heavily to an international audience.
Most of these get fixed in minutes once you know to look for them, which is exactly why the test-payment step in your setup checklist matters more than it seems.
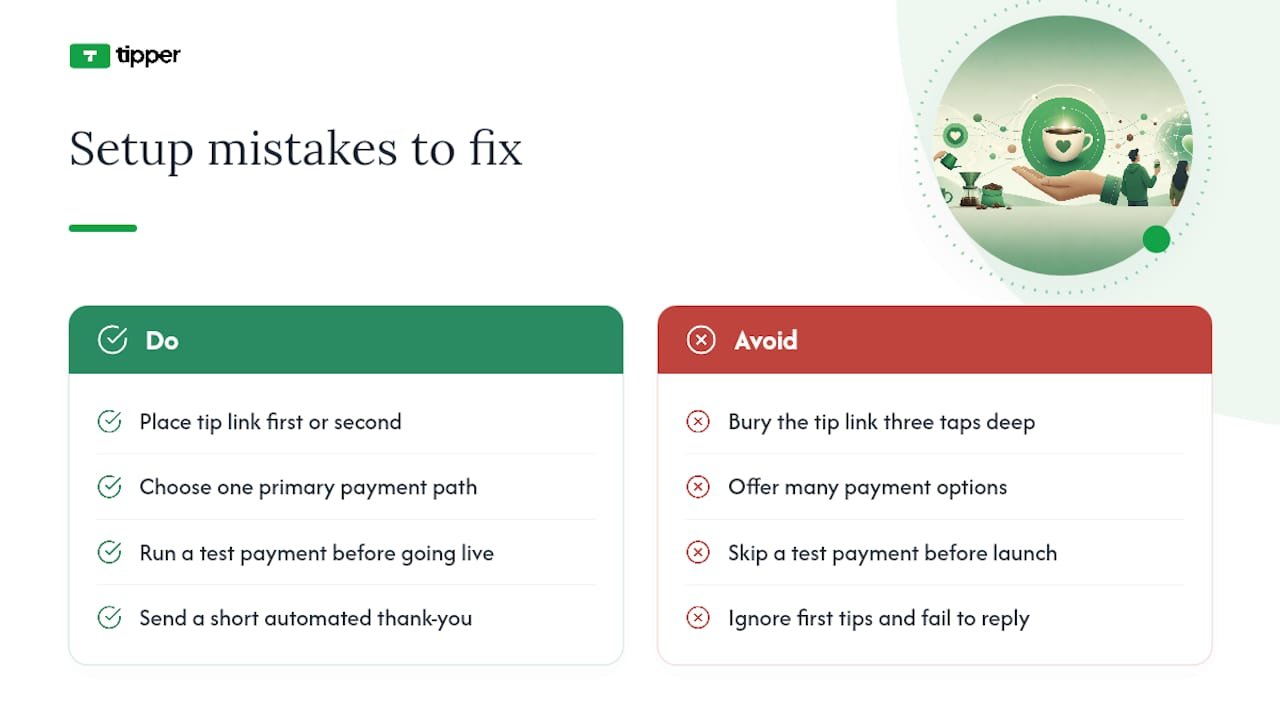
Why Coffee Donations Work Best as a Habit, Not a One-Off
Tips work best when creators treat them as an ongoing rhythm tied to real moments, not a single ask bolted onto a bio and forgotten. The creators who do well with this model check in on their tip page the way they’d check analytics: not obsessively, but regularly enough to notice what’s working. A platform like Tipper fits that rhythm because it removes the friction that normally makes creators reluctant to ask again, no accounts for donors, fast payouts, and a way to say thank you that feels personal instead of automated.
Start Accepting Coffee Donations With Tipper
Tipper lets you accept instant tips through a personalized link or QR code, with Apple Pay and Google Pay supported and no account required on the donor’s side. That last part matters more than most creators expect: every account-creation screen you remove is a donor you don’t lose.
Payouts go directly to you with no waiting on batch processing cycles.
If you’ve read this far, you already know what your tip page needs to say. Create your tip page now, set your three preset amounts, and send yourself a test tip before you share the link anywhere else.
Sources
- Creator Tips Playbook — How to Earn From Your Audience With Tips | Linkos
- How to Set Up Alerts, Donations, and Tip Pages
- Setting up a tip jar for creators in 2026: Stripe, Wero and Mollie compared | LinkDash
- How to Set Up a Crypto Tip Jar on Your Website (WordPress & Shopify)
- Crypto Payments for Content Creators | AnySpend
FAQ
What Are Coffee Donations Exactly?
Coffee donations are small, instant digital tips supporters send a creator through a personalized link or QR code, typically paid via Apple Pay, Google Pay, or card with no donor account required.
How Fast Can I Set Up a Tipping Link?
A basic tip link can be live in 10 to 30 minutes; a polished page with a QR code and tested payments usually takes a few hours over a day or two.
Do Donors Need an Account to Tip Me?
No. Platforms like Tipper let donors pay in one tap using Apple Pay, Google Pay, or a card without creating an account.
What Preset Tip Amounts Should I Use?
Use three presets: a low impulse amount, a highlighted middle amount, and a higher fan-level amount, since this structure consistently converts better than a single blank field.
Are Coffee Donations Taxable Income?
In most jurisdictions, tips count as income, so keep basic records of what you receive and consult an accountant about your specific situation.
Recommended
Party Dance Games for DJs: Collect Tips That Actually Land
The best way to collect tips at a dance party is a mobile-optimized tip page paired with a dynamic QR code or instant pay link that accepts Apple Pay and Google Pay, then redirects to a quick thank-you reward. That’s the whole system. Everything else is placement and timing.
Here’s the three-step verdict if you’re setting this up before a show tonight:
- Build the page. Create a tip page on a platform like Tipper, set a few preset amounts, and add a short thank-you message or video.
- Generate the code. Turn that page into a dynamic QR code or a short link you can text, post, or print.
- Place it and say it. Put the code somewhere eye level and well lit, then mention it out loud at least twice during your set.
Miss any one of those three and your tip rate drops, usually because the code is either invisible or nobody knew it existed.
Key Takeaways
Performers who pair a mobile tip page with a visible, well-timed QR code convert far more of their audience’s goodwill into actual tips.
| Point | Details |
|---|---|
| Setup speed matters | Build your tip page, connect payout, and generate a QR code in under 10 minutes before doors open. |
| Placement drives scans | Put codes at eye level near the mic stand, merch table, and bar edge, using matte finishes over glossy ones. |
| Scripts beat silence | Ask for tips at the opening, midway point, and closing, using a 10 to 15 second script each time. |
| Fees stay simple | Expect a small platform fee plus standard processing costs, with payouts landing within a few business days. |
| Tipper handles the setup | Tipper offers dynamic QR codes, Apple Pay and Google Pay support, and lets creators keep their tips earned. |
Table of Contents
- How Fast Can You Set Up Party Dance Games for Tipping?
- Where Should You Place QR Codes at a Live Event?
- What Should Your Signs Say?
- How Do You Collect Tips During a Livestream?
- What Do Fees and Payouts Actually Look Like?
- When Should You Ask for Tips During a Set?
- What If Your QR Code Won’t Scan?
- Why This Setup Changed My Show Routine
- Collect Tips Without the Guesswork of Building It Yourself
- Sources
- FAQ
How Fast Can You Set Up Party Dance Games for Tipping?
You can be live before soundcheck ends. Here’s the sequence:
- Create your account (about 2 minutes). Sign up on a tipping platform and verify your identity if required.
- Connect your payout method (2 minutes). Link a bank account or a processor like Stripe so tips land somewhere real.
- Build your tip page (3 minutes). Add your name or DJ handle, a short bio line, suggested tip amounts, and a one-line thank-you redirect.
- Generate your QR code and short link (1 minute). A dynamic QR code means you can change the destination later without reprinting anything, which matters if you’re touring or rotating venues.
- Test on both iOS and Android (1 minute). Scan it yourself, then hand your phone to someone else and watch them do it.
That’s under 10 minutes for the entire flow, start to finish.
Pro Tip: Test your printed QR code from about 20 inches away, roughly the distance between a bar top and someone leaning in. If it doesn’t scan instantly under dim venue lighting, bump up the size or contrast before doors open.
Where Should You Place QR Codes at a Live Event?
Placement is the single biggest lever you control, and it’s the one most performers get wrong. A code buried in a corner booth or printed too small might as well not exist.
Put your code in these spots, in order of priority:
- Front of the mic stand, facing the crowd
- The edge of the merch table, where people already have cash or cards out
- Bar or registration points, where there’s a natural pause
- The DJ booth face, visible to anyone dancing nearby
- A floor easel near high-traffic pathways like the entrance or restroom line
Eye level beats waist level every time, and matte finishes beat glossy ones because gloss reflects stage lighting and turns your QR code into an unreadable smear. High-visibility QR placement measurably increases scan rates, and pairing the code with a simple call-to-action nearby helps people understand what happens the moment they scan.
Pro Tip: If your venue is dark, skip paper entirely and use a backlit sign or a tablet propped on a small stand. Light sells the code better than size does.
What Should Your Signs Say?
Good sign copy does two things: it tells people what tipping does, and it removes the need to think.
Try lines like:
- “Tap to tip, thanks for dancing with us”
- “Loved the set? Tips fund the next single”
- “Scan for the after-hours playlist, tips appreciated”
For preset amounts, offer three clearly labeled options rather than a blank field. Suggested tip amounts reduce decision fatigue and tend to raise completion rates because the tipper isn’t doing math on a dance floor. A simple $5 / $10 / $20 spread works for most club and private-party settings; a family-friendly event might lean toward $3 / $5 / $10 instead.
Tie the incentive to something specific, like an instant thank-you video, a shout-out on the mic, or early access to a track. That small reward loop is what turns a one-time tip into a repeat one across the night.

| Tip Amount | Why It Works |
|---|---|
| $5 | Low-friction entry point, easy yes |
| $10 | Anchors as the “default” middle choice |
| $20 | Signals a bigger ask without feeling out of place |
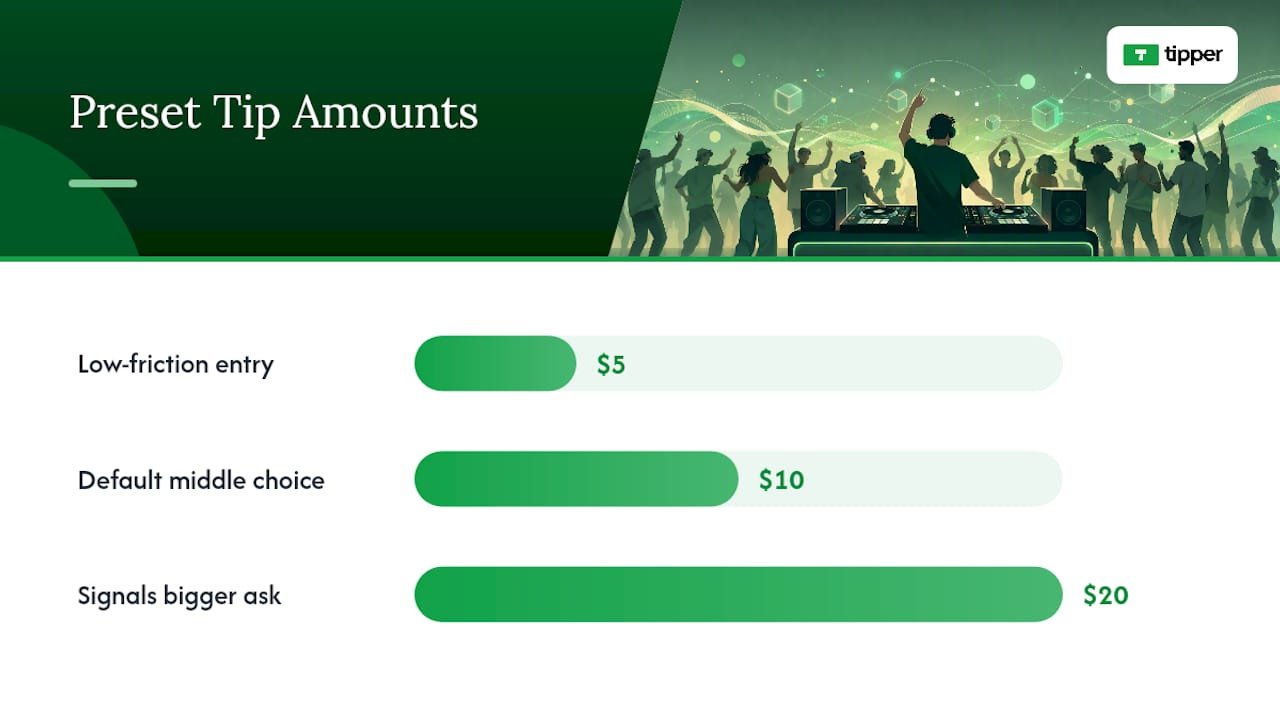
Pro Tip: Match your sign’s tone to the room. A lounge crowd responds to a quieter, wittier line; a packed club needs something short enough to read in two seconds while moving past.
How Do You Collect Tips During a Livestream?
Virtual dance parties need the same tip page, just displayed differently. Pin your link at the top of the chat, drop it into a stream overlay that stays visible during high-energy moments, and repeat it in the stream title so late joiners see it immediately.
- Add the short link to your video description for anyone watching the replay later
- Schedule a chat-bot reminder every 15 to 20 minutes so it doesn’t rely on you remembering
- Coordinate the on-screen prompt with a spoken cue, like calling out the link right as a big drop hits
Real-time tipping tools paired with on-screen incentives hold attention better than a static link sitting quietly in the description. Test the mobile flow yourself before you go live. A link that opens clean on desktop but breaks on a phone browser will cost you tips you never see.
What Do Fees and Payouts Actually Look Like?
Most tipping platforms charge a small platform fee plus a standard payment processing fee on card, Apple Pay, or Google Pay transactions. Neither is hidden if the platform is worth using, but you should know the numbers before someone asks you on the mic.
- Expect a modest transaction fee layered on top of standard card processing rates
- Payouts typically land in your bank within a few business days after the event, depending on your processor
- Reconcile the same night if possible: check your dashboard, confirm the total against what you expected, and flag anything that looks off early
Platforms that let you embed a payment link directly and route funds into a creator-controlled payout flow keep this process simple instead of routing you through a middleman account.
Pro Tip: *You don’t need to itemize fees on your sign.
When Should You Ask for Tips During a Set?
Timing matters as much as placement. Ask too early and nobody’s warmed up. Ask too late and the room’s already heading for the door.
- Opening hello (first 10 minutes): a light mention while people are still settling in.
- Midway reminder (around the halfway mark): a quick, energetic callout tied to a high point in the set.
- Closing thank-you (last 10 minutes): a warmer, more direct ask paired with a genuine thanks.
A script that works for most rooms: “If you’re vibing with this, the QR code by the booth gets you a tip in ten seconds, and I’ll shout you out on the next track.” Keep it under 15 seconds and match your energy to the room. A club set wants punchy and fast, a private party allows a little more warmth.
Pro Tip: Never stack your tip ask right after announcing last call or a big transition. Give it its own moment so it doesn’t get lost.
What If Your QR Code Won’t Scan?
Most scanning problems come down to three things: bad lighting, glare, or a code printed too small. Check for reflections first, since glossy paper under stage lights is the number one culprit.
If the QR still fails, fall back to the short link version. Text it, post it, or have it visible as plain text under the code itself. On the payment side, confirm your payout connection is active, double-check that Apple Pay and Google Pay are both enabled, and glance at your dashboard to verify a tip actually landed rather than just appearing to send.
- Keep a printed short link as backup in case the code itself is unreadable
- Consider an NFC tap card at the merch table for a tap-to-pay alternative
- Have one staff member carry a phone with the tip page bookmarked, ready to hand off
Small fixes like these, drawn from common contactless tipping mistakes, solve most scan failures before they cost you a tip.
Why This Setup Changed My Show Routine
I used to treat tips as an afterthought, something people did if they remembered on their way out. Once I put a code at eye level on the DJ booth and mentioned it twice, the difference wasn’t subtle. Fans stayed engaged longer because the thank-you message made the interaction feel personal instead of transactional. Winning Touch Tennis used a similar tipping page setup to collect appreciation payments from members, and the lesson translates directly: visibility plus a fast, frictionless page beats any amount of charm alone.
Collect Tips Without the Guesswork of Building It Yourself
Tipper gives DJs, dancers, and party entertainers a tip page built specifically for this kind of fast, high-energy moment. It supports Apple Pay and Google Pay so there’s no app download standing between a dancer and their tip, generates a dynamic QR code you can reuse across venues, and lets you customize thank-you messages with text, photos, or short videos.
A typical show-night workflow looks like this: build your tip page during soundcheck, generate the QR, tape it to the mic stand and merch table, then mention it twice during your set with a quick shout-out incentive. That’s it. Set up your tip page before your next show and have it running in under 10 minutes.
Sources
FAQ
What’s the fastest way to start collecting tips at a party?
Create a tip page on a platform like Tipper, generate a dynamic QR code, and place it at eye level near your booth. The whole setup takes under 10 minutes.
Where should I put my QR code for the best scan rate?
Front of the mic stand, the merch table edge, and the bar or registration area work best, since visibility is the single biggest factor in whether people actually scan.
How much should I suggest people tip?
Three clearly labeled presets, like $5, $10, and $20, work well because they reduce decision fatigue compared to an open amount field.
Can I collect tips during a livestream?
Yes. Pin your tip link in the chat, add it to your stream overlay, and repeat it in your title and video description so replay viewers can tip too.
What fees should I expect when using a tipping platform?
Most platforms charge a small platform fee plus standard card, Apple Pay, or Google Pay processing costs, with payouts typically arriving within a few business days.
Recommended

Privacy-First Payment Collection Setup for Creators and Sellers
Use client-side tokenization, virtual cards, and server-side vaulting together, and you can collect payments while keeping almost none of the payer’s raw data on your servers. That’s the whole architecture in one sentence. To build it, you need:
- A tokenization provider or gateway that handles card data client-side
- Virtual-card support so payers never expose a real card number
- A SetupIntent-style consent flow for saving payment methods for later charges
- Encryption in transit and at rest, plus a short data-retention window
Pro Tip: The most common privacy mistake isn’t a weak encryption setting. It’s collecting fields you don’t need, like billing addresses or phone numbers, just because a form template included them by default.
Key Takeaways
A privacy-first payment setup works because it keeps raw payment data off your servers entirely, relying on tokenization and virtual cards to do the exposure-reducing work for you.
| Point | Details |
|---|---|
| Choose a tokenization path first | Pick a gateway or provider that handles card fields client-side before anything reaches your backend. |
| Layer virtual cards where possible | Virtual cards hide the real funding source and add spend limits or pause controls. |
| Set a strict retention window | Store tokens and outcomes only, and delete unneeded metadata on a defined schedule. |
| Build monitoring before scale | Track baseline rates and chargeback spikes so anomalies in anonymous channels surface early. |
| Consider a done-for-you option | Tipper handles tokenized, no-signup tip collection via Apple Pay and Google Pay for creators who don’t want to build the stack themselves. |
Where to go for compliance and technical depth
- PCI Security Standards Council: the Small Merchant Guide explains how tokenization shrinks your compliance scope.
- Stripe: its guidance on anonymous payment methods covers integration patterns and trade-offs.
- FTC: the guide for business on protecting personal information sets the baseline for data-handling practices.
This article is general information, not a substitute for advice from a qualified financial advisor. Consult a qualified financial professional about your own circumstances before acting on anything here.
Table of Contents
- What Is a Privacy-First Payment Collection Setup?
- What Privacy Trade-Offs Should You Expect?
- How Do You Set Up a Privacy-First Payment Flow?
- What Are the Risks of Anonymous Payment Channels?
- How Do You Test and Monitor the Setup Before Launch?
- How Tipper Fits a Privacy-First Payment Collection Setup
- Sources
- FAQ
What Is a Privacy-First Payment Collection Setup?
A privacy-first payment collection setup means the payer’s sensitive data (card numbers, in particular) never touches your servers in raw form. Instead, a tokenization layer or virtual-card provider stands between the payer and your business, converting sensitive fields into references you can safely store. This is the standard the industry calls tokenization and data minimization, and it’s the backbone of modern secure payment processing.
Several building blocks accomplish this, each with different trade-offs:
- Virtual cards generate a temporary or merchant-locked number so the real funding source stays hidden.
- Tokenized checkout (via a gateway like Stripe) replaces card details with a one-time token before anything reaches your backend.
- Prepaid and gift cards offer near-total anonymity but work only for one-off, in-person, or low-volume transactions.
- Cryptocurrency adds pseudonymity but brings volatility and support overhead most small sellers don’t want.
- Payment links bundle tokenization and hosted checkout into a no-code option for solo creators.
| Method | Privacy level | Integration effort | Payer friction | Cost shape | PCI scope impact |
|---|---|---|---|---|---|
| Virtual cards | High | Low to moderate | Low | Standard processing fee | Minimal, funding source hidden |
| Tokenized checkout | High | Moderate | Low | Standard processing fee | Greatly reduced |
| Prepaid/gift cards | Very high | Low | Moderate to high | Often a flat markup | Minimal, no card storage |
| Cryptocurrency | High (pseudonymous) | High | High | Variable, network fees | Not applicable |
| Payment links | Moderate to high | Very low | Very low | Standard processing fee | Reduced (hosted by provider) |
For a one-time tip or donation, a payment link or virtual card is plenty. For recurring billing, you need tokenized checkout with a saved-payment flow. High-value goods call for extra fraud checks regardless of which method you pick, and anonymous payment options like prepaid cards and crypto carry the steepest trade-offs between anonymity and operational practicality.

What Privacy Trade-Offs Should You Expect?
Every privacy gain costs you something, usually in scalability, fraud coverage, or user friction. Building around a few core principles keeps that cost manageable:
- Data minimization: collect only the fields the transaction actually requires.
- Client-side handling: let the card fields live in the payment provider’s iframe or SDK, never your own form.
- Limited retention: store tokens and outcomes, not raw payment details, and delete what you don’t need after a set window.
- Encryption everywhere: in transit via TLS, at rest for anything you do keep.
The tension shows up fastest between anonymity and scale. Full anonymity (cash, gift cards) doesn’t integrate with automated systems or recurring billing. Pseudonymous methods like virtual cards or crypto give you most of the privacy benefit while staying compatible with modern checkout flows, which is why they dominate real-world implementations.
Pro Tip: For tipping and creator payments, aim for “privacy by default, verification by exception.” Keep the standard flow anonymous for the payer, and reserve identity checks for unusual patterns, like a sudden spike in high-value transactions.
How Do You Set Up a Privacy-First Payment Flow?
The short version: tokenize on the client, charge through virtual cards or a gateway token, save payment methods through a consent-based flow, and store almost nothing yourself. Here’s how that breaks down step by step.
- Pick a tokenization provider or gateway. Stripe’s Elements or a similar SDK handles the card fields inside an iframe you never touch directly.
- Implement client-side token creation. The payer’s card details get converted into a token in their browser before any network request reaches your server.
- Use virtual-card numbers where possible. Virtual cards from providers like Privacy generate single-use or merchant-locked numbers, so even your payment processor never sees the payer’s actual card. Privacy.com’s controls, including spend limits and instant pause or close, add a layer of protection most standard cards don’t offer.
- Set up a consent flow for saved payment methods. For recurring tips or subscriptions, Stripe’s SetupIntents and SCA guidance walks through how to save a method for off-session charges without storing card data yourself.
Integration choice depends on your resources. A hosted payment link takes minutes to set up and needs no code, ideal for solo creators. An embedded checkout gives you more branding control but requires front-end work. A full API-driven flow makes sense only if you’re processing volume that justifies custom logic for saved cards, refunds, and disputes.
On the server, store only what you need: a token reference, a transaction outcome, and a timestamp. Never store raw card numbers or CVVs. This is the practice the PCI Security Standards Council recommends for small merchants specifically, and it’s the single biggest lever for shrinking your PCI compliance burden.
Security checklist before launch:
- Enforce TLS and HSTS on every payment-adjacent endpoint.
- Set a Content Security Policy that restricts script sources around checkout pages.
- Rotate API keys and store secrets in a dedicated manager, not environment files in source control.
- Verify webhook signatures before trusting any payment event.
- Restrict server-side access to vaulted tokens by role.
Pro Tip: Test your saved-payment flow with a real off-session charge, not just a live checkout, since 3D Secure and SCA behave differently for user-present versus user-absent transactions. Check your provider’s documentation for the exact flow.
What Are the Risks of Anonymous Payment Channels?
Anonymous and pseudonymous methods create real regulatory exposure if you’re not careful. AML and KYC rules can apply once transaction size or volume crosses certain thresholds, and local restrictions on prepaid or crypto instruments vary by jurisdiction. Tax reporting obligations don’t disappear just because a payment method is privacy-preserving.
Practical mitigation looks like this:
- Set velocity rules that flag unusual spikes in transaction frequency or amount.
- Use device and behavioral signals to route suspicious activity to human review.
- Build a chargeback and rollback workflow before you need it, not after.
- Cap high-risk flows (crypto, prepaid top-ups) at conservative limits until you have monitoring in place.
- Keep transaction logs long enough for forensic review, but no longer than your retention policy requires.
Stripe’s guidance on anonymous payment methods recommends transaction monitoring and defined thresholds specifically because privacy-preserving channels are harder to vet after the fact.
The most common compliance trap isn’t fraud. It’s accepting large anonymous payments with no KYC gate at all, then discovering months later that a single sender exceeded a reporting threshold your business never tracked.
How Do You Test and Monitor the Setup Before Launch?
Run these checks before any real money moves through the system:
- Simulate a full client-side token flow end to end, including failure cases like an expired card.
- Test the saved-payment flow with an off-session charge to confirm SCA behaves as expected.
- Replay a webhook event to confirm your endpoint rejects unsigned or duplicate requests.
- Process a full charge-and-refund cycle and confirm your logs capture only the metadata you intended to keep.
Once live, track a baseline transaction rate so anomalies stand out, set alerts for chargeback spikes, and schedule periodic manual reviews of flagged transactions rather than relying on automation alone.
Pro Tip: Roll out privacy-preserving channels gradually. Put a new virtual-card flow behind a feature flag, send it to a small percentage of traffic first, and widen the rollout only after a week of clean monitoring data.
Why privacy-first payment collection matters for creators
From where we sit, the businesses that win long-term aren’t the ones asking for the most data. They’re the ones asking for the least. A creator who can collect a tip without demanding a payer’s name, address, or account signup builds trust faster, and tokenization means that trust doesn’t come at the cost of PCI liability piling up on your side of the ledger.
How Tipper Fits a Privacy-First Payment Collection Setup
Everything above describes the architecture. Tipper is one way to skip most of the engineering and still land in the right place. Payers tip through a personalized link or QR code using Apple Pay, Google Pay, or a card, with no account or signup required on their end, which means Tipper never asks for the personal details a traditional checkout form would.
On the creator side, you get a customizable tip page, direct payouts, and the ability to send thank-you notes or videos, without building a token vault or a consent flow yourself. If you’re a freelancer or small business trying to collect tips or appreciation payments without standing up your own privacy infrastructure, set up a Tipper page and start collecting in minutes.
Sources
- Anonymous payment methods—A guide for businesses
- Anonymous Payment Methods—A Complete Guide
- Small Merchant Guide to Safe Payments (PCI Security Standards Council)
- Protecting Personal Information: A Guide for Business (FTC)
FAQ
How do I set up a privacy-first payment method?
Combine a tokenization provider for checkout with virtual cards for payment, and store only transaction tokens and outcomes on your server, never raw card data.
Is Privacy.com safe and legit?
Privacy.com is a real virtual-card provider offering single-use and merchant-locked cards with spend limits and pause controls, which reduces exposure of your actual funding source when making payments.
How can I collect payments online without exposing customer data?
Use a hosted payment link or tokenized checkout so card details never pass through your own servers, and consider a service like Tipper if you want no-signup tip collection built in.
How do I set up recurring or saved payments privately?
Use a SetupIntent-style consent flow that saves a payment token for future off-session charges instead of storing the card number yourself; consult your gateway’s SCA documentation for the exact steps.
What’s the difference between anonymous and pseudonymous payment methods?
Anonymous methods like cash or gift cards reveal no identity at all, while pseudonymous methods like virtual cards or crypto mask the funding source but can still be traced under legal or regulatory review.
Recommended

Payment Immediacy for Creators: Why Speed Matters
Payment immediacy means a creator can access money they’ve earned within seconds or minutes of it being sent, rather than waiting through a billing cycle or platform hold. It’s the difference between a fan tapping “send” on a tip and that money actually landing somewhere you can spend it, versus watching a pending balance sit for weeks.
For creators, immediacy isn’t a nice-to-have feature buried in a payments settings menu. It changes how you run your business day to day.
- Cashflow stability: money arrives when you need it, not on someone else’s schedule
- Reinvestment speed: you can buy gear, hire an editor, or boost a post the same day a tip or payout hits
- Retention: creators who get paid fast stick around on a platform longer than those stuck waiting
- Negotiation leverage: payout speed becomes a bargaining chip with brands and platforms
- Financial resilience: irregular income becomes easier to manage when at least part of it is predictable in timing
Standards bodies like the Bank for International Settlements define fast payment systems by their ability to complete a transaction almost instantly, any time of day. Infrastructure like FedNow in the US and tools like Tipper are built specifically to close the gap between “you earned it” and “you can use it.”
Key Takeaways
Payment immediacy works because it converts unpredictable creator income into something closer to real-time cashflow, which directly reduces churn and financial fragility.
| Point | Details |
|---|---|
| Immediacy has a clear definition | It means usable funds within seconds to minutes, not just a fast-sounding label on a contract. |
| Speed drives retention | Platforms paying within seven days see roughly half the churn of those on 30-day cycles. |
| NET-30 and instant are different promises | Billing terms control when payment is due; payout rails control how fast it moves once released. |
| Fees usually land on someone | Instant transfers often carry around a 1% fee, so confirm upfront who absorbs it. |
| Tipper removes the delay entirely for tips | Tipping links let supporters pay instantly via Apple Pay or Google Pay with no account and no invoicing cycle. |
Table of Contents
- Why Payment Speed Changes Creator Economics
- What “Instant,” “Same Day,” and NET-30 Actually Mean
- How Platforms and Fintechs Actually Deliver Instant Money
- The Payout Methods You’ll Actually See
- What Faster Payments Actually Cost You
- How to Get Paid Faster, Starting This Week
- Real Examples of Immediacy in Practice
- Why “Instant” Doesn’t Always Mean the Same Thing
- An Operator’s View on Why Speed Should Be the Default
- Get Paid the Moment Someone Wants to Support You
- Sources
- FAQ
Why Payment Speed Changes Creator Economics
Most creators don’t have one steady paycheck. You’ve got ad revenue landing on one schedule, brand deals on another, tips arriving whenever a fan feels generous, and platform payouts trickling in on their own cycle. That patchwork income is manageable when at least some of it moves fast. It becomes a real problem when everything is delayed at once.
More than a third of the US labor force now identifies as independent workers, and BLS research on social media influencers points to payment speed as a central financial concern for that group. When your income doesn’t arrive on a fixed date, the timing of each individual payment matters more, not less.
The retention data backs this up. Platforms that pay creators within seven days of approval see churn rates roughly half of what platforms see when they stick to 30-day cycles, according to industry analysis on creator retention. Creators who wait 30 or more days for a payment are far more likely to simply stop taking new assignments from that platform or brand. Slow pay doesn’t just annoy people. It pushes them elsewhere.
Faster access to earnings has knock-on effects that compound over time:
- You can pay a video editor or virtual assistant the same week instead of floating them on your own credit
- You can reinvest in equipment or ad spend while a trend is still relevant, not three weeks after it’s cooled
- You gain something to point to when a brand tries to lock you into 60 or 90-day net terms
Pro Tip: Treat payout speed as a line item in every negotiation, the same way you’d negotiate usage rights or exclusivity. Ask brands directly: “What’s your payment timeline, and is there a faster option for a small fee reduction?” Many will say yes because cash held longer costs them something too.
What “Instant,” “Same Day,” and NET-30 Actually Mean
Contract language around payment timing is inconsistent, and that inconsistency costs creators money and stress. Here’s what each common label actually promises in practice.
“Instant” should mean funds are usable within seconds to a couple of minutes. “Same day” usually means hours, not seconds, funds clear before the bank’s daily cutoff but you might wait until evening. “Faster payments” is a broader category that can mean anywhere from a few hours to next business day. “NET-30” or “NET-45” refers to billing terms, not payout speed. It’s a promise about when an invoice becomes due, and it says nothing about how fast the money moves once it’s released.
That last distinction trips up a lot of creators. NET-30 is a business term. Instant bank push or card push is a technical rail. A brand can offer NET-30 billing and then, once the 30 days are up, still pay you through a slow wire that takes three more business days. The label and the rail are separate promises.
| Label | Typical time to funds | Common delivery rail |
|---|---|---|
| Instant | Seconds to a few minutes | Card push, instant bank rails, platform wallet with instant unlock |
| Same day | A few hours, same business day | Same-day ACH, some bank transfers |
| Faster payments | Hours to next business day | Faster Payments-style rails, some card networks |
| NET-30 / NET-45 | 30 to 45 days before payment is even released | Standard ACH or check once released |
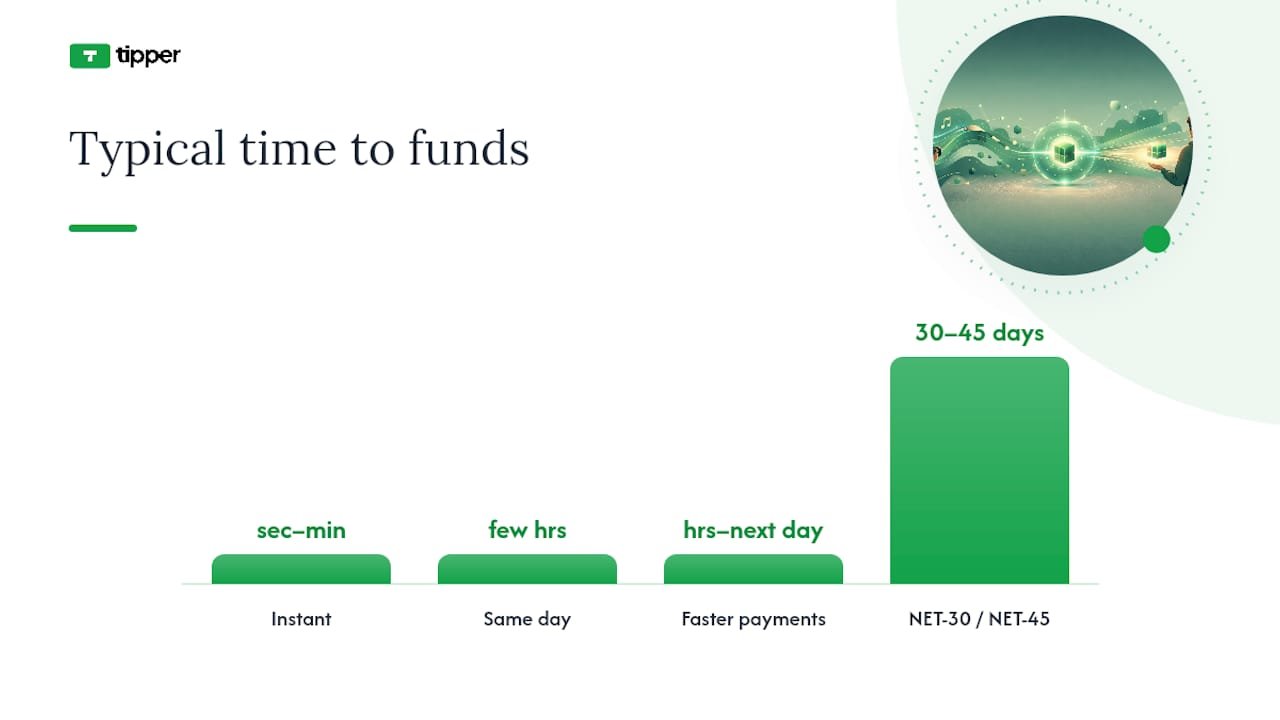
Eligibility gates matter here too. Instant options often require a debit card (not a prepaid card), a bank account in a supported country, or a verified account past a certain age or transaction history. A creator in one country might get instant card push while someone in another region on the same platform gets stuck with standard ACH, purely because of what rails their bank supports.
How Platforms and Fintechs Actually Deliver Instant Money
Behind every “instant payout” button is a specific piece of financial plumbing, and it’s worth knowing roughly how it works so you can judge whether a platform’s promise is real or just marketing.
The most common rails are:
- Card push (debit push): funds route directly to your debit card’s network rather than sitting in a bank queue, often landing in minutes
- Instant bank rails: systems like FedNow in the US, or comparable real-time rails elsewhere, move money bank-to-bank around the clock
- Platform wallets: money lands in an in-app balance instantly, but you still have to transfer it out to your bank, which may or may not be instant itself
- Fronting or advance services: a company like Lumanu advances a creator their expected payment before the underlying brand or platform funds have actually settled, essentially floating the cash and taking on the collection risk itself
There are two commercial patterns worth separating. One is native instant rails, where the money genuinely moves in real time because the underlying payment infrastructure supports it. The other is fronting, where a fintech pays you first out of its own balance sheet and then collects from the actual payer later. Both feel identical from a creator’s side, instant money, but they carry very different risk profiles for the company providing it.
Mastercard has invested heavily here through Mastercard Move, a network of partnerships designed to give platforms and gig workers faster, more transparent access to what they’ve earned. Mastercard’s own reporting notes that platforms adopting these faster rails see measurably better user experience and retention, echoing the churn data seen elsewhere in the creator economy.
Substack, for its part, has built subscription payouts around Stripe’s instant payout infrastructure, letting writers pull earned revenue out closer to the moment it’s collected instead of waiting for a monthly batch. Whatever platform or fintech you’re evaluating, always check the fine print on eligibility. Country restrictions, minimum balances, and card type requirements can quietly turn an “instant” feature into something that only works for a fraction of users.
The Payout Methods You’ll Actually See
Contracts and platform dashboards use a handful of recurring payout methods, and each comes with its own timing, fee structure, and friction level.
ACH / direct deposit. The default for most platform payouts in the US. Funds typically take one to three business days. Usually free to the creator, though the platform may absorb a small processing cost.
Card push / instant debit payouts. Money lands on a linked debit card, often within minutes.
Platform wallets. Common on marketplaces and creator platforms. The balance updates instantly, but moving it to an actual bank account may still take the standard ACH timeline unless the platform offers an instant cash-out option, often for a fee.
PayPal and similar wallets. Fast for peer transfers, slower and costlier for currency conversion or business withdrawals. Instant transfer to a linked card is usually available for a small percentage fee.
Tipping links and one-tap pay (Apple Pay, Google Pay). These skip the invoice-and-wait cycle entirely. A supporter taps once, no account required on their end, and the money moves through the underlying card network on essentially the same timeline as any instant card transaction. This is the category tipping links fall into, and it’s built specifically to remove the multi-day gap between appreciation and access.

Wire transfers. Reserved for larger one-off payments, often international. Slow (one to five business days) and expensive, with fees frequently in the $15 to $50 range depending on the bank and currency.
Pro Tip: Set your default payout destination to a real debit card, not a prepaid or virtual card, since many instant-payout systems reject non-standard cards outright. Check this in your platform settings before you need the money urgently, not after.
What Faster Payments Actually Cost You
Speed isn’t free. Somebody in the chain, you, the platform, or the brand, absorbs the cost of moving money faster than the default rails allow, and it’s worth knowing who that is before you assume instant is always the better deal.
The direct cost drivers include instant-payout fees charged by the processor (commonly a percentage of the transfer amount), debit card network fees, currency conversion spreads on cross-border payments, and the margin a platform builds in if it’s fronting funds ahead of its own collection.
There are operational risks too, and they cut in the platform’s direction more than the creator’s, but they still shape what gets offered to you:
- Chargeback exposure: if a brand payment gets reversed after a creator has already been paid instantly, someone eats that loss
- Reconciliation complexity: instant rails moving money in real time make bookkeeping harder to audit than batch payments
- KYC/AML friction: instant payout products usually require tighter identity verification upfront, which can delay your first payout even while later ones are instant
- Liquidity exposure: fronting services are taking on real financial risk every time they pay a creator before collecting from the actual source, which is why they charge for it
Who typically pays the fee depends on the platform. Some brands absorb an instant-payout surcharge as a cost of doing business with top creators. Others pass it straight to you. When you’re negotiating a deal, ask directly which side of that fee you’re on, and use it as a bargaining point, particularly if you’re a repeat contributor with leverage. On the compliance side, remember that faster money is still taxable money. University of Bath research on influencer income flags how easy it is to mismanage reporting when payments arrive through unconventional channels like platform credits or in-kind arrangements. Instant cash doesn’t remove that obligation.
How to Get Paid Faster, Starting This Week
You don’t need to wait for platforms to fix this industry-wide. There’s a lot you can control directly.
- Ask for a partial upfront payment. Even 25% to 50% before deliverables are due protects you against a slow final settlement and signals you take your business seriously.
- Add an accelerated payout clause to contracts. Specify a release trigger, “payment due within 5 business days of content approval,” rather than a vague monthly cycle.
- Set up instant-ready payout destinations before you need them. A verified debit card or bank account that supports instant rails should be configured before your next deal closes, not scrambled together after.
- Use tipping links for direct supporter payments. These bypass invoicing entirely and let fans pay you the moment they decide to, with platform tools built for exactly this.
- Document deliverables against payment milestones. The Library of Congress guide to influencer marketing costs is a useful reference for structuring what you deliver against what triggers payment.
- Push for a hybrid payout policy if a platform offers one. Many platforms now offer gated instant payout lanes for eligible creators while keeping NET-30 as the default, according to platform payout strategy guidance. Ask if you qualify.
Pro Tip: Here’s a contract clause you can adapt directly: “Payment shall be released within 3 business days of content approval via [instant bank transfer / card push], with approval defined as written sign-off or 5 business days of no feedback, whichever comes first.” That single clause removes the two biggest sources of payment delay, ambiguous approval windows and vague release timing.
Real Examples of Immediacy in Practice
Substack and instant payouts. Substack writers rely on Stripe’s instant payout infrastructure to pull subscription revenue closer to the moment it’s collected, rather than waiting for a fixed monthly disbursement, cutting the lag between a subscriber signing up and the writer seeing that money.
ShearShare and Mastercard Move. ShearShare, a marketplace connecting hair stylists with booth space, integrated Mastercard Move to give its workers faster access to earnings, a model Mastercard highlights as evidence that gig and creator-adjacent platforms see real retention gains when they shorten payout timelines.
The residuals benchmark. Fast Company’s reporting points out that SAG-AFTRA actors typically see residual payments within 30 to 60 days of a project airing, while creators on many brand deals wait 90 to 180 days for comparable campaign payments. That gap is the clearest evidence that the creator economy’s payment norms lag behind other entertainment sectors, not because the technology can’t move faster, but because the industry hasn’t standardized around doing so.
Retention data across platforms. The pattern holds everywhere it’s been measured: platforms that pay within a week retain creators at roughly double the rate of platforms running 30-day cycles, reinforcing that speed isn’t a cosmetic feature, it’s a business lever.
Why “Instant” Doesn’t Always Mean the Same Thing
The word “instant” gets used loosely, but the plumbing behind it varies by country and system, and understanding the difference helps explain why some payments genuinely land in seconds while others just feel fast.
The BIS distinguishes between coupled real-time settlement, where the interbank settlement and the money landing in your account happen at essentially the same moment, and decoupled deferred settlement, where banks settle with each other later in batches, but the payee still sees funds available almost immediately because the system guarantees it.
Sweden’s Swish runs on real-time settlement. India’s IMPS is near-instant. The UK’s Faster Payments system settles between banks on a deferred, net basis, yet still makes funds available to the recipient within seconds, because the underlying scheme guarantees payee availability regardless of when the banks square up behind the scenes.
The message flow generally looks like this: payer initiates → payment service provider validates and sends the message → the settlement layer either clears in real time or queues for batch settlement → the payee’s account shows available funds, often before the interbank settlement is even finished.
For creators, what matters is payee availability, not what’s happening between banks behind the scenes. A primer on instant versus faster payments makes this distinction clear: the label “instant” is really a promise about when you can spend the money, not a description of the bank’s internal settlement mechanics. When a platform tells you a payout is instant, the honest follow-up question is: instant to my account, or instant somewhere in the pipeline that I still can’t touch yet?
An Operator’s View on Why Speed Should Be the Default
Creators have spent years being treated like unsecured lenders to platforms and brands, fronting content, time, and production costs, then waiting months to see a return. That framing has held up mostly because the technology for faster settlement wasn’t widely accessible until recently. It is now, and the industry’s slow adoption of it looks increasingly like inertia rather than necessity.
The strongest argument for immediacy isn’t convenience, it’s fairness paired with financial reality. A creator managing irregular income from five different sources needs predictability more than the average salaried employee, not less. Every week a payment sits delayed for no operational reason is a week that creator is absorbing risk that belongs, functionally, to the platform or brand holding the money.
That said, immediacy has real limits. Fronting services carry genuine liquidity risk, and native instant rails only work where the underlying banking infrastructure supports them. Nobody should promise instant payouts everywhere and mean it. The realistic goal is a system where instant is the default wherever the rails allow it, and creators are told plainly, upfront, when it isn’t available yet. Tools built specifically around tipping links and one-tap payments, Tipper’s approach among them, are a practical step toward that default, because they remove the invoicing and approval delay entirely from at least one income stream.
Get Paid the Moment Someone Wants to Support You
Tipper closes the gap this entire article has been describing: the space between a supporter deciding to pay you and the money actually reaching you. A fan taps your personalized link, pays with Apple Pay, Google Pay, or a card, and never needs to create an account. No invoice, no NET-30 clause, no waiting on a brand’s finance department to process a batch.
That structure matters because it puts you outside the delayed-payment problems this article covers in detail. There’s no fronting service taking a cut for advancing your money, and no billing cycle to negotiate around, because Tipper isn’t collecting on your behalf and holding funds. You can also add a thank you message, text, photo, or video, so supporters get something personal back in the same moment they’ve just made your day a little easier. If you want a payment flow built around immediacy from the ground up rather than retrofitted onto slower rails, Tipper and see how it feels to get paid the moment someone decides you’re worth supporting.
Sources
For readers who want to dig into the mechanics and industry context behind this article, these sources cover the technical, commercial, and labor-market angles in more depth.
- BIS quarterly review: instant payments and settlement models
- Payday on demand: how fast payouts are crucial for creators and gig workers — Mastercard
FAQ
How do influencers accept payments?
Influencers typically accept payment through ACH direct deposit, card push transfers, platform wallets like PayPal, brand invoicing on NET-30 terms, and direct tipping links using Apple Pay or Google Pay for one-tap fan payments.
What are the four types of payment methods creators use?
The four most common categories are bank transfers (ACH or wire), card-based push payments, platform-native wallets, and one-tap digital wallet links such as Apple Pay or Google Pay tipping pages.
How long does payment initiation take?
Instant rails move money in seconds to a few minutes, same-day options clear within business hours, faster payment systems typically take hours to next business day, and standard NET-30 terms mean payment isn’t even released for 30 days after invoicing.
How do social media payments work?
Social media payments generally route through a platform’s built-in monetization tools, a brand’s invoicing cycle for sponsored content, or direct supporter payments via tipping links, with speed depending entirely on which payout rail the platform or brand uses behind the scenes.
Does Tipper require supporters to have an account?
No. Tipper lets supporters pay through a personalized link or QR code using Apple Pay, Google Pay, or a card, with no account required on the sender’s side.
Recommended

The Micro-Payment Content Model: A Practical Guide
The micropayment content model charges small, per-item fees for individual pieces of digital content. Think $0.10 for a single article, $0.25 for a video, or a $1 tip after a live stream. Use it when you need flexible, pay-per-use monetization that captures revenue from people who will never subscribe.
Common fits include:
- Single articles or blog posts behind a pay-per-view gate
- Individual videos or audio episodes
- Tips and appreciation payments for creators
- In-game items or virtual goods
- Pay-per-message or micro-service billing
- IoT device usage billed by the transaction
The model works best alongside subscriptions and tipping, not instead of them. It converts the occasional visitor who won’t commit to a monthly plan, and it lets you price content at its actual value rather than bundling everything into one flat fee.
Key Takeaways
The micro-payment content model works when you aggregate transactions to control fees, minimize checkout friction with wallet-based payments, and treat micropayments as a complement to subscriptions rather than a replacement.
| Point | Details |
|---|---|
| Define itemized pricing first | Pick one content item and a price between $0.10 and $2.00 before building any infrastructure. |
| Aggregation controls fee math | Stored-value or server-side aggregation is necessary for sub-$1 transactions to remain profitable. |
| Wallet support lifts conversion | Apple Pay and Google Pay eliminate card-entry friction and typically improve mobile conversion. |
| Measure conversion per view | Track pay-prompt views vs. completed payments for two weeks before scaling or changing infrastructure. |
| Tipper for instant pilots | Tipper’s pay link and QR code let creators test micropayment demand with no code and no sender account required. |
Table of Contents
- What does the micro-payment content model actually mean?
- Why did early micropayment systems fail?
- How do micropayments actually get processed?
- What business models use micropayments, and where do they fit?
- Why transaction costs are the core constraint
- What technology and payment rails should you integrate?
- Which providers should you evaluate?
- When does the micropayment model actually make sense?
- A practical implementation checklist with KPIs
- Where micropayments fit in a creator’s content strategy
- Tipper makes the pay-link step immediate
- Sources
- FAQ
What does the micro-payment content model actually mean?
A few terms appear constantly in this space, and vendors don’t always agree on definitions. Here’s what each one means in practice.
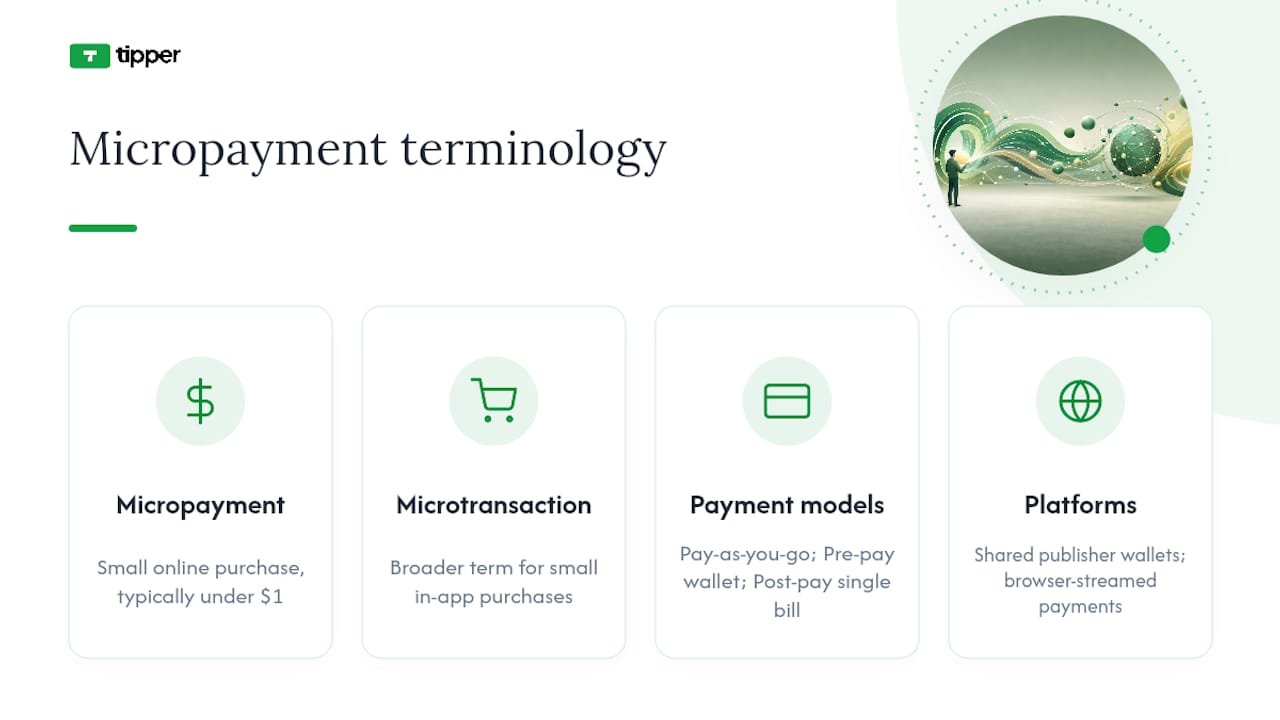
Micropayment refers to a small online transaction, typically under $1, though some providers draw the line at $10. Investopedia defines micropayments as small-value online transactions used for content, tips, and in-game purchases, with the “micro” floor shifting as infrastructure improves.
Microtransaction is the broader commercial term, often used in gaming and app stores. It covers any small in-app purchase, whether $0.01 or $4.99, and is the label most mobile platforms prefer.
Pay-as-you-go means the buyer pays only for what they consume, one item at a time, with no pre-loaded balance.
Pre-pay (stored value) means the buyer loads a wallet balance upfront, then spends from it. Each purchase draws down the balance without triggering a new card transaction.
Post-pay (aggregation billing) means purchases accumulate in a running tab and settle in a single charge at a threshold or billing cycle, similar to how a phone carrier bills data overages.
Collaborative models pool infrastructure across multiple publishers or platforms so that a single wallet or account works across properties, spreading fixed costs across a larger transaction base.
Web monetization / Interledger refers to a browser-level protocol concept that streams tiny payments from a visitor’s wallet to a publisher in real time, without a checkout step. The W3C has explored this space, though no universal standard has achieved wide adoption.
Why did early micropayment systems fail?
The idea is older than most people realize. Researchers and payment engineers were proposing micropayment schemes in the mid-1990s, well before anyone had a smartphone.
Early academic proposals included Millicent, PayWord, MicroMint, and lottery-based variants. Ronald Rivest and colleagues proposed aggregation schemes specifically designed to bundle small values into fewer bank settlements, cutting processing overhead. The Rivest aggregation paper shows how the math works: if you can batch 1,000 $0.01 payments into a single $10 settlement, the fixed cost per transaction drops by three orders of magnitude.
The W3C ran micropayment markup experiments in the early 2000s, trying to embed payment capabilities directly into web protocols. None of it stuck.
Why did these efforts fail? Three reasons, consistently:
- Transaction fees: Card-network fixed fees made sub-dollar payments economically absurd. A $0.30 fixed fee on a $0.10 payment means you lose money on every sale.
- Front-end friction: Every system required registration, account creation, or software installation before a buyer could pay. Most visitors left.
- No shared rails: Each scheme built its own wallet, its own network, its own merchant relationships. Without interoperability, neither side of the market reached critical mass.
The ECB analysis of micropayment adoption barriers identifies these same friction points as the primary reasons earlier systems didn’t scale. What’s changed since then: digital wallets like Apple Pay and Google Pay have eliminated registration friction for millions of users, instant payment rails have reduced settlement latency, and mobile-first behavior has normalized small in-app purchases at scale.
How do micropayments actually get processed?
Three core mechanisms handle the math of moving tiny amounts of money without destroying the margin.
Immediate micro-transaction
The buyer pays at the moment of purchase. A card or wallet is charged directly. This is the simplest architecture but the most expensive per transaction, because every payment triggers card-network fees. It only makes sense when the ticket price is high enough to absorb a fixed fee, or when the payment rail (like a stored-value wallet) bypasses card networks entirely.
Stored-value aggregation
The buyer loads a balance into a wallet. Each micro-purchase debits the wallet internally, with no new card transaction. The card network only sees the initial top-up. This is how most in-game currency systems work: you buy 1,000 coins for $9.99, then spend coins on items. The merchant’s processing cost is one card transaction, regardless of how many items the buyer purchases.
Server-side aggregation with delayed settlement
Purchases accumulate server-side until they hit a threshold or billing cycle. Then one charge covers everything. The buyer experiences frictionless access; the merchant batches settlement. This is the post-pay model, and it requires the merchant to carry credit risk between purchase and settlement.
In all three cases, the processing flow runs roughly the same way: the payer’s wallet or card authorizes the payment, the processor routes it to the merchant account, and the platform pays out to the creator or publisher on a schedule. Tokenization handles card data so the merchant never stores raw PAN data, which reduces PCI scope significantly.
Pro Tip: Use stored-value or server-side aggregation whenever your average transaction is under $1. Triggering a card-network transaction for every $0.10 purchase will consume your margin before you reach meaningful volume. Load the wallet once; spend from it freely.
What business models use micropayments, and where do they fit?
Pay identifies three main commercial structures. A fourth, the collaborative model, applies specifically to multi-publisher environments.
| Model | User friction | Settlement complexity | Merchant risk |
|---|---|---|---|
| Pay-as-you-go | High (pay each time) | Low | Low |
| Pre-pay (stored value) | Low after top-up | Medium | Medium (float) |
| Post-pay (aggregation) | Very low | High | High (credit risk) |
| Collaborative / consortium | Low (shared wallet) | High | Shared |
Use cases map to models fairly naturally:
- Content-on-demand (single articles, videos, audio): pre-pay or post-pay work best. The buyer loads a balance or runs a tab; access is instant.
- Tipping: pay-as-you-go is fine here because the buyer chooses the amount and the moment. Friction is acceptable when the act is voluntary appreciation.
- In-game purchases: stored-value is the industry standard. Virtual currency decouples the purchase decision from the card transaction.
- Pay-per-message or micro-services: post-pay aggregation, billed at end of period.
- IoT device billing: post-pay or collaborative, often with real-time metering and periodic settlement.
The MDPI study on consumer readiness for microtransactions found that consumers in a sampled population were receptive across several digital-content categories, which supports running small pilot experiments to test demand before committing to a full integration.
Why transaction costs are the core constraint
The math is unforgiving at small ticket sizes. A standard card transaction carries a fixed fee (often around $0.30) plus a percentage of the transaction value. You cannot build a business on that arithmetic.
The practical thresholds involve smaller microtransactions requiring aggregation or wallet-based processing to be viable, while higher-value transactions may use direct processing with better margins.
The ECB notes that regulatory and scheme rules can impose practical lower limits on electronic payments, so technical feasibility isn’t the only constraint. Some payment schemes decline transactions below certain cent thresholds entirely.
PayPal Micropayments offers a fee structure intended for small transactions, providing an option with lower fees compared to standard PayPal merchant accounts. This makes it more viable for sub-$5 payments than a standard merchant account, though it still requires enough volume to justify the integration.
Fee aggregation improves the picture significantly. If a stored-value wallet processes 100 purchases of $0.10 each from a single top-up of $10, the merchant pays one card-network fee on the $10 load, not 100 fees on 100 transactions. Net take rate improves by roughly an order of magnitude.
Breakeven framing: before launching, calculate your net take rate after fees at your expected average transaction value and volume.
What technology and payment rails should you integrate?
The right integration path depends on your transaction volume, your audience’s device behavior, and how much engineering time you can spend.
- Start with a pay link or payment button. Stripe, PayPal, and similar providers offer hosted payment pages that require no backend code. This is the fastest way to test whether your audience will pay per item at all.
- Add wallet support early. Apple Pay and Google Pay reduce friction dramatically for mobile users. One-tap payment eliminates the card-entry step that kills conversion on small purchases.
- Implement server-side aggregation once volume justifies it. This requires a backend, a database for tracking balances or tabs, and webhook handling for payment events. Don’t build this first.
- Configure payout flows. Decide how often creators or merchants receive payouts (daily, weekly, on-demand) and what minimum threshold triggers a payout. Stripe Connect and PayPal Payouts both handle this at scale.
- Handle chargebacks and fraud. Micropayments attract low-value fraud. Set velocity limits (max transactions per user per hour), require email or phone verification for stored-value top-ups, and monitor for unusual patterns.
Trade-offs to weigh:
- PCI scope: hosted pay links keep card data off your servers entirely. SDKs and direct API integrations require more compliance work.
- Reconciliation: aggregated billing creates complex reconciliation. Every item in a tab needs a record so disputes can be resolved.
- User friction vs. control: hosted pages are fast to launch but limit customization. SDKs give full control at the cost of integration time.
Payment integration strategy is also a payments consulting question worth getting right before you build, especially if you’re handling stored-value balances that carry regulatory implications in some states.
Pro Tip: *Prototype with a pay link first. Measure conversion for two weeks.
Which providers should you evaluate?
A short list of real options, each with a distinct profile:
- Stripe: Best for developer-led integrations. Stripe’s micropayments guidance recommends aggregation and wallet-based flows for low-ticket items. Strong SDK, excellent documentation, and Stripe Connect handles creator payouts natively. Not the cheapest per-transaction option for very small amounts.
- PayPal Micropayments: Offers a dedicated fee structure for small transactions, with a lower fixed fee than standard PayPal rates. TechCrunch covered PayPal’s 2010 micropayments launch as a signal of commercial interest in the model. Still relevant for publishers with existing PayPal audiences.
- Dropp: A newer micropayment platform built specifically for sub-dollar transactions, using a stored-value model to avoid per-transaction card fees. Worth evaluating if your average ticket is under $0.50.
- Web Monetization / Interledger: A browser-level protocol concept that streams tiny payments in real time. Still experimental; no mainstream browser has shipped native support. Worth watching, not yet worth building on.
- Tipping platforms (including Tipper): For creators whose primary use case is appreciation payments rather than gated content, a digital tip jar tool is often the fastest path to live micropayments. No stored-value complexity, no aggregation logic, just a link that pays.
When evaluating any provider, check: fixed fee per transaction, percentage fee, minimum payout threshold, payout frequency, chargeback policy, and whether they support Apple Pay and Google Pay natively.
When does the micropayment model actually make sense?
Not every content business should run micropayments. Here’s a practical decision frame.
Good signals for micropayments:
- Your content has clear per-item value (a single research report, a tutorial, a live session recording)
- You have a meaningful audience that visits occasionally but won’t subscribe
- Your average ticket can support fees after aggregation ($0.25 or above, or you’re using a wallet rail)
- You have the technical capacity to integrate a pay link or SDK
- You can aggregate transactions to reduce per-transaction costs
Red flags:
- Very low traffic volume (under a few thousand monthly visitors makes conversion math brutal)
- High chargeback risk (digital goods with no physical delivery are chargeback-prone)
- Regulatory constraints on stored-value balances in your jurisdiction
- Content that’s genuinely better suited to a subscription (recurring, high-volume, habitual consumption)
Compared to subscriptions, micropayments have lower commitment friction but also lower revenue predictability. A subscriber pays every month whether they consume or not; a micropayment buyer pays only when they show up. The tip-based revenue model sits between the two: voluntary, per-interaction, and often higher per-event than a prorated subscription day.
Paywalls and micropayments can coexist. A metered paywall (free for the first three articles, then pay per article) is a micropayment model with a free trial built in.
A practical implementation checklist with KPIs
This sequence keeps risk low and learning fast.
- Define your itemized pricing. Pick one piece of content. Set a price between $0.10 and $2.00. Don’t optimize the price yet; just pick something defensible.
- Prototype a pay link. Use Stripe Payment Links, PayPal, or a tipping platform. Get a live URL in under a day. No backend required.
- Measure conversion per view for two weeks. Track how many people who see the pay prompt actually complete a payment. Even 1% is a signal worth building on.
- Add wallet flows. Enable Apple Pay and Google Pay on your payment page. Conversion typically improves for mobile users when card entry is eliminated.
- Implement aggregation once volume justifies it. If you’re processing more than a few hundred transactions per month, stored-value or server-side aggregation will materially improve your net take rate.
- Configure payouts and reconciliation. Set a payout schedule, document every transaction, and build a basic dispute-resolution process before you scale.
Key KPIs to track:
- Conversion per view (pay prompts seen vs. payments completed)
- Average transaction value (AOV)
- Payout latency (time from transaction to creator payout)
- Net take rate (revenue after all fees, as a percentage of gross)
- Retention lift (do micropayment buyers return more often than non-payers?)
Research supports keeping friction as low as possible at every step. The MDPI consumer readiness study found receptiveness across digital-content categories, but receptiveness doesn’t survive a clunky checkout. The ECB’s analysis reinforces that front-end friction is a primary adoption barrier, not just fee math.
Pro Tip: Run your first micropayment experiment on your highest-traffic piece of content, not your newest one. You need enough views to get a statistically meaningful conversion signal within two weeks. Low-traffic content takes months to generate useful data.
Where micropayments fit in a creator’s content strategy
The creators who get the most from micropayments treat them as a third revenue layer, not a replacement for anything. Subscriptions cover the core audience. Ads or sponsorships cover the casual visitor. Micropayments and tips capture the middle: people who value specific content enough to pay once but not enough to subscribe.
Practically, this means tagging a subset of your content as pay-per-item, placing the pay prompt immediately after a preview (not at the end of the full piece), and following up with a thank-you message that nudges toward a subscription. The payment link placement matters more than most creators expect. A prompt buried at the bottom of a post converts far worse than one placed at the natural decision point.
Small-scale experiments limit downside. Start with one piece of content, one price point, and one payment method. If conversion is flat after two weeks, change the price or the content before changing the infrastructure. The risk of a failed micropayment experiment is low; the risk of over-building before validating demand is real.
Tipper makes the pay-link step immediate
Creators who want to test the pay-link stage of the implementation checklist without writing any code have a direct option in Tipper. A personalized Tipper link or QR code maps exactly to the “prototype a pay link” step: it’s live in minutes, supports Apple Pay and Google Pay natively, and requires no account from the person sending a tip.
Where Stripe and PayPal require developer setup and merchant account configuration, Tipper is built specifically for the creator-to-supporter flow. Senders pay with one tap. Creators receive instant tips with customizable pages, thank-you messages (text, photo, or video), and direct payouts.
If you’re at step one of the checklist and want a live payment link today, start with Tipper and validate demand before committing to a more complex integration.
Sources
- A big future for small payments? Micropayments and their impact on the payment ecosystem
- What Are Micropayments? Exploring Their Fintech Applications
- What Are Micropayments? How Do They Work? 2026 Info
FAQ
What is a micro-payment plan?
A micro-payment plan charges buyers a small fee, typically under $1, for each individual piece of digital content they access, rather than a flat subscription. It’s a pay-per-item model that works alongside subscriptions and tipping.
How does a micro-payment gateway work?
A micro-payment gateway processes small transactions by routing payments through a stored-value wallet or aggregation system, batching multiple purchases into fewer card-network transactions to keep per-transaction fees from exceeding the payment value.
Are micropayments worth implementing?
Micropayments are worth testing when your average ticket is $0.25 or above, you have enough traffic to generate a meaningful conversion signal, and you can use aggregation or wallet-based rails to control fees. Below those thresholds, subscriptions or tip-based models often produce better margins with less complexity.
What are the main types of micropayment models?
The three main arrangements are pay-as-you-go (pay per item, no pre-loaded balance), pre-pay stored value (load a wallet, spend from it), and post-pay aggregation (purchases accumulate and settle in a single charge). Collaborative models pool infrastructure across multiple publishers to spread fixed costs.
Can creators use micropayments without a developer?
Yes. Pay-link tools and tipping platforms like Tipper let creators accept small payments via a personalized link or QR code, with Apple Pay and Google Pay support, and no code or sender account required. This covers the first stage of any micropayment pilot.
Recommended

Real-Time Payments for Freelancers: Benefits Explained
Real-time payments give freelancers immediate access to funds the moment a transaction clears, cutting out the multi-day settlement delays that make cash flow unpredictable. That single shift, from waiting to having, changes how you budget, which gigs you take, and how much time you spend chasing invoices.
Here is the short version of how real-time payments benefit freelancers:
- Cash flow on demand. Funds land in seconds, not days, so you can pay bills, buy supplies, or take on new work without waiting for a batch to settle.
- Fewer disputes and less reconciliation. Payment finality and instant confirmation mean both you and your client know the transfer succeeded, reducing follow-up emails and back-office guesswork.
- Faster access to tips and shift pay. Gig workers and creators can receive earnings immediately after finishing work, whether that’s a shift, a session, or a tip through a payment link.
The U.S. infrastructure making this possible includes the Federal Reserve’s FedNow Service, the Clearing House RTP network, same-day ACH, push-to-card transfers, and digital wallets like Apple Pay. Payment providers like Stripe sit on top of these rails to give freelancers practical access. According to PYMNTS and Ingo Payments survey data, freelancers are notably more likely than average consumers to choose instant payments when offered, and a large majority would select instant pay if it were available.
Key Takeaways
| Point | Details |
|---|---|
| Instant access to funds | RTP and FedNow settle in seconds, 24/7, so you never wait days for a transfer to clear. |
| Less admin overhead | Payment finality and instant confirmation cut follow-up emails and reconciliation time significantly. |
| Freelancers value speed | Survey data shows 84% of freelancers would choose instant pay if available, and many will pay a fee for it. |
| Test before you scale | Run a small test transaction on any new instant payout tool to confirm actual speed and record the timestamp. |
| Tipper for instant tips | Tipper’s personalized tip links support Apple Pay, Google Pay, and cards, with no sender account required and direct payouts to you. |
Table of Contents
- Where do freelancers actually use real-time payments?
- How fast payments help freelancers beyond just speed
- How real-time payments actually deliver funds in the U.S.
- Fees, speed trade-offs, and practical limits
- What to watch out for: fraud, reversals, and tax implications
- How to start accepting real-time payments as a freelancer
- Which tools can freelancers use for instant payouts right now?
- When real-time payments aren’t the right choice
- What instant pay actually feels like in practice
- Tipper makes instant tipping simple for freelancers
- Sources
- FAQ
Where do freelancers actually use real-time payments?
Real-time payment rails map cleanly onto the irregular, project-based nature of freelance work. The use cases below are where the speed advantage shows up most clearly in practice.
Instant tips after a service. A photographer wrapping up a wedding reception can share a Tipper link or QR code on the spot. Guests pay via Apple Pay with no account required, and the photographer sees the funds immediately. The Clearing House RTP network explicitly lists instant merchant settlement as a supported use case, and tip-style payments fit that pattern exactly.

Shift-based and on-demand pay. Delivery drivers, rideshare workers, and hourly gig workers often finish a shift and want access to earnings that same evening. Push-to-card transfers and platform-level instant payout features make this possible, with funds hitting a debit card in minutes rather than waiting for the next ACH batch. The Clearing House documents payroll-at-end-of-shift as a core RTP use case.

Immediate invoice payouts. A consultant who sends a $2,000 invoice can request payment via an RTP-enabled payment link. When the client pays, the funds settle irrevocably in seconds rather than the two to five business days a standard ACH transfer takes. Stripe’s real-time payments explainer notes that faster settlement helps freelancers and microbusinesses access and move money quickly, reducing the risk that a late payment disrupts rent or operating costs.
Reimbursements and expense refunds. A freelance event producer who fronts costs for supplies can receive a reimbursement the same day via same-day ACH or an RTP push, rather than waiting a week for a check.
Marketplace escrow releases. Some project-based platforms hold funds in escrow until work is approved. RTP-enabled release means the money moves the moment the client clicks “approve,” not the next business day.
- Instant tips: digital wallets (Apple Pay, Google Pay), payment links
- Shift pay: push-to-card, platform payout features
- Invoice payouts: RTP network, same-day ACH, payment links
- Reimbursements: same-day ACH, push-to-card
- Escrow releases: RTP network, platform-level instant transfer
Pro Tip: For gig economy tipping specifically, a dedicated tipping workflow that lets clients pay without creating an account removes the biggest friction point between finishing a job and getting paid for it.
How fast payments help freelancers beyond just speed
Speed is the headline, but the deeper benefits of instant payments show up in how you run your business day to day.
Cash flow without the guessing game. When you know funds land in seconds, you can schedule bill payments, buy materials, and accept last-minute gigs without holding a mental buffer for “when will that transfer clear?” A Federal Reserve business payments study found that 92% of businesses using instant payments cited improved cash flow as a primary benefit, and the same dynamic applies directly to solo operators and freelancers.
Less time chasing and reconciling. With standard ACH, you send an invoice, wait, check your bank, wonder if it cleared, and sometimes send a follow-up. With RTP, you get a confirmation within seconds of the transfer completing. Bank of America’s analysis frames this as precision and transparency, not just speed: originators and recipients both know the status immediately, which cuts exceptions and back-office rework. For a freelancer, that means fewer “did you get my payment?” emails from clients and fewer hours spent matching deposits to invoices.
Better planning and budgeting. RTP’s 24/7 availability means a client can pay you at 11 PM on a Sunday and you have access to those funds before Monday morning. That timing precision, documented by J.P. Morgan’s payments research, lets you plan bill payments and cash reserves with much more accuracy than batch-settled systems allow.
Willingness to take more work. This one is underappreciated. When you know you’ll be paid immediately after finishing a job, you’re more likely to accept short-notice gigs, work with newer clients, or take on smaller projects that wouldn’t be worth the invoicing overhead otherwise. Survey data from PYMNTS and Ingo Payments found that many freelancers report instant payments reduce financial strain, and that willingness to pay a fee for instant disbursements is higher among freelancers than among the general population.
Pro Tip: Open a dedicated business checking account just for incoming instant payments. When funds arrive, you can see your “available to spend” balance at a glance without mentally subtracting pending transfers. Pair it with real-time bookkeeping to keep your records current automatically.
How real-time payments actually deliver funds in the U.S.
Understanding the rails helps you know what to ask for and what to expect when a payment is described as “instant.”
The main U.S. rails and methods
FedNow. Launched by the Federal Reserve in 2023, FedNow is a central-bank-backed instant settlement service available to participating U.S. financial institutions. When your bank and your client’s bank both participate, a FedNow transfer settles in seconds, around the clock, every day of the year.
The Clearing House RTP network. The private-sector counterpart to FedNow, the RTP network has been operating since 2017. It supports request-for-payment messaging, which lets you send a payment request directly to a client’s bank app, and the client can approve it with a tap.
Push-to-card. A debit card-based instant transfer where a payer “pushes” funds to your Visa or Mastercard debit card. Common in gig platform payouts and marketplace disbursements. Funds typically arrive within 30 minutes, though many transfers complete in under a minute.
Same-day ACH. Not truly real-time, but meaningfully faster than standard ACH. Funds settle within the same business day through up to three daily settlement windows. No 24/7 availability, but it covers a wide range of transaction sizes and is broadly supported.
Digital wallets (Apple Pay, Google Pay). Wallets move money through underlying card or bank rails. Apple Pay and Google Pay can facilitate instant peer-to-peer transfers when linked to eligible accounts, and they’re the most frictionless option for clients who want to tip or pay on a mobile device.
Settlement and finality at a glance
| Rail / Method | Typical speed | Availability | Reversibility |
|---|---|---|---|
| FedNow | Seconds | 24/7/365 | Final / irrevocable |
| The Clearing House RTP | Seconds | 24/7/365 | Final / irrevocable |
| Push-to-card | Under 30 minutes | 24/7 (most networks) | Limited; card network rules apply |
| Same-day ACH | Same business day | Business hours only | Reversible within window |
| Digital wallets | Seconds to minutes | 24/7 | Varies by underlying rail |
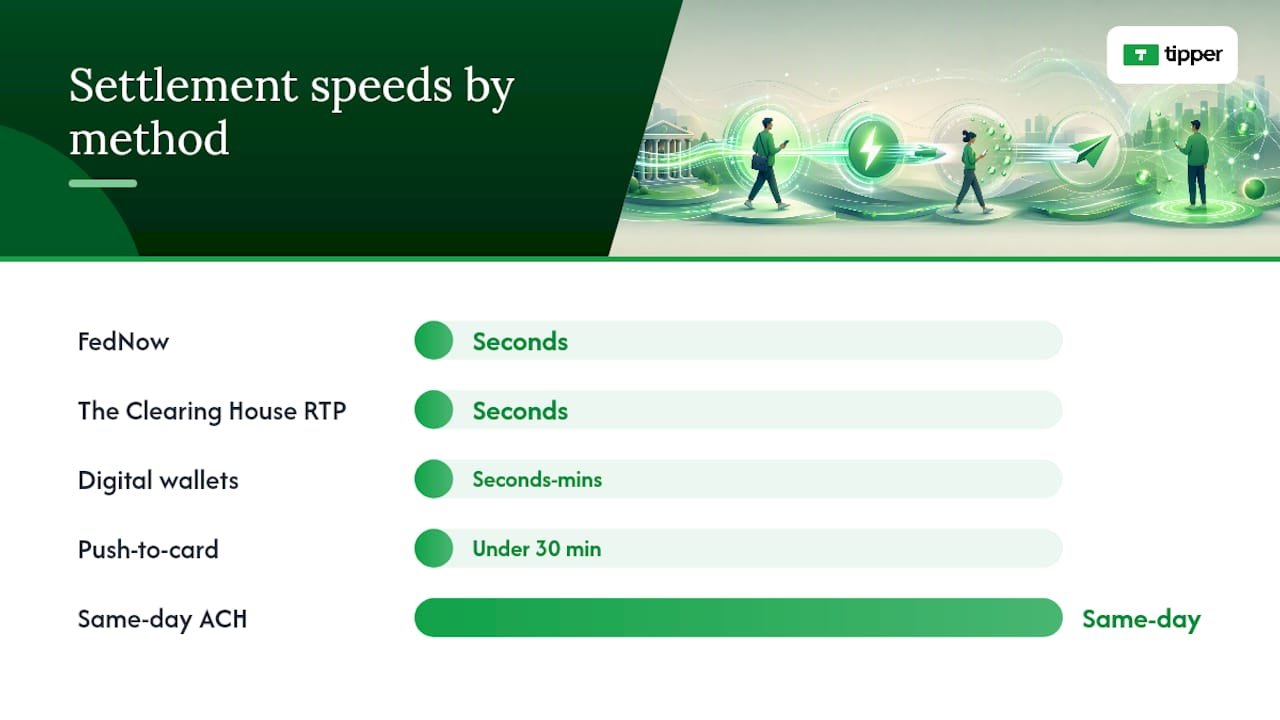
One practical note: RTP and FedNow transfers carry richer payment data using the ISO 20022 messaging standard. That means a transfer can include invoice numbers, reference codes, and remittance details alongside the funds, which makes reconciliation faster and reduces the chance of mismatched records.
Fees, speed trade-offs, and practical limits
Real-time payment advantages come with a cost structure that differs from standard ACH, and knowing the shape of those costs helps you decide when instant pay is worth it.
Standard ACH is typically free or close to it for the sender, and same-day ACH adds a small per-transaction fee on the sending side. RTP and FedNow transfers often carry a flat fee per transaction, though the exact amount depends on your bank or payment provider.
Platforms and employers sometimes pass instant-payout fees to the recipient. A gig platform might offer “instant” payout for a fee deducted from your earnings, while standard payout is free but takes one to two business days. Survey data from PYMNTS and Ingo Payments shows that many freelancers are willing to pay that fee, particularly when cash flow is tight or when the work is high-value.
There are also per-transaction caps to be aware of. The Clearing House RTP network supports transactions up to high limits, but individual banks often set lower thresholds. FedNow transaction limits vary by participating institution. For most freelance invoices, these caps are not a practical constraint, but for large project payments, it’s worth confirming your bank’s specific limit before promising a client an instant transfer.
| Dimension | Same-day ACH | RTP / FedNow | Push-to-card |
|---|---|---|---|
| Speed | Same business day | Seconds | Under 30 minutes |
| Typical fee structure | Small flat fee (sender) | Flat fee per transaction | Percentage of amount |
| Reversibility | Reversible within window | Final / irrevocable | Limited |
| Availability | Business hours | 24/7/365 | 24/7 (most networks) |
What to watch out for: fraud, reversals, and tax implications
The finality that makes RTP valuable is also the property that creates the most risk. Once an RTP or FedNow transfer settles, it cannot be recalled the way a standard ACH can. That means if you send money to the wrong account, or if a fraudster tricks you into sending funds, recovery depends on the recipient’s cooperation, not a bank reversal.
Fraud patterns to know. Social engineering is the most common attack vector. A scammer poses as a client, sends a fake payment confirmation, and asks you to ship goods or start work before the funds actually arrive. Always verify payment in your bank account directly, not from a screenshot or email. For new clients paying via RTP, wait for the confirmation in your own banking app before delivering work.
Finality vs. platform-level holds. Even though the underlying rail settles instantly, the platform sitting on top may impose its own hold period for fraud review. A marketplace might show a payment as “pending” for 24 hours before releasing it to your balance. That is a platform policy, not a rail limitation, and it varies by provider.
Chargebacks and disputes. RTP transfers themselves are not chargeable in the same way a credit card transaction is. But if a client pays via a card-funded wallet or a card-based push, the card network’s dispute rules still apply. Know which rail your payment actually traveled before assuming it’s fully final.
Tax and record-keeping. Instant tips, shift pay, and invoice payouts via RTP are all taxable income, regardless of how fast they arrive. The speed of settlement does not change your reporting obligations. For each instant receipt, record the timestamp, the payer’s name or ID, the amount, and the invoice or job reference. That metadata is exactly what you need at tax time, and RTP’s richer payment messaging often includes it automatically if you’re using a platform that passes it through.
A simple rule: treat every instant receipt the same way you’d treat a check. Log it the day it arrives, tag it to a project, and set aside your estimated tax percentage immediately.
How to start accepting real-time payments as a freelancer
Getting set up to receive instant payments takes a few deliberate steps, but none of them are complicated.
-
Decide which instant method fits your work. If you do project-based work with direct clients, an RTP-enabled payment link or request-for-payment flow is the cleanest option. If you work through a gig platform, check whether it offers instant or same-day payout and what the fee is. For tips and appreciation payments, a wallet-enabled tip link is the fastest path.
-
Open a dedicated receiving account. A separate business checking account for incoming instant payments keeps your cash flow visible and your bookkeeping clean. Many online banks support FedNow or RTP receiving without extra setup. Gig worker instant pay guidance consistently points to account separation as the single most practical workflow change.
-
Update your payment terms. Add a line to your contracts and invoices specifying your preferred payment method and any fee for instant processing. Something like: “Payment via RTP or same-day ACH preferred. A 1.5% instant-processing fee applies to push-to-card payouts.” That sets expectations before the invoice arrives.
-
Test with a small transaction. Before relying on instant pay for a large invoice, send yourself a $1 test transfer or ask a trusted client to run a small payment through the new flow. Confirm the funds appear in your account within the expected window and that the payment data (reference, amount, timestamp) is correct.
-
Integrate payment links or request-for-payment flows. A payment link lets clients pay with one tap, without logging into a portal or entering your bank details manually. For tips specifically, a personalized link that supports Apple Pay or Google Pay removes every barrier between finishing a job and getting paid for it.
Documents and settings to prepare: bank routing and account numbers for instant rails, your EIN or SSN for tax reporting, a refund and dispute policy, and invoice metadata fields (job ID, date, client name).
Pro Tip: When you phrase your payment terms, be specific about the rail: “Please pay via Zelle, RTP, or same-day ACH to [account details]” is clearer than “please pay electronically.” Specificity reduces the chance a client defaults to a paper check. For a full freelancer tipping workflow, including how to set up your first tip link, the step-by-step guide covers the setup in detail.
Which tools can freelancers use for instant payouts right now?
The practical options fall into a few categories, each suited to a different type of freelance work.
Payment link and checkout tools. Stripe supports real-time payment methods and push-to-card payouts, making it a solid option for freelancers who invoice directly. You can create a payment link, share it with a client, and receive funds via the client’s preferred method. Stripe’s documentation covers which rails are available in the U.S. and what the fee structure looks like for each.
Push-to-card payout services. Several platforms let employers and marketplaces push earnings directly to a worker’s debit card. If you work through a marketplace, check whether it supports instant payout and what the per-transfer fee is. For evaluating payout terms and cadence, understanding when funds are released and under what conditions matters as much as the speed claim.
Digital-wallet-first flows. Apple Pay and Google Pay work best when the payer is on a mobile device and wants to complete a transaction in seconds. For in-person services, a QR code that opens a wallet-enabled payment page is the fastest possible experience for both parties.
Marketplace payout features. Many gig platforms now offer instant or same-day payout as a toggle in your earnings dashboard. The fee is usually deducted from your balance rather than charged separately, so read the fine print before assuming the “instant” option is free.
Tipper for instant tips. For creators and freelancers who receive tips, Tipper offers a personalized tip link and QR code that clients can use without creating an account. Apple Pay, Google Pay, and card payments are all supported. Payouts go directly to the creator, and the sender experience takes seconds. It fits the instant payment tools category that works best for service workers, photographers, musicians, and anyone whose clients want to show appreciation on the spot.
Checklist for evaluating any instant payout tool:
- Payout speed (seconds vs. hours vs. next business day)
- Fee structure (flat vs. percentage, who pays)
- Reconciliation data included with each transfer
- API or payment link support for your workflow
- Refund and hold policy
- Privacy handling for sender and recipient data
Pro Tip: Run a $1 test payout through any new tool before using it for real income. Record the exact time the funds appeared in your account. If the tool claims “instant” but funds take 20 minutes, that is useful information for setting client expectations and for your own cash-flow planning.
When real-time payments aren’t the right choice
Instant pay is not always the best option, and knowing when to skip it saves you fees and complexity.
- Recurring retainers with trusted clients. If a client pays the same amount on the first of every month, a standard ACH setup is simpler and free. The predictability of a retainer already solves the cash-flow problem that RTP is designed to address.
- High-value transactions that exceed rail caps. If your bank’s RTP limit is lower than your invoice amount, you’ll need to split the payment or use a wire. Wires are slower to set up but handle large amounts without the per-transaction cap constraints of some RTP implementations.
- Disputed or conditional work. If there’s any chance a client will contest the work, an irrevocable RTP transfer puts you in a harder position than a reversible ACH. For new client relationships or milestone-based projects, consider keeping standard ACH until trust is established.
- When clients won’t absorb the fee. If a client refuses to pay an instant-processing fee and you don’t want to absorb it yourself, the math may not work. A 1.5% fee on a $500 invoice is $7.50, which is manageable. On a $50 invoice, it starts to feel disproportionate.
- High-volume small payouts. If you receive dozens of small instant transfers daily, the per-transaction fees add up and the bookkeeping becomes more complex than a daily batch settlement. Scheduled same-day ACH or invoice acceleration services may be a cleaner fit.
For situations where instant pay isn’t ideal, same-day ACH covers most of the speed gap at lower cost, and invoice factoring or acceleration services can bridge cash-flow gaps on larger invoices without requiring the client to change their payment behavior.
What instant pay actually feels like in practice
Finishing a project and seeing the payment land before you’ve closed your laptop changes something about how you think about your work. The financial anxiety that comes with waiting, checking your bank twice a day, wondering if the client forgot, simply isn’t there. You know the job is done and the money is there, so you can move on to the next thing. Budgeting becomes more concrete too: instead of estimating when funds might arrive, you’re working with real numbers. The one adjustment worth noting is administrative. Instant receipts still need to be logged, tagged to a project, and set aside for taxes, so keeping a separate account and a simple tracking habit makes the whole system work cleanly.
Tipper makes instant tipping simple for freelancers
Freelancers who rely on tips, whether photographers, musicians, coaches, or content creators, often lose those payments to friction. A client wants to tip but doesn’t have cash, doesn’t want to create an account, or doesn’t know where to send money. Tipper removes every one of those barriers.
With Tipper, you get a personalized tip link and QR code that your clients can use in seconds. Apple Pay, Google Pay, and card payments are all supported, and senders never need to sign up for anything. Payouts go directly to you, and you keep your earnings. You can add a thank-you message, a photo, or a short video to make the experience personal. Privacy is built in: senders share only what they choose, and your payout details stay private.
If you finish a job and want to get paid for it right now, create your Tipper page and share the link with your next client. Setup takes minutes, and the first tip can arrive before you’ve packed up your gear.
Sources
- Real-Time Payments Explained | Stripe
- Instant payments: Understanding RTP® and FedNow® Service | J.P. Morgan
- 2024 Business Payments Study | Federal Reserve / Payments Improvement
This article is general information, not a substitute for advice from a qualified financial advisor. Consult a qualified financial professional about your own circumstances before acting on anything here.
FAQ
Which payment method is best for freelancers?
The best method depends on your workflow. For direct client invoices, an RTP-enabled payment link or same-day ACH covers most situations. For tips and on-the-spot payments, a wallet-enabled tip link (Apple Pay or Google Pay) is the fastest and most frictionless option for both you and your client.
What are the main benefits of real-time payments for freelancers?
Immediate fund availability, payment finality, and 24/7 settlement are the core advantages.
Is RTP cheaper than ACH for freelancers?
Standard ACH is typically free or near-free, while RTP and push-to-card transfers carry per-transaction fees, either flat or as a percentage of the amount. Same-day ACH sits in between. Whether RTP is worth the cost depends on how urgently you need the funds and whether your client or platform absorbs the fee.
Do instant payments affect how I report income for taxes?
No. Funds received via RTP, push-to-card, or digital wallets are taxable income in the period you receive them, the same as any other payment method. The speed of settlement does not change your reporting obligations, so log each instant receipt with a timestamp, payer name, and invoice reference as soon as it arrives.
What is the $3,000 rule for banks?
The $3,000 rule refers to Bank Secrecy Act requirements that financial institutions collect and retain records on certain cash transactions and transfers at or above that amount. It is not specific to RTP, but it means your bank may request documentation for transfers at or above that threshold. For most freelance payments, this is a background compliance requirement rather than a practical barrier.
Recommended

Freelance Extra Income Strategies That Actually Work
The fastest way to earn reliable freelance extra income is to package skills you already have into short, high-value services and use a three-month action plan to land paying clients. Certified financial planners consistently recommend starting with existing skills rather than learning something new, because the path from “idea” to “first payment” shrinks from months to days.
Here are the five strategies with the fastest time to first dollar:
- Value-based micro-services (copywriting, design, dev audits): Post a single, specific offer on Upwork or Fiverr today. First step: write one 150-word service description with a fixed price.
- Retainer arrangements: Pitch one existing contact for a monthly package (social posts, bookkeeping, SEO reports). First step: send a three-sentence email this week.
- Digital products (templates, printables, mini-courses): List one product on Etsy or Gumroad. First step: create a single Canva template and price it at $9–$19.
- Creator tip flows: Share a tip link after every piece of content you publish. First step: set up a Tipper page in under ten minutes and paste the link in your bio.
- Marketplace gigs (DoorDash, Rover, Turo): Sign up and complete onboarding. First step: submit your application today; most platforms approve within 48–72 hours.
Each of these works because setup cost is near zero, the first transaction can happen within a week, and all five can run alongside a full-time job.
Key Takeaways
| Point | Details |
|---|---|
| Start with existing skills | Packaging skills you already have gets you to a first payment faster than learning something new. |
| Set a specific earnings target | A concrete goal (e.g., $600/month) determines which gig category and pricing model makes sense. |
| Set aside 25–30% for taxes | Route that percentage to a separate savings account immediately on every payment received. |
| Move to retainers early | One retainer client at $500–$2,000/month stabilizes income and breaks the hourly-rate ceiling. |
| Tipper for instant tips | Creators can add a tip link to any deliverable or bio and accept Apple Pay or Google Pay with no sender account required. |
Table of Contents
- Freelance extra income strategies: a prioritized list by effort and reward
- How to choose the right side hustle for your skills and schedule
- Best practices to keep your side income growing and sustainable
- U.S. tax and payment basics every freelancer needs to know
- Platforms and payment tools to find work and get paid quickly
- Your 30/60/90 day plan to earn your first $500–$2,000
- What actually works (and what usually doesn’t)
- Tipper makes it easy to collect tips and small payments instantly
- Sources
- FAQ
Freelance extra income strategies: a prioritized list by effort and reward
Fidelity’s guide to side hustles notes that even modest supplemental income of $100+ per month adds up fast, and that matching the work to your schedule and skills is what keeps it going past the first month. The ideas below are grouped by how quickly they pay and how much skill they require.
Quick marketplace gigs
These are the lowest-friction entry points. You trade time for money directly, with no portfolio required.
DoorDash / Uber Eats / Instacart: Food and grocery delivery pays $15–$25 per hour on average, depending on your market and tip rates. You set your own hours, which makes it genuinely compatible with a day job. Sign up, pass a background check, and you can be delivering within a week.

Uber / Lyft: Rideshare driving pays similarly, with surge pricing pushing earnings higher during peak hours. The main startup cost is a qualifying vehicle and a clean driving record.
Rover: Dog walking and pet sitting through Rover typically earns $15–$30 per visit or walk. Pet owners book recurring services, so one good client can turn into a steady weekly income. Create a profile, get a few five-star reviews from neighbors, and the bookings compound.
Turo: If you own a car you don’t drive every day, listing it on Turo can generate $300–$700 per month depending on your vehicle and location. It’s passive once the listing is live.
Skill-based freelance services
These take slightly longer to set up but pay significantly more per hour.
Freelance writing and copywriting: Blog posts, email sequences, and product descriptions are in constant demand. Rates range from $50 per article for beginners to $150–$500+ for experienced writers with a niche. Upwork and direct outreach to small businesses are both viable starting points.
Graphic design: Logos, social media graphics, and pitch decks sell well on Fiverr and through direct client work. A beginner designer can earn $25–$75 per hour; a specialist with a strong portfolio can charge $100+.
Web development and tech support: Even basic WordPress setup or Shopify customization commands $50–$150 per hour. If you have any coding background, this is one of the highest-return skills to package.
Virtual assistance: Scheduling, inbox management, research, and data entry. Rates run $18–$40 per hour. The barrier to entry is low, and many clients want ongoing help, which creates natural retainer opportunities.
Recurring and retainer services
One retainer client at $500–$1,500 per month changes the math on side income entirely. Monthly social media management, SEO reporting, bookkeeping, or email newsletter writing all lend themselves to retainer pricing. The pitch is simple: instead of quoting per project, offer a fixed monthly scope at a slight discount in exchange for commitment.
Digital products
Templates, Notion dashboards, Lightroom presets, printable planners, and short e-books sell on Etsy, Gumroad, and Creative Market. The upfront work is real, but each sale after that costs you nothing. A single well-designed resume template on Etsy can sell dozens of times per month.
Creator tip-based income
If you publish content, teach, or coach, a tip link is the simplest way to monetize appreciation directly. Share it after tutorials, at the end of newsletters, or in your link-in-bio. Tips are small individually but accumulate, and they require zero ongoing work once the link is live.

Pro Tip: Before you list on a marketplace, search for the top three sellers in your category and note exactly how they title their gigs, what they include in each tier, and what their reviews praise most. Model your offer on what’s already working, then differentiate on one specific thing.
Earnings estimates by category
| Category | Typical hourly or project range | Startup friction | Time to first payment |
|---|---|---|---|
| Delivery / rideshare (DoorDash, Uber, Lyft) | $15–$25/hr | Low (background check, vehicle) | 3–7 days |
| Pet care (Rover) | $15–$30/visit | Low (profile + reviews) | 1–2 weeks |
| Car rental (Turo) | $300–$700/month | Low (vehicle listing) | 1–2 weeks |
| Freelance writing | $50–$500/project | Medium (portfolio sample) | 1–3 weeks |
| Graphic design | $25–$100+/hr | Medium (portfolio) | 1–3 weeks |
| Virtual assistance | $18–$40/hr | Low (profile + outreach) | 1–2 weeks |
| Web development | $50–$150/hr | Medium (skills + portfolio) | 2–4 weeks |
| Digital products (Etsy, Gumroad) | $9–$19/unit | Medium (creation time) | 2–6 weeks |
| Retainer services | $500–$2,000/month | Medium (existing relationship) | 2–4 weeks |
| Creator tips | Varies (micro-payments) | Very low (tip link setup) | Same day |
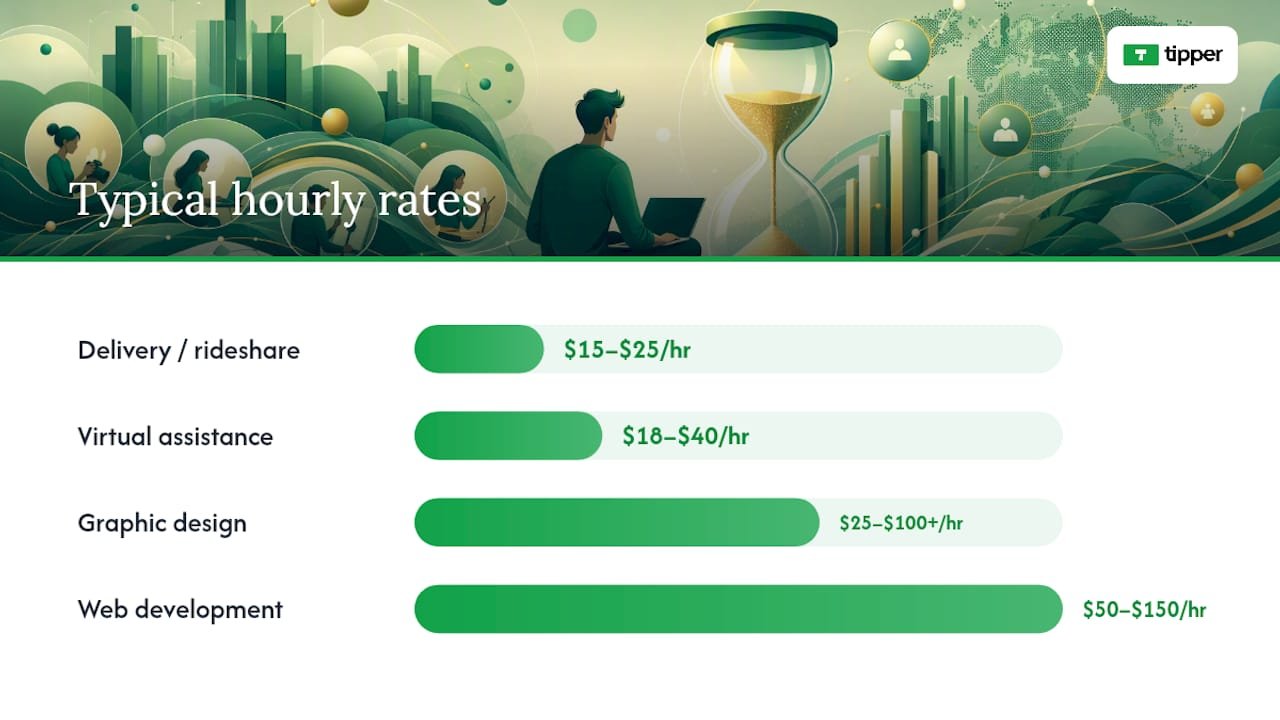
How to choose the right side hustle for your skills and schedule
Most people stall here. They read a list of ideas, feel excited, and then do nothing because they can’t decide. This checklist cuts through that.
Step 1: Run a quick skill inventory
Write down every skill you use at work or have used in the past five years. Include software, writing, communication, design, analysis, teaching, and physical skills. Don’t filter yet. You’re looking for anything someone would pay for.
Step 2: Do a time audit
How many hours per week can you realistically commit without burning out or jeopardizing your primary job? Be honest. Ten hours per week is a solid starting point. Five hours is enough for digital products or a single retainer client.
Step 3: Set a specific earnings target
“Make more money” is not a target. “Earn $600 per month within 90 days” is. Your target determines which category of side hustle makes sense. At $18/hr for virtual assistance, $600/month requires about 33 hours of paid work. At $500 per retainer, it requires one client.
Step 4: Apply a startup cost filter
Most of the best freelance extra income strategies cost nothing to start. If an idea requires buying equipment, inventory, or expensive software before you earn a dollar, deprioritize it until you’ve validated demand with something cheaper.
Step 5: Apply a risk and commitment filter
Some platforms (Turo, Rover) require physical assets or ongoing availability. Others (Upwork, Fiverr, Etsy) are fully asynchronous. Match the commitment level to your lifestyle, not just your income goal.
Step 6: Pick your top three candidates and test the smallest version
Don’t launch three side hustles at once. Pick the one with the fastest time to first dollar and run a micro-offer: one service, one price, one outreach message. If you get a response within a week, you have signal. If not, adjust the offer before scaling.
Pro Tip: Treat your first offer as an experiment, not a business. Write one sentence describing what you do, who it’s for, and what they get. Send it to five people. The feedback from those five conversations is worth more than a month of planning.
For readers exploring multiple income streams simultaneously, this guide to income streams you can start with a full-time job covers the model-selection logic in more depth.
Best practices to keep your side income growing and sustainable
Getting the first client is the easy part. Keeping income stable and growing it without burning out is where most people struggle.
Pricing: move away from hourly as fast as you can
Hourly pricing caps your income at your hours. Project pricing and retainers break that ceiling. Once you’ve completed two or three projects, you have enough data to quote a fixed price based on the outcome, not the time. A client who pays $300 for “five blog posts” doesn’t care if you write them in three hours or eight.
Scaling to $5,000–$10,000 per month typically requires value-based pricing, retainer or outcome-based contracts, and simple repeatable systems. That level usually takes 6–18 months of consistent work, but the pricing shift is what makes it possible at all.
Client acquisition: make it a weekly habit
- Block 90 minutes every week specifically for outreach. Treat it like a meeting you can’t cancel.
- Send five personalized messages per week: two to warm contacts, three to cold prospects in your niche.
- After every completed project, ask for one referral and one testimonial. Most clients will say yes if you ask directly.
- Follow up once, seven days after any unanswered pitch. A single follow-up roughly doubles response rates.
Time management: protect your primary job
Set hard rules: no client calls before 7 AM or after 9 PM on weekdays. Batch similar tasks (all writing on Tuesday evenings, all client emails on Sunday mornings). Use a shared calendar block labeled “unavailable” to prevent scope creep into your personal time.
Quality controls that prevent late payments
Write a one-page scope statement for every project, even small ones. Include deliverables, revision limits, and payment terms. Invoice on delivery, not after. These three habits eliminate most payment disputes before they start.
Scaling moves
Once you’re earning consistently, you have three options: productize (turn your service into a fixed package), outsource (subcontract overflow to another freelancer), or swap time for recurring revenue (convert one-off clients to monthly retainers). Income smoothing through retainers and pipeline discipline is the most reliable way to convert irregular gig income into something that feels like a salary.
Pro Tip: When you land your third client in the same niche, you’ve found a market. Existing clients stay at their rate; new clients pay the new one.
U.S. tax and payment basics every freelancer needs to know
Taxes are the part most new freelancers ignore until they get a surprise bill in April. Don’t do that.
The essential steps, up front
- File if you earn $400 or more in net self-employment income in a year. That’s the IRS threshold.
- Pay quarterly estimated taxes using Form 1040-ES. Due dates fall in April, June, September, and January.
- File Schedule C (profit or loss from business) and Schedule SE (self-employment tax) with your annual return.
The IRS Self-Employed Individuals Tax Center is the authoritative source for all of this.
How much to set aside
A common starting rule of thumb is to set aside 25–30% of every payment into a separate savings account the moment it lands. That buffer covers both self-employment tax and federal income tax for most earners in the $30,000–$80,000 range. Don’t touch it.
Khan Academy’s money tips for freelancers recommend simple tracking and savings habits as the single most effective way to avoid year-end surprises.
Recordkeeping checklist
- Save every invoice you send and every receipt for a business expense.
- Track mileage if you drive for work (delivery, client visits).
- Keep records for at least three years from the date you file the return they relate to.
- Use a free spreadsheet or a low-cost app like Wave to log income and expenses monthly, not annually.
1099s and platform income
Any client or platform that pays you $600 or more in a calendar year is required to send you a Form 1099-NEC. You must report all self-employment income on your return regardless of whether you receive a 1099. Platforms like Upwork, Fiverr, DoorDash, and Rover all report payments to the IRS.
Tax note: The figures above are general guidance. Tax rules change, and your situation may differ. Confirm current thresholds and deadlines directly with the IRS or a qualified tax professional.
Platforms and payment tools to find work and get paid quickly
Finding work: marketplace vs. direct outreach
| Approach | Best for | Time to first client | Control over rates |
|---|---|---|---|
| Upwork | Skilled services (writing, dev, design, VA) | 1–3 weeks | Medium (platform fees apply) |
| Fiverr | Packaged micro-services, creative work | 1–4 weeks | Medium (platform fees apply) |
| Etsy | Digital products, printables, templates | 2–6 weeks | High |
| DoorDash / Uber / Lyft | Delivery and rideshare gigs | 3–7 days | Low (platform sets rates) |
| Rover | Pet care services | 1–2 weeks | Medium |
| Turo | Vehicle rental | 1–2 weeks | High |
| Direct outreach (email, LinkedIn) | Retainer clients, specialized services | 2–6 weeks | High |
Upwork and Fiverr are the fastest paths to a first client for skill-based work. Direct outreach takes longer but produces higher-value, longer-term relationships. For most new freelancers, the right answer is both: use a marketplace to build reviews and cash flow while simultaneously pitching direct clients.
Accepting payments
For invoiced work, tools like Wave (free), PayPal Business, and Stripe let you send professional invoices and accept card payments. For recurring retainer clients, set up automatic billing through Stripe or a similar processor so you’re not chasing payments every month.
For creators and freelancers who want to accept small, spontaneous payments without the overhead of invoicing, a tip link is the most frictionless option. You share a link or QR code, and supporters pay instantly via Apple Pay, Google Pay, or card. No account required on their end. The instant payment tools guide for freelancers covers the full range of options worth considering.
Privacy and security when choosing a payment tool
Check that any payment tool you use doesn’t expose your personal bank account details to clients. Stripe and PayPal Business both keep your banking information private. For tip-based flows, look for platforms that don’t require senders to create an account, since friction on the sender’s side directly reduces conversion.
Pro Tip: Set up a dedicated business checking account before you earn your first dollar. It takes 15 minutes at most banks and makes tax time dramatically simpler. Every dollar in, every dollar out, in one place.
For a deeper look at privacy trade-offs across payment tools, the payment privacy guide for U.S. freelancers is worth reading before you commit to a platform.
Your 30/60/90 day plan to earn your first $500–$2,000
This plan assumes 5–10 hours per week of available time. Adjust the targets if you have more.
Days 1–30: set up and land your first client
- Complete your skill inventory and pick one primary offer.
- Create profiles on two platforms (one marketplace, one direct-outreach channel like LinkedIn).
- Write your one-sentence offer: “I help [audience] achieve [outcome] in [timeframe] for [price].”
- Send 10 outreach messages in week one, 10 more in week two.
- Complete your first paid project, however small. Deliver on time. Ask for a review.
- Open a dedicated business checking account and a tax savings account.
Month 1 target: $100–$300 and at least one five-star review or testimonial.
Days 31–60: build consistency and raise your rate
- Raise your rate by 15–20% for all new inquiries.
- Pitch one existing client on a monthly retainer arrangement.
- Add a second platform or outreach channel.
- Start making quarterly estimated tax payments if your income is on track to exceed $400 for the year.
- Track time spent vs. income earned to identify your most profitable activity.
Month 2 target: $300–$800 and one recurring client or retainer.
Days 61–90: scale what’s working
- Double down on the one offer that generated the most revenue in months 1–2.
- Create one digital product (template, guide, checklist) that packages your knowledge.
- Ask every satisfied client for one referral.
- Add a tip link to every deliverable, email signature, and social profile.
- Review your 90-day numbers: income, hours worked, effective hourly rate. If any offer earns below $20/hr effective, reprice or drop it.
Month 3 target: $500–$2,000 total, with at least one repeating revenue source.
If an idea produces zero responses after 30 days of consistent outreach, that’s a signal to change the offer, the channel, or the price, not to give up on freelancing entirely.
What actually works (and what usually doesn’t)
Most side-hustle advice focuses on the launch. Very little of it addresses what separates people who earn $200 in month one and quit from those who hit $2,000 by month three and keep going.
The pattern that scales is almost always the same: a specific offer for a specific audience, priced on outcomes rather than hours, with a simple system for finding new clients every week. Retainers, productized services, and digital goods all share one trait: the work you do once keeps paying. A retainer client you land in month two is still paying in month eight. A template you build on a Tuesday evening can sell on a Saturday morning while you’re asleep.
What usually fails is the opposite: vague offers (“I do social media stuff”), hourly pricing with no floor, and relying entirely on a marketplace without any direct outreach. Undifferentiated low-rate marketplace work can generate cash in the short term, but it’s a ceiling, not a ladder. The freelancers who break through it are the ones who pick a niche, raise their rates after every three projects, and treat client acquisition as a non-negotiable weekly habit rather than something they do when they’re desperate.
One thing most guides underestimate: the behavioral side matters as much as the strategy. Showing up consistently for 90 days, even when early results are slow, is the actual competitive advantage. Most people quit before the compounding starts.
Tipper makes it easy to collect tips and small payments instantly
Creators and freelancers who publish content, teach, or deliver services often leave money on the table simply because there’s no easy way for supporters to say “thank you” with a dollar amount attached. Tipper solves that with a personalized tip link and QR code you can share anywhere: your email signature, a social bio, the footer of a deliverable, or a printed card at an in-person event.
Senders don’t need an account. They tap Apple Pay, Google Pay, or enter a card, and the tip lands. There’s no subscription, no monthly fee, and no complicated setup. You can customize your tip page, add a thank-you message (text, photo, or video), and start receiving payments the same day you sign up.
For freelancers building a tip-based revenue stream alongside invoiced work, Tipper fits naturally as the “instant appreciation” layer: share your link after every tutorial, workshop, or delivered project and let supporters pay what feels right to them. It’s a low-effort extra revenue stream that complements every other strategy in this article.
Ready to add a tip link to your workflow? Set up your Tipper page in under ten minutes.
Sources
- Self-Employed Individuals Tax Center — IRS
- 20 Realistic Side Hustles for 2026 – NerdWallet
- 20 side-hustle ideas to help you make money | Fidelity
- How to Make $5,000-$10,000/Month as a Freelancer Without Leaving Your House – Escribr
This article is general information, not a substitute for advice from a qualified financial advisor. Consult a qualified financial professional about your own circumstances before acting on anything here.
FAQ
How do I make an extra $1,000 a month freelancing?
Pick one skill-based service (writing, design, virtual assistance, or web work), price it at $200–$500 per project, and land two to five clients per month. A single retainer client at $500–$1,500 per month can get you there with one relationship.
What side hustle can realistically earn $2,000 a month?
Specialized freelance services (copywriting, web development, social media management) and retainer arrangements are the most reliable paths to $2,000/month. Most freelancers reach that level within three to six months of consistent outreach and one or two anchor clients.
How do I make extra money freelancing with no portfolio?
Start with one free or deeply discounted project for a nonprofit, a friend’s business, or a personal project you can show. Three solid samples are enough to pitch paid work on Upwork or Fiverr. Platforms like Rover and DoorDash require no portfolio at all.
Do I have to pay taxes on freelance side income?
Yes. If your net self-employment earnings reach $400 or more in a year, you must file and pay self-employment tax. The IRS Self-Employed Individuals Tax Center covers the exact forms and thresholds.
Can creators accept tips without setting up a full payment system?
Yes. A tip link through a platform like Tipper lets supporters pay instantly via Apple Pay, Google Pay, or card with no account required on their end. It takes under ten minutes to set up and works as a standalone income layer alongside any other freelance work.
Recommended

How Content Appreciation Payments Work for Creators
Content appreciation payments are one-off or recurring tips supporters send to creators via personalized links, in-platform tools, or micropayment protocols. The flow is short: supporter pays, processor handles checkout, funds reach the creator minus any applicable fees.
Here’s the three-step version:
- Supporter side: A viewer clicks a tipping link, scans a QR code, or taps an in-platform button, then pays with Apple Pay, Google Pay, a card, or a connected wallet.
- Technical layer: A payment processor (Stripe, PayPal, or a gateway like those powering Tipper) handles authentication, fraud checks, and settlement.
- Creator side: Funds arrive in the creator’s connected account, either instantly or on a scheduled payout cycle, net of processing fees.
Platforms like Tipper take this further by removing the account requirement for senders entirely, which cuts the biggest drop-off point in most tip flows. The rest of this guide covers every content payment model available, how the money actually moves, U.S. tax basics, and a step-by-step checklist to get your own system live.
Key Takeaways
Content appreciation payments work because they remove friction between a supporter’s impulse to give and the creator’s ability to receive, and the platforms and processors that handle the middle layer determine how much of each tip actually lands.
| Point | Details |
|---|---|
| Core definition | Tips and appreciation payments are ordinary income in the U.S., reported in the year received. |
| Best starting method | Direct tipping links with no-account-required checkout convert better than in-platform tools for creators below monetization thresholds. |
| Fee reality | On a $5 tip with a 2.9% + $0.30 processing fee, a creator nets approximately $4.41; know your processor’s rate before setting suggested amounts. |
| Top implementation step | Test Apple Pay and Google Pay on both iOS and Android before launch; broken payment flows are the most common conversion killer. |
| Conversion tip | Personalized thank-you messages (text, photo, or short video) increase repeat giving by strengthening the creator-supporter relationship. |
| Tipper’s approach | Tipper provides instant tipping links with no sender account required, Apple Pay/Google Pay support, and direct payouts to creators. |
This article is general information, not a substitute for advice from a qualified financial advisor. Consult a qualified financial professional about your own circumstances before acting on anything here.
Table of Contents
- How content appreciation payments work across different models
- How the money actually moves from supporter to creator
- U.S. tax and legal basics every creator needs to know
- A practical checklist for implementing appreciation payments
- What Tipper’s platform data shows about instant tipping links
- Why appreciation payments change the creator-supporter relationship
- Tipper makes instant tipping simple for creators
- Sources
- FAQ
How content appreciation payments work across different models
Not every creator needs the same payment type. The right model depends on your audience size, platform, and how often you publish.
- In-platform tipping (Super Thanks-style): Viewers pay directly inside a platform like YouTube. YouTube reports creators receive a majority share of Super Thanks revenue after taxes and fees. Pro: zero friction for the viewer. Con: you must meet platform monetization thresholds to qualify, and the platform controls the feature.
- Direct tipping links and QR codes: A personalized URL or scannable code takes supporters to a branded checkout page. Newer monetization gateways enable instant, no-account-required payments via these links, supporting Apple Pay and Google Pay. Pro: works everywhere, no platform dependency. Con: you drive the traffic yourself.
- One-time donations: A fixed or open-amount payment, often through PayPal or Stripe-powered forms. Pro: familiar to audiences. Con: no built-in recurring mechanism.
- Micropayment streaming (Web Monetization / Coil): Protocols like Coil and the Interledger standard stream fractions of a cent per second while a visitor reads or watches. Token-based models like Brave/BAT extend this with peer-to-peer settlement. Pro: passive, attention-proportional income. Con: tiny audience penetration today; treat it as supplemental, not primary.
- Content rewards / view-based CPM pools: A brand funds a pool; creators submit clips; approved clips earn a stated rate per 1,000 verified views until the budget runs out. Pro: scalable for high-volume creators. Con: per-submission caps and review delays often matter more than the headline CPM rate.
- Subscriptions and memberships: Recurring monthly payments for exclusive content. Pro: predictable revenue. Con: high churn risk if content cadence slips.
- Pay-per-content / paid downloads: Supporters pay a fixed price for a specific piece of content. Pro: clear value exchange. Con: limits organic reach.
- Gifting or product-as-payment: Brands send physical products or gift cards in exchange for coverage. Pro: low cash-flow friction. Con: fair-market value is still taxable income.
- Flat fees and performance / commission models: A sponsor pays a set amount upfront, or a percentage of tracked conversions. Industry experts report a shift toward pay-per-demonstrated-value models that tie creator compensation to measured attention rather than flat fees, a trend accelerated by AI-driven attribution. Pro: aligns incentives. Con: attribution tracking adds complexity.
Pro Tip: If your audience is under 10,000 followers, direct tipping links often convert better for smaller creators who have not met platform eligibility thresholds. Start there, then layer in platform tools as you grow.
How the money actually moves from supporter to creator
Understanding the technical path helps you choose the right processor and avoid surprises on payout day.
The payment flow, step by step:
- Supporter clicks a tipping link, scans a QR code, or taps an in-platform button.
- Checkout loads, pre-filled with suggested amounts and a message field.
- Supporter authenticates via Apple Pay, Google Pay, a saved card, or PayPal.
- Processor (Stripe, PayPal, or a gateway) runs verification and anti-fraud checks.
- Funds are authorized and held briefly, then released to the creator’s connected account.
- Creator receives a payout, either instantly, on a rolling schedule, or on demand.
UX elements that move conversion numbers:
- No-account-required checkout removes the single biggest abandonment trigger.
- Pre-filled suggested amounts (e.g., $3 / $5 / $10) reduce decision fatigue.
- A personal message field increases emotional investment and repeat giving.
- Mobile-first design with Apple Pay / Google Pay reduces tap count to two or three.
Common processors and what to expect:
Stripe supports instant payouts to debit cards (for an additional fee) and standard ACH transfers. PayPal offers fast transfers to linked bank accounts. Apple Pay and Google Pay are payment methods that sit on top of Stripe or similar processors; they don’t hold funds themselves. Emerging sub-second, direct-to-wallet settlement patterns are beginning to eliminate the multi-day payout window entirely for some platforms.
Sample fee illustration (labeled assumptions):
Assume a $5 tip with a typical card processing fee, the creator nets a bit less than the full amount. On a $10 tip under similar conditions, the creator nets correspondingly more after fees. These are illustrative; actual rates vary by processor, card type, and volume.
Chargebacks and privacy: Credit card chargebacks are a real risk on tip flows. Keeping transaction records and using processors with built-in fraud tools (Stripe Radar, PayPal’s fraud filters) reduces exposure. On the privacy side, tokenization means the processor stores card data, not your platform, so creators never handle raw payment credentials. Collect only what you need: name (optional), email for receipt, and tip amount.
The IAB Tech Lab’s Content Monetization Protocol (CoMP) v1.0 signals where structured commercial terms for content are heading at the industry level, particularly for AI-consumed content, though it’s not yet a creator-facing tool.
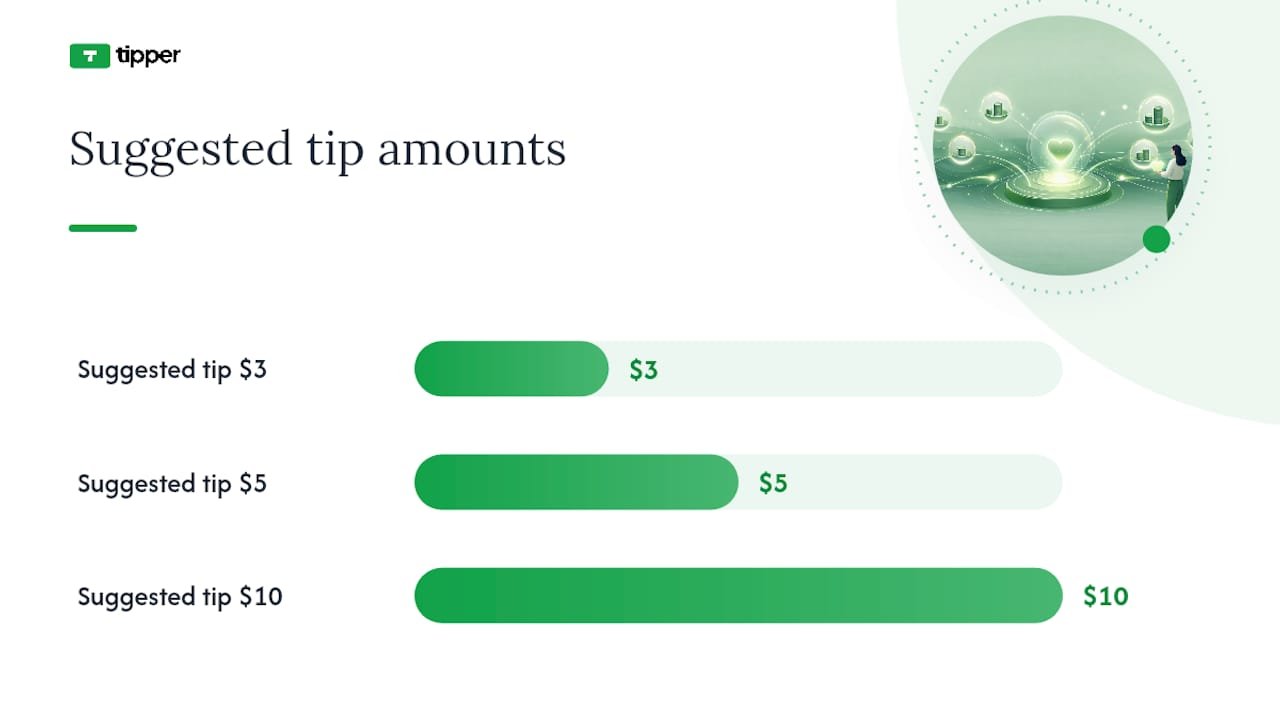
U.S. tax and legal basics every creator needs to know
Appreciation payments are generally treated as ordinary income in the U.S. You report them in the year you receive them, at your marginal income tax rate. They are not deferred compensation, and they are not analogous to equity instruments like stock appreciation rights.
What to record for every payment received:
- Date of receipt
- Gross amount paid by the supporter
- Platform or processing fees deducted
- Net amount deposited to your account
- Platform or payer name (when available)
Platform reporting thresholds: Payment processors and platforms are required to issue a Form 1099-K when payments cross IRS reporting thresholds. These thresholds have changed in recent years and are subject to further revision, so check the current IRS guidance or ask a tax professional rather than relying on a static number here.
Wage vs. non-wage distinction: Tips and appreciation payments to independent creators are generally non-wage income, not employee compensation, unless a formal work-for-hire arrangement exists. That distinction affects how you file and whether self-employment tax applies.
Pro Tip: Open a dedicated bank account or sub-account for creator income the day you start collecting tips. Mixing personal and creator funds is the most common recordkeeping mistake, and it makes year-end reporting significantly harder.
Tax callout: The IRS treats tips received by self-employed individuals as self-employment income, meaning you may owe both income tax and self-employment tax (currently 15.3% on net earnings up to the Social Security wage base). Quarterly estimated payments are worth discussing with a CPA if your tip income is consistent.
This article provides general information only. Consult a qualified tax professional for advice specific to your situation, as rules change and individual circumstances vary.
Platform terms of service and AML: Most platforms prohibit using tipping features for goods or services that violate their terms. Anti-money laundering (AML) regulations also apply to payment processors; large or unusual tip volumes may trigger review. Stay within platform guidelines and keep records that demonstrate the payments are genuine appreciation for content.
A practical checklist for implementing appreciation payments
Follow this in order. Skip nothing in the setup phase; the testing phase is where most creators lose money.
Setup
- Choose your primary method (direct tipping link for most creators starting out; in-platform if you’re already monetization-eligible).
- Create your tipping link or QR code and brand the checkout page with your name, photo, and a one-line description of what supporters are tipping for.
- Connect your payment processor (Stripe or PayPal are the most widely supported in the U.S.).
- Set three suggested tip amounts appropriate for your audience (a common starting range: $3, $5, $10).
- Write your thank-you message, either a short automated text note or a brief video, and configure it to send on payment confirmation.
- Set your payout cadence (daily, weekly, or on-demand) and confirm your tax settings with your processor.
- Add a one-line privacy note to your tip page: “We collect only your payment information to process your tip. We don’t store card details.”
Testing
- Complete a live test transaction on mobile (iOS and Android) and desktop.
- Verify Apple Pay and Google Pay load correctly and complete without errors.
- Test the refund flow: issue a test refund and confirm it processes cleanly.
- Check that your analytics platform (Google Analytics 4 or equivalent) registers the conversion event.
- If you’re running campaigns, add UTM parameters to your tipping link so you can attribute tips to specific posts or videos.
Launch
- Place your tipping link in your bio, pinned comment, video description, and end-screen CTA.
- Use a short, direct ask: “If this helped you, a $5 tip keeps more content like this coming. No account needed.”
- For live content, mention the link verbally once, mid-stream, not just at the end.
Measure and iterate
- Track: conversion rate on your tipping link, average tip amount, percentage of repeat tippers, and retention of tippers vs. non-tippers over 90 days.
- A/B test suggested amounts: try $3/$5/$10 vs. $5/$10/$20 for one month each and compare average tip size.
- Review cross-platform tipping data monthly to see which content type drives the most tips.
For view-based reward campaigns specifically, some platforms approve submissions within 48–72 hours and pay in fiat or crypto; factor that review window into your cash-flow planning.
What Tipper’s platform data shows about instant tipping links
The clearest finding from instant-link tipping flows: removing the account-creation step is the single highest-leverage change a creator can make to tip conversion. When a supporter has to sign up before paying, a large share of them leave. When they can tap Apple Pay and be done in under ten seconds, they don’t.
Platform benchmark: Personalized thank-you features, including text notes, photos, and short video messages, increase repeat giving because they strengthen the creator-supporter relationship. Payment flows that surface a personalization step drive higher repeat-contributor rates. (Cloudflare monetization gateway research)
Two thank-you message templates that work:
- Text note (send immediately on payment): “Thank you so much for the tip, [Name]. It genuinely means a lot and helps me keep making [content type]. I’ll see you in the next one.”
- Short video note (record once, update monthly): A 15–20 second clip where you say the supporter’s name (or “everyone who tipped this month”), describe one specific thing their support made possible, and sign off warmly. Specificity is what separates a memorable thank-you from a generic one.
Fee transparency builds trust. Displaying the net amount the creator receives, or at least noting that a small processing fee applies, reduces the friction of “where does my money actually go?” Tipper’s model adds a platform fee plus payment processing fees at checkout, so supporters see the full cost before confirming. Creators keep their earnings directly; funds go to their connected account.
Pro Tip: Tell your audience what their tip makes possible. “Your $5 tip covers the software I use to edit these videos” converts better than a generic ask because it makes the value exchange concrete.
For a deeper look at how tipping links are configured and tested, the technical setup is worth reviewing before you go live.
Why appreciation payments change the creator-supporter relationship
The mechanics matter, but the shift they enable is more interesting than the plumbing. When a supporter sends a tip, they’re not buying a product. They’re signaling that your work has value to them personally, and that signal, when acknowledged, creates a different kind of loyalty than a subscription ever does.

The ask doesn’t have to feel awkward. Creators who do it well treat it the same way a musician thanks the crowd: briefly, genuinely, and without making it the whole show. One mention per video, one link in the bio, one honest sentence about what the support enables. That’s enough. Pressure kills the goodwill that makes appreciation payments work in the first place.
For creators exploring token-based and micropayment models, creator economy operators like Naomi Lennon have written thoughtfully about how these newer compensation structures fit into a broader monetization strategy.
Tipper makes instant tipping simple for creators
Tipper gives creators a personalized tipping link and QR code that supporters can use to send a tip in seconds, with no account required on the sender’s side. Apple Pay, Google Pay, and card payments all work out of the box. Supporters can attach a text note, photo, or short video to their tip, and creators receive funds directly to their connected account.
Creators keep their earnings; Tipper adds a platform fee plus payment processing fees at checkout, so the cost is transparent before anyone confirms a payment. There’s no subscription to maintain and no minimum payout threshold that locks your money up for weeks.
If you’re ready to see how it works with your own audience, set up your tipping link at Tipper and run a live test before your next post goes out. The setup takes under ten minutes, and you’ll know immediately whether the flow works on your phone.
Sources
- Cloudflare: Monetization gateway
- Digiday: WTF is pay-per-demonstrated-value in AI content licensing?
- ClipAffiliates: What Is a Content Rewards Program?
- YouTube Help: Super Thanks eligibility, availability, and policies
FAQ
How do influencers accept appreciation payments?
Influencers typically accept tips through personalized tipping links, QR codes, in-platform features like YouTube’s Super Thanks, or payment processors like PayPal and Stripe. Platforms like Tipper let supporters pay via Apple Pay or Google Pay with no account required, which reduces checkout friction significantly.
What is a thank-you payment?
A thank-you payment is a voluntary, one-time tip a supporter sends to a creator to express appreciation for content they found valuable. It carries no expectation of a product or service in return, though it is still treated as ordinary income for U.S. tax purposes.
What is the purpose of a token of appreciation in creator payments?
A token of appreciation, whether a monetary tip or a platform-specific token like Brave’s BAT, signals that a supporter values a creator’s work beyond passive consumption. These payments strengthen the creator-supporter relationship and, when acknowledged with a personalized thank-you, tend to increase repeat giving.
How do I thank a client or supporter for making a payment?
Send an immediate automated text note on payment confirmation, then follow up with a short personalized message or video. Naming the supporter and describing specifically what their tip enables converts a generic receipt into a genuine connection, which is the most reliable driver of repeat tips.
Recommended
How to Reward Loyal Customers Digitally in 2026
Set up a personalized tipping link and a matching QR code today, and you can collect instant appreciation payments from supporters within the next 30 minutes. The fastest path to digital customer loyalty rewards isn’t a points program or a punch card. It’s a direct tip link that accepts Apple Pay, Google Pay, or a card, with no account required from the person sending money.
Here’s what to complete in your first session:
- Create a free account on Tipper and set your payout method
- Customize your branded tip URL (e.g., tipper.app/yourname)
- Generate a downloadable QR code pointing to that URL
- Drop the link into your bio and test it from your phone
For a cleaner, trackable short link, Bitly’s branded link tools let you customize the back-half of any URL and monitor clicks, geography, and referral sources per link.
Pro Tip: Test your link from inside Instagram and TikTok before you share it publicly. In-app browsers behave differently from Safari or Chrome, and catching that early saves you from losing tips on launch day.
Key Takeaways
A personalized tip link with three preset amounts, a tested QR code, and a personal thank-you message is the fastest way to reward loyal customers digitally and build repeat support.
| Point | Details |
|---|---|
| Set up first | Create a Tipper account, set payout method, and test your link before sharing. |
| Optimize the tip page | Use three preset amounts with a highlighted middle option and one line of social proof. |
| Share after delivering value | Place the link in your bio, video captions, email footer, and on printed receipts or QR signage. |
| Track four core metrics | Monitor clicks, conversion rate, average tip, and referral source weekly via CSV export. |
| Tipper as your platform | Tipper supports Apple Pay, Google Pay, and card checkout with customizable thank-you messages and no account required from tippers. |
Table of Contents
- How does a tipping link actually process a payment?
- Step-by-step setup: create your tip link and QR code
- How do you design a tip page that actually converts?
- Where should you share your tip link and QR code?
- Tracking and analytics: which metrics actually matter?
- What fees and taxes should creators expect?
- Real use cases: creators, freelancers, and small businesses
- Your 30-to-90-day launch plan
- How do you protect your tip link from fraud?
- What legal compliance applies to digital tipping?
- How to personalize tips based on supporter loyalty
- How do you get supporters to share your tip link?
- How does Tipper connect to your existing marketing tools?
- How are refunds and disputes handled for tips?
- Why direct tipping builds stronger loyalty than points programs
- Tipper makes it easy to start collecting tips today
- Sources
- FAQ
How does a tipping link actually process a payment?
The flow is simpler than most creators expect: supporter taps the link or scans the QR, lands on your tip page, picks an amount, pays via Apple Pay, Google Pay, or card, and you get a payout notification. That’s it.
The friction points live in the handoffs. In-app browsers on Instagram, TikTok, and Snapchat can intercept the payment handoff before it reaches Apple Pay or Google Pay, dropping the transaction entirely. linkboo documents this “vanishing visitor” problem and shows that forcing the destination into the system browser preserves deep links and prefilled amount parameters, which materially improves conversion from social apps.
On the back end, you need four things working before you share anything: a branded link, a secure checkout that handles authentication, configured payout settings, and an email or push notification so you know when a tip lands.
Pro Tip: If your link opens inside a webview and the payment never completes, add an escape flow. Some link-in-bio tools include an “open in browser” redirect. Test this before launch.
Step-by-step setup: create your tip link and QR code
- Create your Tipper account and complete identity verification (KYC) so payouts aren’t held.
- Set your payout method (bank transfer or connected wallet) before you share anything.
- Choose your branded link — customize the URL slug to your name or brand handle.
- Configure payment options — confirm Apple Pay, Google Pay, and card checkout are all active.
- Build your tip page — add a short headline, three preset amounts, and a profile photo.
- Generate a dynamic QR code from your dashboard and download a high-resolution version for print.
- Test end-to-end in Instagram’s in-app browser, in Safari, and on Android Chrome. Run a $1 test tip through each payment method.
Required settings checklist before going live:
- KYC and payout details confirmed
- Privacy settings reviewed (what data you collect from tippers)
- Refund and dispute policy noted in your tip page footer
- Notification email verified
Linkly’s comparison of link-in-bio vs. custom short links is worth a quick read here. Link-in-bio tools use the provider’s domain and are fast to set up; custom short links on your own domain give stronger brand control and cleaner analytics. For most creators starting out, the hosted option is fine.
Pro Tip: Add a prefilled amount parameter to your link (e.g., ?amount=5) for specific placements like email footers or receipts. A link that opens with $5 already selected converts better than a blank tip page.
How do you design a tip page that actually converts?
Simple pages convert best. Three preset amounts, a clear call-to-action, and one line of social proof outperform elaborate pages every time. The creator tips playbook from Linkos recommends starting with an external tip link to validate demand before moving to native tipping, and it highlights preset amounts with an emphasized middle option as a consistent conversion driver.
Copy and layout guidance:
- Headline: One short sentence. “Support my work” or “Buy me a coffee” both work. Keep it under 8 words.
- Amounts: Three presets ($3, $5, $10 works well). Bold or highlight the middle option. Add one custom-amount field below.
- Social proof line: “Join 120 supporters” or “47 people tipped this month” anchors the decision.
- Microcopy: One sentence explaining what tips fund (“Keeps the newsletter free and ad-free”).
- Fee disclosure: A small, unobtrusive line noting that a processing fee is added at checkout.
The thank-you flow matters as much as the tip page itself. An immediate onscreen confirmation plus an automated thank-you message (text, photo, or short video) turns a one-time transaction into a relationship. Tipper lets you configure this message per campaign, which means a supporter who tips after a livestream gets a different note than one who tips from your email footer.
Pro Tip: Add an opt-in checkbox on the confirmation screen for supporters who want updates. This is your most engaged audience. Don’t skip it.
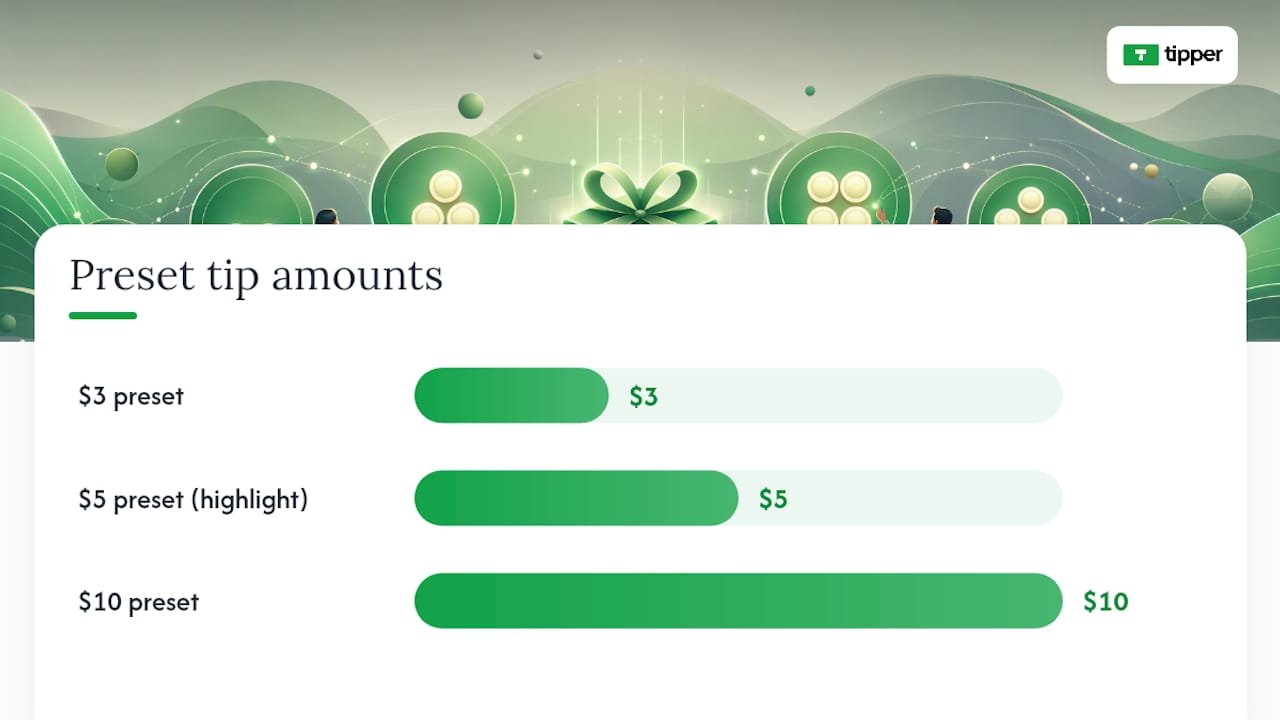
Where should you share your tip link and QR code?
Put the link where intent is highest, right after you’ve delivered value.
- Bio link: Your tip link or a link-in-bio page with the tip link as the top destination. Cutt for creators shows how a single branded URL can host multiple tracked destinations and a QR code for offline use.
- Video captions and end cards: “If this helped, tip here” placed at the end of a tutorial or review.
- Livestream overlays: A persistent lower-third with your short link during the stream.
- Printed receipts and packaging: A QR code on the receipt pointing to your tip page. QR code placement for small businesses covers print sizing and signage best practices.
- Email footer: A one-line ask with a prefilled-amount link.
- Event signage and table cards: Print the QR at 2 inches minimum for reliable scanning.
Timing matters. Ask after you’ve delivered something, not before. A “buy me a coffee” anchor works because it gives the supporter a concrete mental frame for the amount.
Pro Tip: The in-app webview problem hits hardest on TikTok. If your audience is primarily TikTok, test your link with a tool that forces a real browser redirect before you run any promotion.
Tracking and analytics: which metrics actually matter?
Track clicks, conversion rate, revenue per link, and creator-level attribution. That four-number stack tells you what’s working and where to cut.
| Metric | Definition | Why It Matters | Export Tip |
|---|---|---|---|
| Clicks | Total link taps | Measures reach and placement effectiveness | Bitly dashboard or UTM report |
| Unique visitors | Deduplicated sessions | Filters bot traffic from real intent | Google Analytics audience report |
| Conversions | Completed tips | Core revenue signal | Tipper transaction export |
| Conversion rate | Tips ÷ clicks | Diagnoses page or placement problems | Calculate from CSV |
| Average tip | Revenue ÷ conversions | Guides preset amount optimization | Tipper dashboard |
| Geography | Country/city of tipper | Informs content timing and language | Bitly or GA geo report |
| Referral source | Where the click came from | Shows which channel drives paying supporters | UTM parameters |
For deeper reporting, connect your tip link clicks to Gleanit’s real-time engagement analytics or pipe UTM data into Google Analytics. Schedule weekly CSV exports from Tipper and name each link with a consistent pattern (e.g., creator-name-channel-date) so filtering by creator or campaign takes seconds. Loyalty-linked tipping automation covers how naming patterns and API calls can scale this reporting across multiple creators or campaigns.
What fees and taxes should creators expect?
Expect a platform transaction fee plus a payment processor fee on each tip. Tips are taxable income in the United States and require recordkeeping from day one.
Cost items to verify before launch:
- Platform fee per transaction (check Tipper’s current rate at checkout)
- Card processing fee (typically a percentage plus a flat cent amount per transaction)
- Apple Pay and Google Pay processing rates (usually the same as card)
- Payout minimums and hold times
- Chargeback and dispute handling policy
- Refund policy and who bears the cost
On taxes: the IRS treats tips as ordinary income. Track gross receipts, not net, because the gross amount is what gets reported. If your tip volume grows, set aside a portion of each payout for quarterly estimated taxes. The 1099-K reporting threshold has shifted in recent years, so confirm the current threshold with a tax professional or the IRS directly rather than relying on platform estimates.
Pro Tip: Export your transaction CSV at the end of every month and drop it into a dedicated folder. Twelve monthly files are far easier to hand to a CPA than one year-end scramble.
Real use cases: creators, freelancers, and small businesses
Newsletter writer. Adds a prefilled $5 tip link to every email footer. After six months of consistent sends, repeat tippers make up the majority of monthly tip revenue. A short video thank-you sent within 24 hours of each tip is the single tactic she credits for turning one-time supporters into regulars.
Freelance designer. Adds a QR code to every invoice PDF pointing to a tip page with a $10 preset. The note reads: “If this project exceeded expectations, a tip means a lot.” No pressure, no awkwardness. Roughly one in eight clients tips.
Local coffee shop. Prints a QR code on the counter card and receipt. The tip page has three amounts and a photo of the team. Digital tipping for local businesses shows how this setup increases per-visit revenue without changing the service model.

The common thread: a personal thank-you message sent within hours of the tip consistently increases the chance of a second tip. It doesn’t need to be long. Two sentences and a name is enough.
Your 30-to-90-day launch plan
Days 1–30: launch and collect your first 10 tips
- Complete account setup and KYC on day one.
- Add the tip link to your bio and one content piece by day three.
- Share the link in at least three channels by day seven.
- Run a test tip from a friend’s device to confirm the full flow.
- Hit 10 completed tips before day 30.
- If conversion rate stays below 1% after 200 clicks, change the CTA copy or the preset amounts.
- Export your first CSV at the end of week four.
Days 30–60: optimize
- A/B test two headline variants on your tip page.
- Try a prefilled-amount link in one channel and compare conversion to the standard link.
- Send a personal thank-you to every tipper from the first month.
Days 60–90: scale and systematize
- Build an automated thank-you workflow triggered by each completed tip.
- Offer a small recognition to supporters who tip three or more times (a shoutout, early access, or a personal note).
- Review geo data and referral sources. Double down on the channel with the highest conversion rate.
- Set up offline conversion tracking if you use QR codes in person.
How do you protect your tip link from fraud?
Use a platform that handles PCI compliance and payment authentication at the processor level. Tipper’s checkout runs on a compliant payment stack, so card data never touches your server.
Practical steps for creators:
- Use a unique link per campaign so you can disable a compromised link without killing all traffic.
- Monitor for unusual tip patterns (many small tips in rapid succession from the same geography).
- Never share your payout credentials or dashboard login. Use two-factor authentication.
- For QR codes in physical locations, check them periodically to confirm no one has placed a sticker over yours.
Chargebacks are the most common fraud vector. Keep your refund policy visible on the tip page and respond to disputes promptly through your payment processor’s portal.
What legal compliance applies to digital tipping?
In the United States, digital tipping platforms that process payments must comply with anti-money laundering (AML) rules under the Bank Secrecy Act, which is why KYC verification is required before payouts. As a creator, your obligation is to complete that verification honestly and report income accurately.
Data protection: collect only what you need. If your tip page includes an opt-in for updates, your handling of those email addresses falls under CAN-SPAM for email and, if you have European supporters, GDPR. Use a reputable email tool and honor unsubscribe requests immediately.
If your tip volume crosses certain thresholds, your platform is required to issue a 1099-K. Keep your own records regardless, because the platform’s reporting and your actual receipts should match.
This is general information, not legal or tax advice. Confirm current thresholds and obligations with a qualified professional or the relevant government agency.
How to personalize tips based on supporter loyalty
Not every supporter is at the same stage. Someone who has tipped five times deserves a different experience than a first-timer.
Segment by behavior, not by assumption:
- First-time tippers: Send a warm welcome message and explain what their support funds.
- Repeat tippers (2–4 tips): Acknowledge the pattern. “You’ve supported me three times now” lands differently than a generic thank-you.
- High-frequency supporters: Offer something exclusive — early access to content, a personal Q&A, or a shoutout. This is the group most likely to share your link.
Use your tip link naming convention and transaction export to identify these tiers. A simple spreadsheet with tipper email (if provided), tip count, and total amount is enough to run a basic segmentation. Loyalty-linked tipping strategies covers how to automate this at scale using API patterns.
How do you get supporters to share your tip link?
The most reliable referral tactic is a personal ask to your most engaged supporters. People who have already tipped are your best advocates.
- After a tip, include a line in the thank-you message: “If you know someone who’d enjoy my work, sharing this link means a lot.”
- Create a shareable version of your tip page with a short, memorable URL (Bitly’s personalized URL tools make this easy to generate at scale).
- Run a milestone campaign: “Help me reach 100 supporters this month” gives existing tippers a concrete goal to rally around.
- Offer a small recognition for referrals, like a shoutout or early access, without making it transactional enough to trigger payment regulations.
The key is making sharing feel natural, not obligatory. A supporter who shares because they’re genuinely proud of backing you is worth more than one who shares for a reward.
How does Tipper connect to your existing marketing tools?
Tipper’s transaction data exports as CSV, which plugs into any CRM or analytics tool that accepts spreadsheet imports. For pixel-based retargeting, add your Meta or Google pixel to your tip page where the platform allows, so you can retarget visitors who clicked but didn’t tip.
For CRM integration, tag tippers in your email platform (Mailchimp, ConvertKit, or similar) using the email address they provide at checkout. This creates a high-intent segment you can message separately from your general list.
Gleanit’s engagement analytics can layer on top of your tip link data to give real-time campaign reporting, which is useful if you’re running a time-limited promotion and need to monitor conversion as it happens.
How are refunds and disputes handled for tips?
Tips are generally non-refundable by design, but chargebacks can still occur if a supporter disputes a charge with their bank. When that happens, the payment processor initiates a dispute process and may hold the funds temporarily.
Keep your refund policy visible on your tip page. A one-line statement (“Tips are voluntary and non-refundable, but contact me if you have a concern”) reduces disputes by setting expectations upfront. Respond to any dispute through your processor’s portal within the deadline they specify, typically 7–10 days, or the chargeback is automatically decided against you.
For large or unusual tips, it’s reasonable to wait for the standard clearing period before spending the funds, since chargebacks on larger amounts carry more financial exposure.
Why direct tipping builds stronger loyalty than points programs
Points programs create obligation. A tip creates a moment. When a supporter sends $5 because your tutorial saved them two hours, that’s a signal no algorithm can replicate. The transaction is voluntary, immediate, and personal, which is exactly why it reinforces loyalty more durably than a discount earned after ten purchases.
The creators who see the highest repeat tip rates share one habit: they respond personally. Not with a form email, but with a note or a short video that references something specific. That response closes a loop the supporter didn’t expect to be closed, and it’s the reason they come back.
There’s also an ethics dimension worth naming. Don’t harvest tipper data beyond what’s necessary to process the payment and send a thank-you. Supporters who tip are extending trust. Using their email address to add them to a marketing list without explicit consent breaks that trust faster than any thank-you message can rebuild it. Collect what you need, use it for what you said you’d use it for, and let the relationship grow from there.
Tipper makes it easy to start collecting tips today
Creators who want to reward loyal supporters digitally without building a complex loyalty system have a direct path: a personalized tip link, a matching QR code, and a thank-you message that feels human.
Tipper gives you all three in one place, with no subscription fee and no account required from the person tipping. Supporters pay via Apple Pay, Google Pay, or card in seconds. Set up takes under 30 minutes. Create your free Tipper account and collect your first tip today.
Sources
- Personalized URLs for direct campaigns — Bitly blog
- URL Shortener for Influencers and Content Creators in 2026: Brand Links, Analytics and Link in Bio
- Link in Bio vs Custom Short Links: What Creators Should Use in 2026 — Linkly
- Creator Tips Playbook — How to Earn From Your Audience With Tips | Linkos
- linkboo for tip-jar creators — recover the Venmo, Cash App, and PayPal tips TikTok quietly loses | linkboo
This article is general information, not a substitute for advice from a qualified financial advisor. Consult a qualified financial professional about your own circumstances before acting on anything here.
FAQ
How do I reward loyal customers digitally without a points program?
Set up a personalized tip link or QR code on a platform like Tipper. Supporters tip instantly via Apple Pay, Google Pay, or card, with no account required, and you send a personal thank-you to reinforce the relationship.
Does Tipper charge a subscription fee?
Creating and maintaining a Tipper account is free. A transaction fee plus payment processing fee applies to each completed tip, with no monthly subscription required.
How do I handle taxes on tips I receive in the United States?
The IRS treats tips as ordinary income. Track gross receipts from day one, set aside a portion for quarterly estimated taxes if volume grows, and confirm current 1099-K reporting thresholds with a tax professional.
What’s the best way to share a tip link on social media?
Place the link in your bio and add a short ask at the end of posts where you’ve delivered clear value. For TikTok and Instagram, test that your link opens in the system browser rather than the in-app webview to avoid payment handoff failures.
How do I turn one-time tippers into repeat supporters?
Send a personal thank-you message within 24 hours of each tip, referencing something specific about the supporter’s contribution. Creators who respond personally consistently see higher repeat tip rates than those who rely on automated generic confirmations.
Recommended

Payment Links Boost Engagement: A Practical Guide
Yes, payment links boost engagement by removing checkout friction, enabling purchases inside the channels where conversations already happen, and creating trackable, campaign-specific buying moments you can launch in minutes.
The top benefits, quickly:
- Reduced friction: customers pay in two taps without creating an account or navigating a full website
- Channel-native conversion: share a link in a DM, SMS, or social post and close the sale right there
- Abandoned-inquiry recovery: follow up a stalled quote or booking with a direct checkout link
- Deposit and no-show protection: secure a commitment upfront via a single SMS link
- Trackable repeat behavior: reusable links with metadata let you measure who returns and when
Try this in the next 48 hours: create a branded payment link, drop it into an SMS or DM to a warm lead, and watch whether it converts faster than your usual invoice or checkout redirect.
Key Takeaways
Payment links boost engagement by collapsing checkout friction into a single tap, enabling channel-native purchases, and giving you trackable, campaign-specific buying moments you can launch in under five minutes.
| Point | Details |
|---|---|
| Friction is the core problem | Nearly 70% of online carts are abandoned; a payment link removes the steps that cause drop-off. |
| Channel-native links convert faster | A link sent in the same DM or SMS where the conversation happened closes sales without redirects. |
| Deposits reduce no-shows | Sending a deposit link immediately after booking secures commitment before the appointment date. |
| Measure time-to-pay first | Median hours from link sent to payment received is the fastest signal that your setup is working. |
| Tipper as your starting point | Tipper offers branded payment links with Apple Pay, Google Pay, no sender account required, and direct payouts. |
Table of Contents
- How do payment links actually work?
- How payment links increase customer engagement
- Where do payment links work best for small businesses?
- How do you create and share payment links?
- Are payment links safe to use?
- How do you measure whether payment links increase engagement?
- What tactics maximize results when using payment links?
- Answering the most common questions about payment link risks
- Why Tipper works well for creators, freelancers, and small businesses
- The case for making payment links a weekly habit
- Tipper makes it easy to start collecting payments today
- Sources
- FAQ
How do payment links actually work?
A payment link is a shareable URL, QR code, or embedded button that opens a hosted checkout page. The customer selects their payment method, completes the transaction, and receives a confirmation. No website required on your end, and no account required on theirs.
The flow in plain terms:
Link shared → customer opens hosted checkout → selects payment method (card, Apple Pay, Google Pay) → payment confirmed → receipt delivered automatically
Payment links let businesses create a full, branded checkout page without a website or code, then share that same link across email, SMS, social, and QR codes, or scale link creation via API for campaign automation.
Common link types you will encounter:
- Reusable links: one URL that works for every customer, ideal for a tip jar or a standard service fee
- Single-use links: expire after one transaction, useful for custom quotes or sensitive amounts
- Subscription links: recurring billing on a set schedule
- QR codes: printed on receipts, menus, or business cards for in-person payments; digital business cards are a practical way to carry one at all times
- Time-limited or quantity-limited links: built-in scarcity for event tickets or product drops
A payment link can be reused, shared widely, limit purchases, and is simpler to implement than a full ecommerce integration, which is exactly why small businesses reach for them first.
How payment links increase customer engagement
Six concrete mechanisms drive the engagement lift:
-
Friction removal. Every extra step between “I want this” and “I paid” costs you customers. Checkout friction is one of the leading causes of cart abandonment, and a payment link collapses a multi-page checkout into a single tap. According to Baymard Institute research, the average documented online cart abandonment rate is very high, with a forced account-creation step among the top reasons shoppers leave.
-
Channel-native buying. The link lives inside the conversation. A customer asking about your service in Instagram DMs does not want to be redirected to a website, then a cart, then a checkout. Drop the link in the reply and the transaction happens where the relationship already exists.
-
Abandoned-inquiry recovery. Sent a quote that went quiet? A follow-up message with a direct payment link converts more reliably than a second invoice because it removes every remaining step. Accepting payments across multiple channels with payment links helps recover abandoned carts and improve loyalty.
-
Deposit and no-show reduction. A hair stylist, photographer, or consultant who texts a deposit link immediately after booking secures commitment before the appointment. No deposit form, no awkward follow-up call.
-
Personalized offers and loyalty rewards. Payment links let businesses embed personalized loyalty rewards and discounts directly within the payment flow, which encourages repeat interactions. A returning client gets a link with a 10% loyalty discount baked in; a new lead gets a standard rate. Same product, different link, measurably different conversion.
-
Repeat-purchase support. Merchants use reusable payment links to create standing buy points for customers who prefer not to create accounts, which supports higher repeat-purchase rates and simpler reconciliation.
Pro Tip: Embed loyalty-linked rewards directly in a unique link for your best customers. Even a small discount signals recognition and lifts the chance they pay immediately.
Where do payment links work best for small businesses?
The highest-ROI scenarios, by channel:
- Social posts and DMs: pin a reusable link in your bio or drop a single-use link in a DM to close a sale mid-conversation. A creator selling a digital download, for example, can pin a link in a TikTok comment and collect payment without ever leaving the app.
- SMS campaigns: short message, clear amount, one link. SMS open rates are high, and a time-limited link adds urgency. Payment links speed up payments and reduce manual admin for sellers who lack a full ecommerce site.
- Invoices: replace a PDF invoice with a payment link embedded in the email. The client clicks, pays, and you get notified. No chasing, no bank-transfer confusion.
- Service deposits: send a deposit link within minutes of a booking confirmation. The client pays before they forget, and you reduce no-shows.
- Event tickets: a single reusable link handles ticket sales across every channel; set a quantity limit and it closes automatically when sold out.
- Tips and donations: freelancers, coaches, and creators use contactless tip collection via QR or link to let supporters pay appreciation in seconds.
- Subscriptions: a recurring payment link handles membership or retainer billing without a full subscription platform.
Before/after: a freelance designer who previously emailed PDF invoices and waited an average of 11 days for payment switched to a payment link embedded in the project-completion email. Payment came in the same day. The link took three minutes to create.
How do you create and share payment links?
No-code setup (six steps):
- Log into your payment platform dashboard and create a new product or service entry.
- Set the price, currency, and quantity limit (or leave it open for tips and donations).
- Add your logo, brand colors, and any terms or description the customer should see.
- Choose reusable or single-use, and set an expiry date if the offer is time-limited.
- Generate the link and/or QR code.
- Share via SMS, email, social, or embed as a buy button on a pay-monthly website, and confirm that payment notifications are turned on.
API and automation: when you need to send hundreds of unique links for a campaign, integrate dynamic pricing, or push payment data directly into a CRM, the API path is worth the setup time. It unlocks bulk link generation, automatic CRM tagging, and analytics events that feed directly into Google Analytics or your reporting stack.
Pro Tip: Add UTM parameters or a unique order ID to each link’s metadata before sharing. This lets you attribute every conversion to its exact campaign, channel, or customer segment, and it keeps your reporting clean from day one. See how tipping links work for creators for a practical walkthrough.
Are payment links safe to use?
The short answer: yes, when you use a reputable, compliant provider. The risks are real but manageable.
Common risks and mitigations:
- Phishing and fake links: bad actors copy the look of a real checkout. Mitigation: always use a branded URL from your provider, not a generic redirect, and send links only through verified channels.
- Exposed amounts: a reusable link with a visible price can be screenshot and shared out of context. Mitigation: use single-use links for custom quotes.
- Misattributed receipts: a customer pays but the receipt goes to the wrong email. Mitigation: confirm the customer’s email before sharing and test the receipt flow once.
On the technical side, modern hosted checkouts use AES encryption and TLS to protect payment data in transit and at rest. Merchants should use PCI-compliant hosted checkout providers and follow PCI Security Standards Council guidance to reduce card-data risk. A good provider handles PCI compliance on your behalf; confirm this before you go live.
Safe-sharing checklist: verify the recipient’s contact details, use branded links with your logo visible at checkout, expire unused links after 48–72 hours, and monitor your dashboard for unexpected refunds or chargebacks. For a broader look at secure payment processes, the partner guide from Vopify covers the finance-team angle well.

How do you measure whether payment links increase engagement?
| Metric | Where to track it | Short-run target |
|---|---|---|
| Conversion rate on link clicks | Platform dashboard or UTM in Google Analytics | Baseline first, then improve by 10% per iteration |
| Time-to-pay (median hours) | Dashboard payment timestamps | Under 24 hours for SMS/DM channels |
| Average order value | Dashboard or CRM | Compare link vs invoice for same product |
| Repeat-purchase rate | CRM or customer list | Rising month-over-month signals loyalty |
| Campaign attribution | UTM parameters per link | Every link tied to one source/campaign |
| Deposit/no-show reduction | Booking records vs. payment records | Fewer no-shows after deposit link introduced |
Two quick experiments:
Send the same offer to two similar groups in the same week. Group A gets a PDF invoice; Group B gets a payment link. Compare time-to-pay and conversion rate. That single test usually produces a clear winner within days.
Compare conversion against a standard link sent to a similar segment. The lift, or lack of it, tells you whether urgency pricing is worth building into your workflow.
What tactics maximize results when using payment links?
Do:
- Keep the message short: one sentence of context, the amount, and the link
- Brand the checkout page with your logo and a clear product description
- Set an expiry on time-sensitive offers to create urgency
- Follow up once, 24 hours later, if the link has not been clicked
Don’t:
- Send a link with no context or amount visible in the message
- Reuse a high-value custom-quote link across multiple customers
- Skip the confirmation notification setup (you need to know when you get paid)
- Follow up more than twice on the same link
SMS deposit request template:
DM purchase-close template:
Pro Tip: Add a small, time-limited loyalty reward inside the checkout for returning customers. Even 5–10% off signals that you noticed they came back, and one-click tip solutions show this tactic consistently lifts repeat conversion.
Answering the most common questions about payment link risks
-
What are the risks of using payment links? The main risks are phishing (fake links that mimic yours), accidental reuse of a custom-price link, and missed receipts. All three are mitigated by using a branded, PCI-compliant provider, setting expiry dates, and confirming the customer’s contact details before sending.
-
How do payment links work? A payment link is a URL that opens a hosted checkout page. The customer selects their payment method (card, Apple Pay, Google Pay), completes the transaction, and receives an automatic receipt. The merchant sees the payment in their dashboard in real time.
-
How do you create a payment link? Log into your payment platform, create a product or service entry with a price, generate the link or QR code, and share it. Most platforms offer a no-code dashboard that takes under five minutes for a first link.
Quick verification checklist for recipients: confirm the URL matches the sender’s known brand domain, check that the checkout page shows the merchant’s logo and a clear amount, and save the receipt email for your records.
Why Tipper works well for creators, freelancers, and small businesses
Tipper maps directly to the engagement benefits covered above:
- One-click tips and purchases: supporters pay in seconds, no account creation required on their end
- Apple Pay and Google Pay support: mobile wallet payments reduce friction to near zero
- Branded tip pages: your logo, your colors, your message, which builds the trust that converts
- Thank-you messages: send a text, photo, or video reply after each tip, turning a transaction into a relationship moment
- Direct payouts: earnings go to you, not held in a platform wallet indefinitely
Next steps on Tipper: create your page, add your branding, generate your link or QR code, share it in your next campaign, and check your dashboard 48 hours later. Tipper charges a small processing fee per transaction; creating and maintaining an account is free, with no subscription required.
The case for making payment links a weekly habit
The biggest shift is not tactical, it is behavioral. Businesses that see the strongest engagement lift from payment links are the ones that send a link as a default, not an afterthought. After every booking, send a deposit link. After every completed project, send a payment link in the same message as the delivery. After every event, share a tip link in the follow-up note.
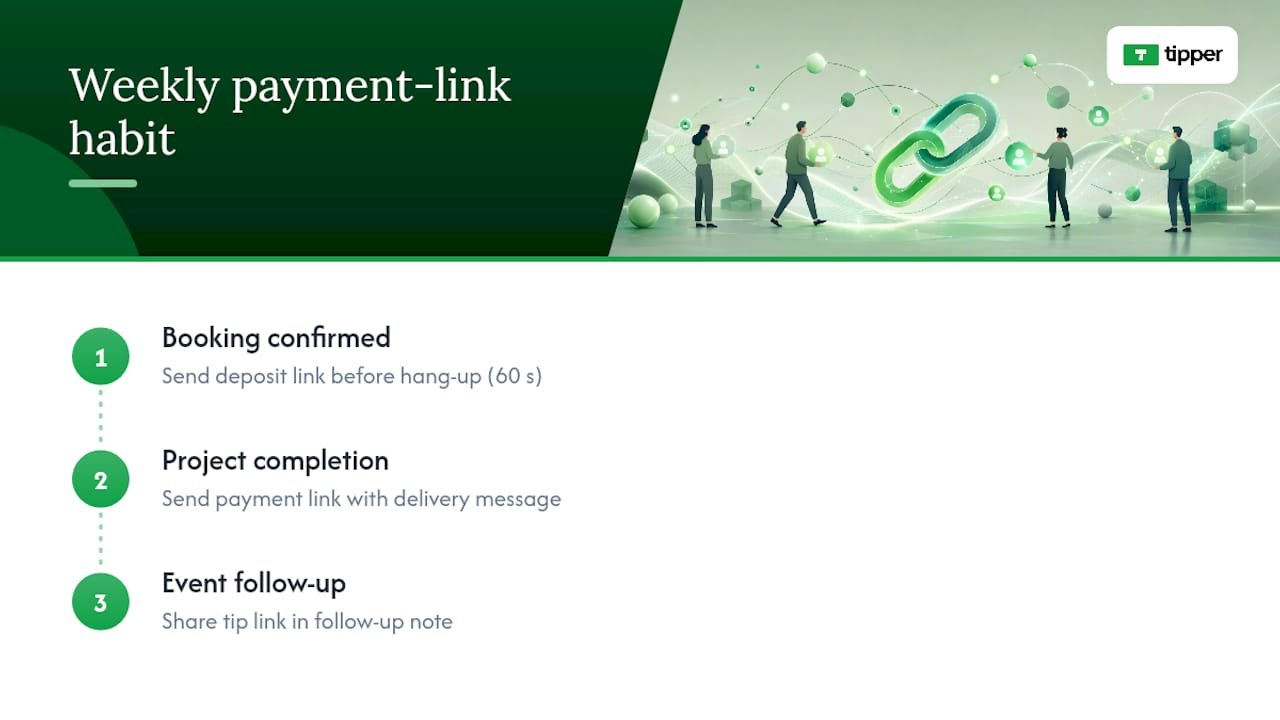
One habit worth adopting this week: the moment a client confirms a booking, send a deposit link before you hang up or close the chat. It takes 60 seconds, and it changes the entire dynamic of the relationship from “I’ll invoice you later” to “we’re confirmed.”
Tipper makes it easy to start collecting payments today
Tipper gives creators, freelancers, and small business owners a ready-made payment link with Apple Pay, Google Pay, and card support built in. No website needed, no sender account required, and no subscription fee. You create your branded page in minutes, generate a link or QR code, and start collecting tips or payments immediately.
Create your Tipper page and share your first link today. For a deeper look at how the platform handles instant payouts and no-signup tipping, the instant tip payment guide walks through the full flow.
Sources
- Guide to using payment links for streamlined sales | Stripe
- Payment links | Stripe Docs
- PCI Security Standards Council
FAQ
How do payment links boost engagement for small businesses?
Payment links remove checkout friction by letting customers pay in one tap inside the channel where they already are, whether that is SMS, social, or email, which cuts abandonment and speeds up conversion.
Are payment links safe to trust as a customer?
Yes, when the link comes from a branded, PCI-compliant provider. Verify the URL matches the sender’s known domain, confirm the checkout page shows the merchant’s logo and a clear amount, and save the receipt.
What are the biggest risks of using payment links?
Phishing links that mimic legitimate checkouts, accidental reuse of custom-price links, and missed receipt delivery. Using a branded checkout page, setting expiry dates, and confirming customer contact details before sending mitigates all three.
How do you create a payment link quickly?
Log into a platform like Tipper, create a product or service entry with a price, generate the link or QR code from the dashboard, and share it. The whole process takes under five minutes with no code required.
Do payment links work for tips and donations, not just product sales?
Yes. Platforms like Tipper are built specifically for tips, with Apple Pay and Google Pay support, no sender account required, and branded pages that let supporters pay appreciation in seconds.
Recommended